
启用开发者模式
在“开发者模式”(也称为“开发模式”)下,您能够侧载应用、调试组件,并通过网络或USB接口,借助开发者shell和Vega设备适配器 (VDA),访问Fire TV设备。您可以测试应用、访问安全shell、管理程序包、调试组件和访问文件系统。通过亚马逊开发者账户进行身份验证后,方可激活开发者模式,随即会重新启动设备。所有Vega Fire TV设备都使用相同的开发者模式启用流程。
预计完成时间: 5-10分钟
先决条件
在开始之前,请确保您已具备:
- 亚马逊开发者账户(身份验证必需)— 如果没有账户,请先注册。
- 装有Vega CLI的开发机 — 通过
vega --version进行验证。如未安装,请参阅安装Vega SDK - 最新版SDK管理器 — 运行
vega update,获取最新版本。请参阅Vega SDK管理器 - 运行Vega OS的Fire TV设备,且与您的计算机连接至同一网络。有关受支持设备的完整列表,请参阅Fire TV设备规格。
对Fire TV的开发者模式进行身份验证
开发者模式要求您使用Vega CLI,通过亚马逊开发者账户进行身份验证。此流程包括从Fire TV设备获取验证码,然后通过浏览器完成身份验证,最后在终端中完成设备启用。启用后,设备会自动重启。
-
访问Fire TV Settings(设置)菜单:
选项1: 使用Home按钮
a. 按下遥控器上的Home按钮进入Home屏幕。
b. 导航到顶部菜单栏。
c. 向右滚动查找并选择Settings图标(齿轮符号)。
选项2: 使用Home按钮快捷方式(速度更快)
a. 长按遥控器上的Home按钮3秒钟。
b. 从出现的快捷菜单中选择Settings(设置)。
-
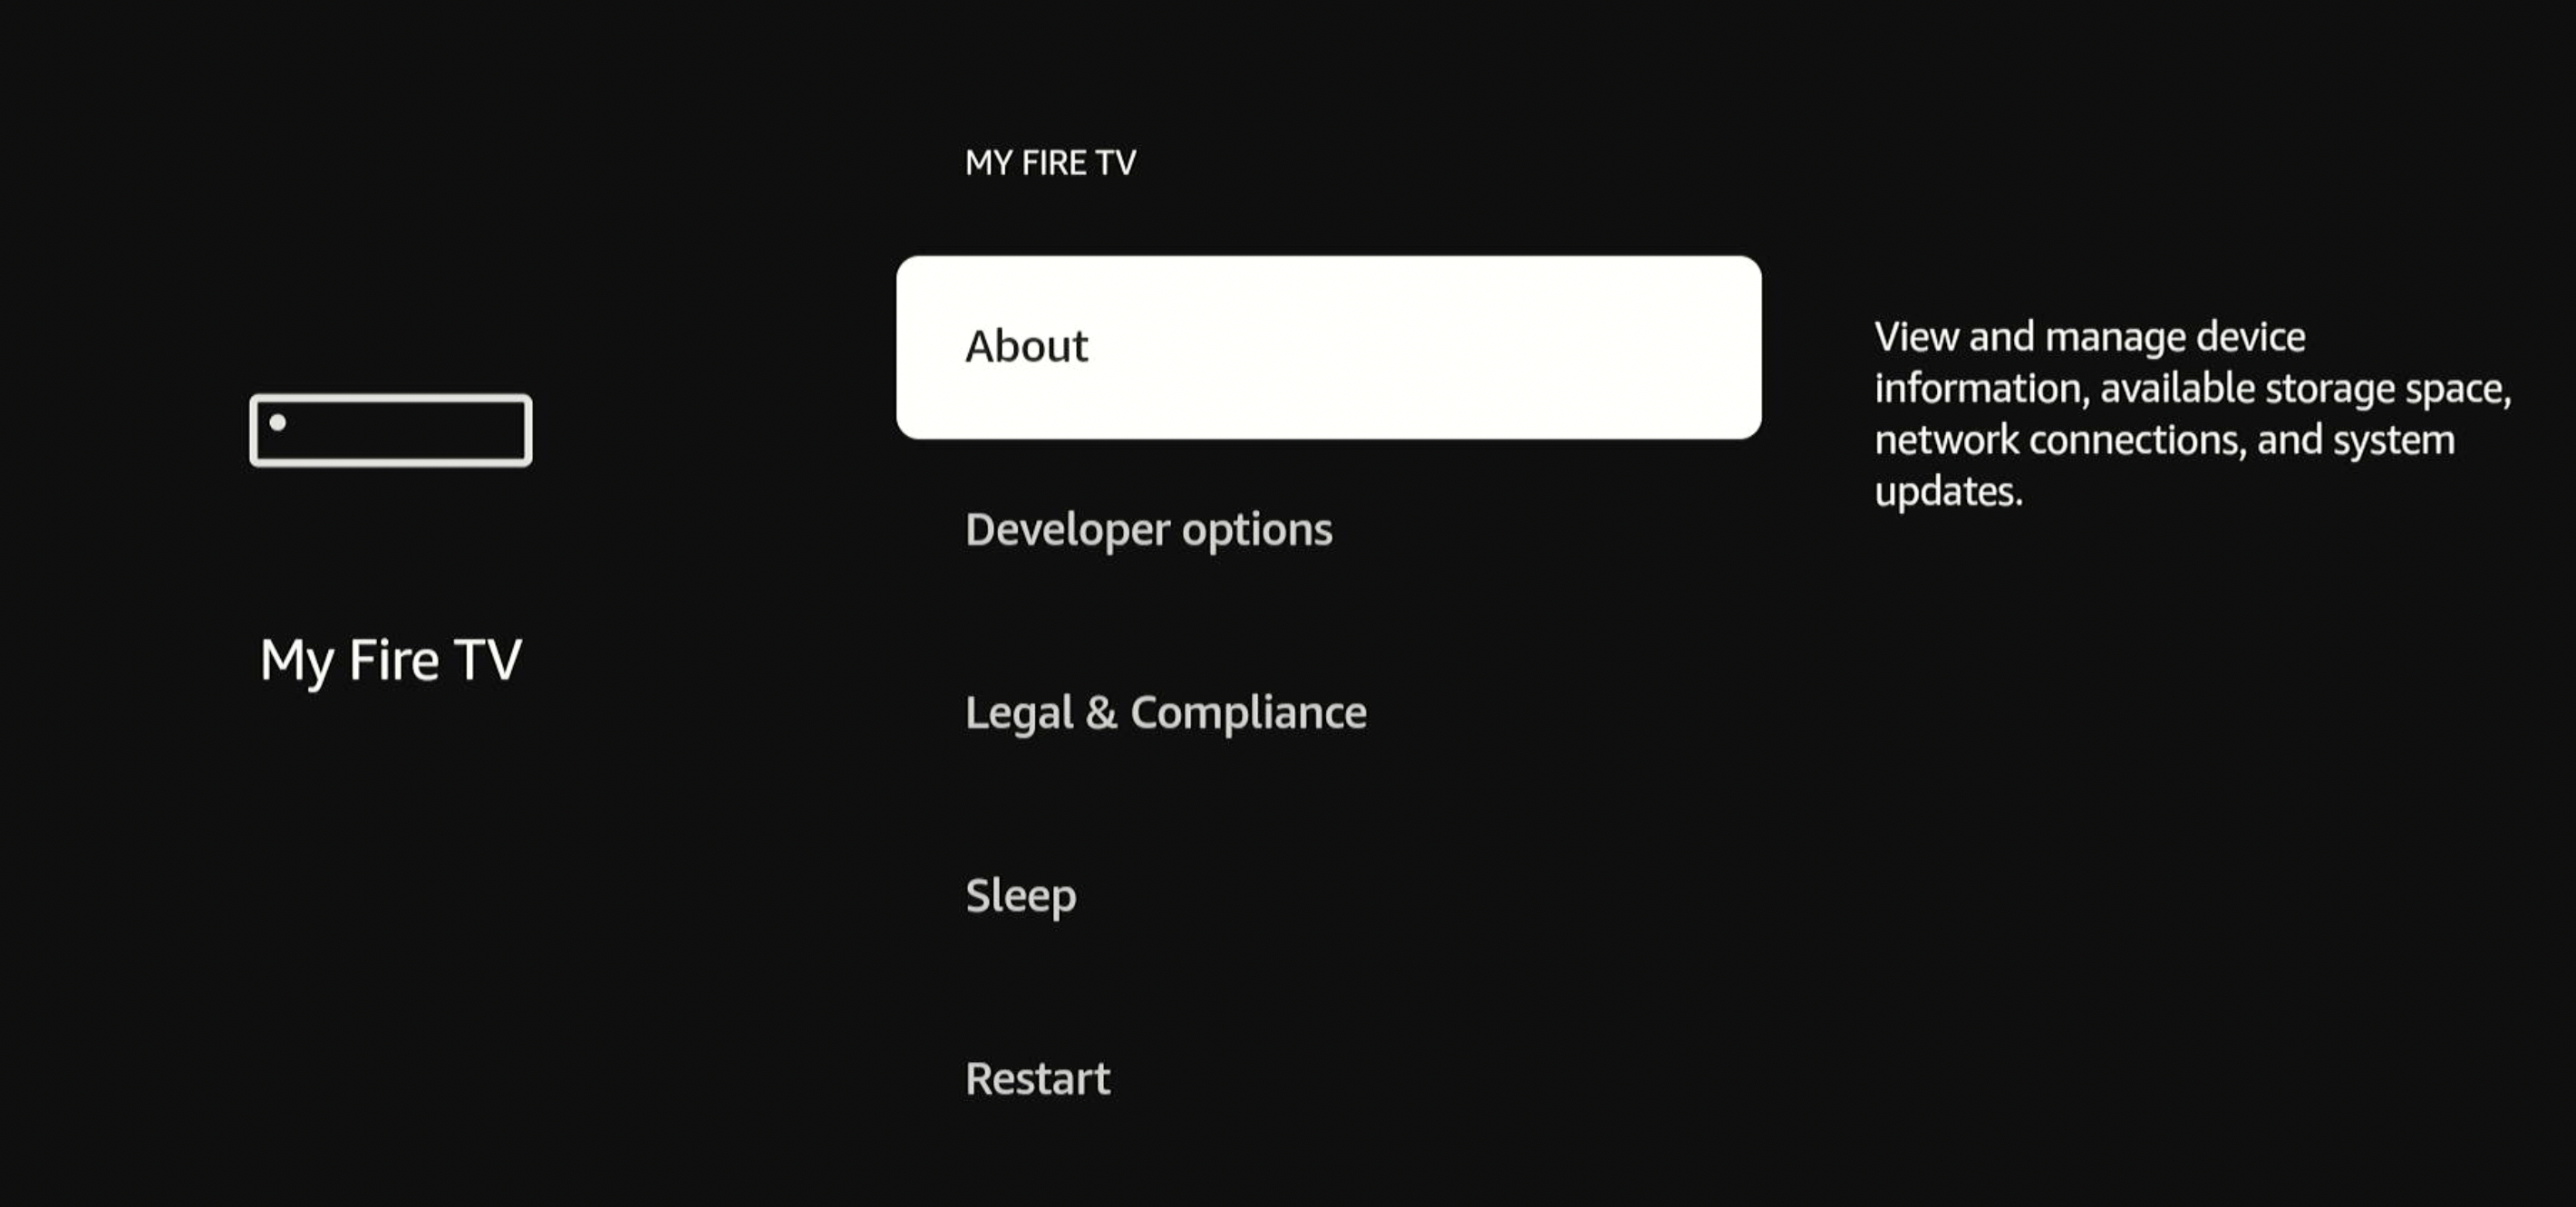
前往Settings(设置)> My Fire TV(我的Fire TV)> About(关于)。
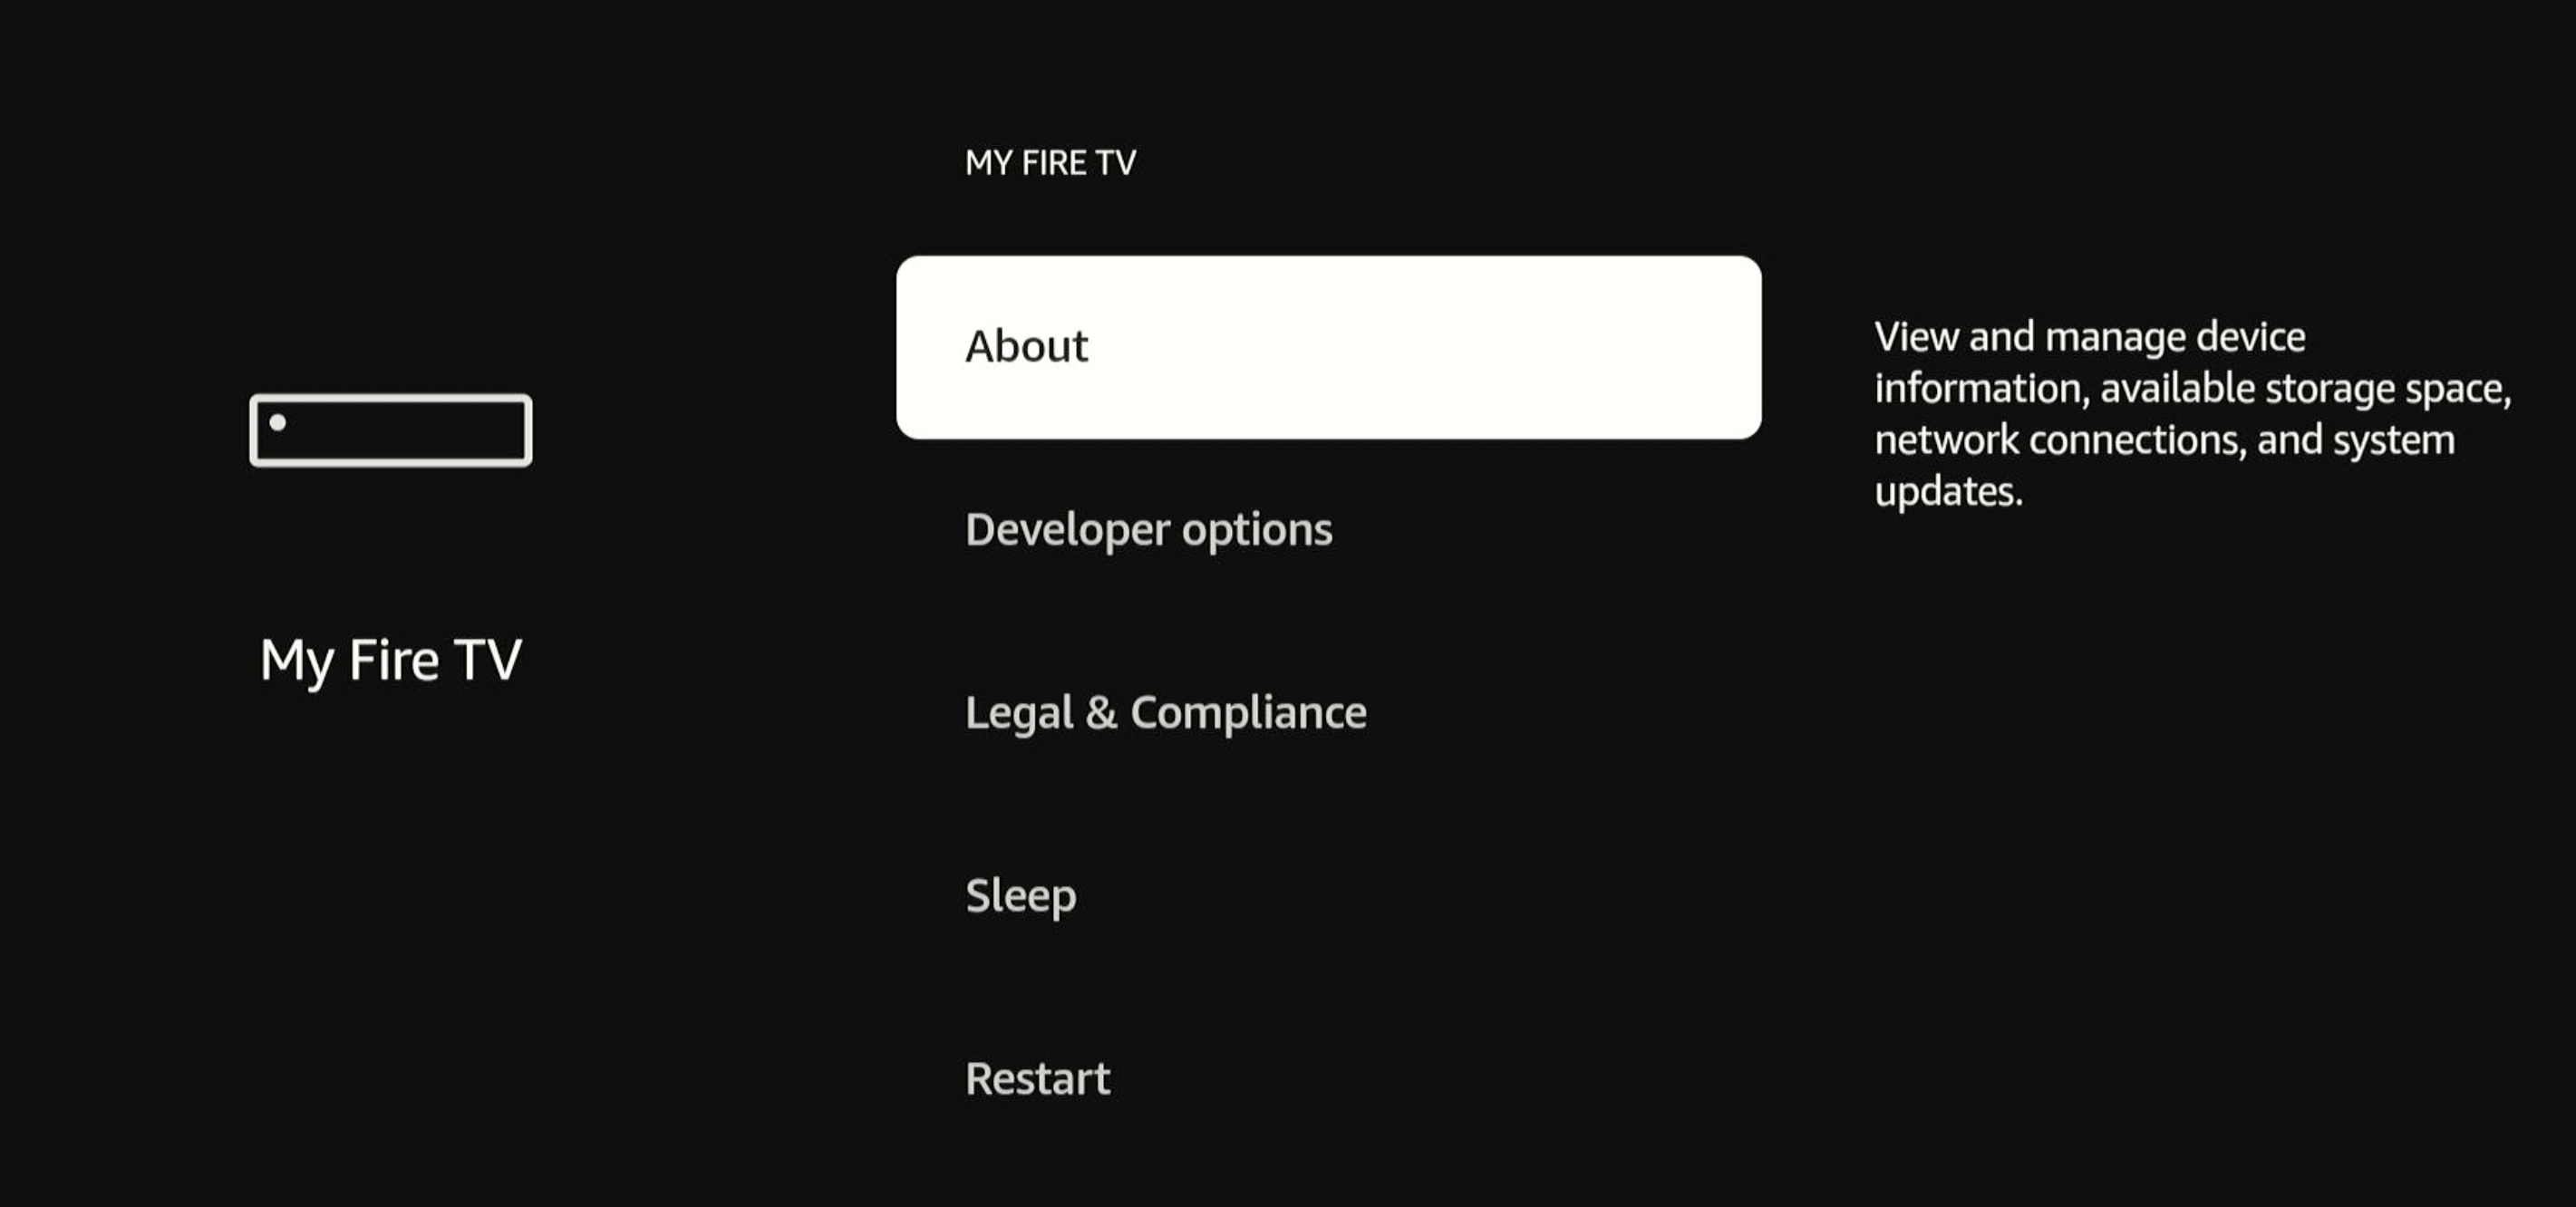
-
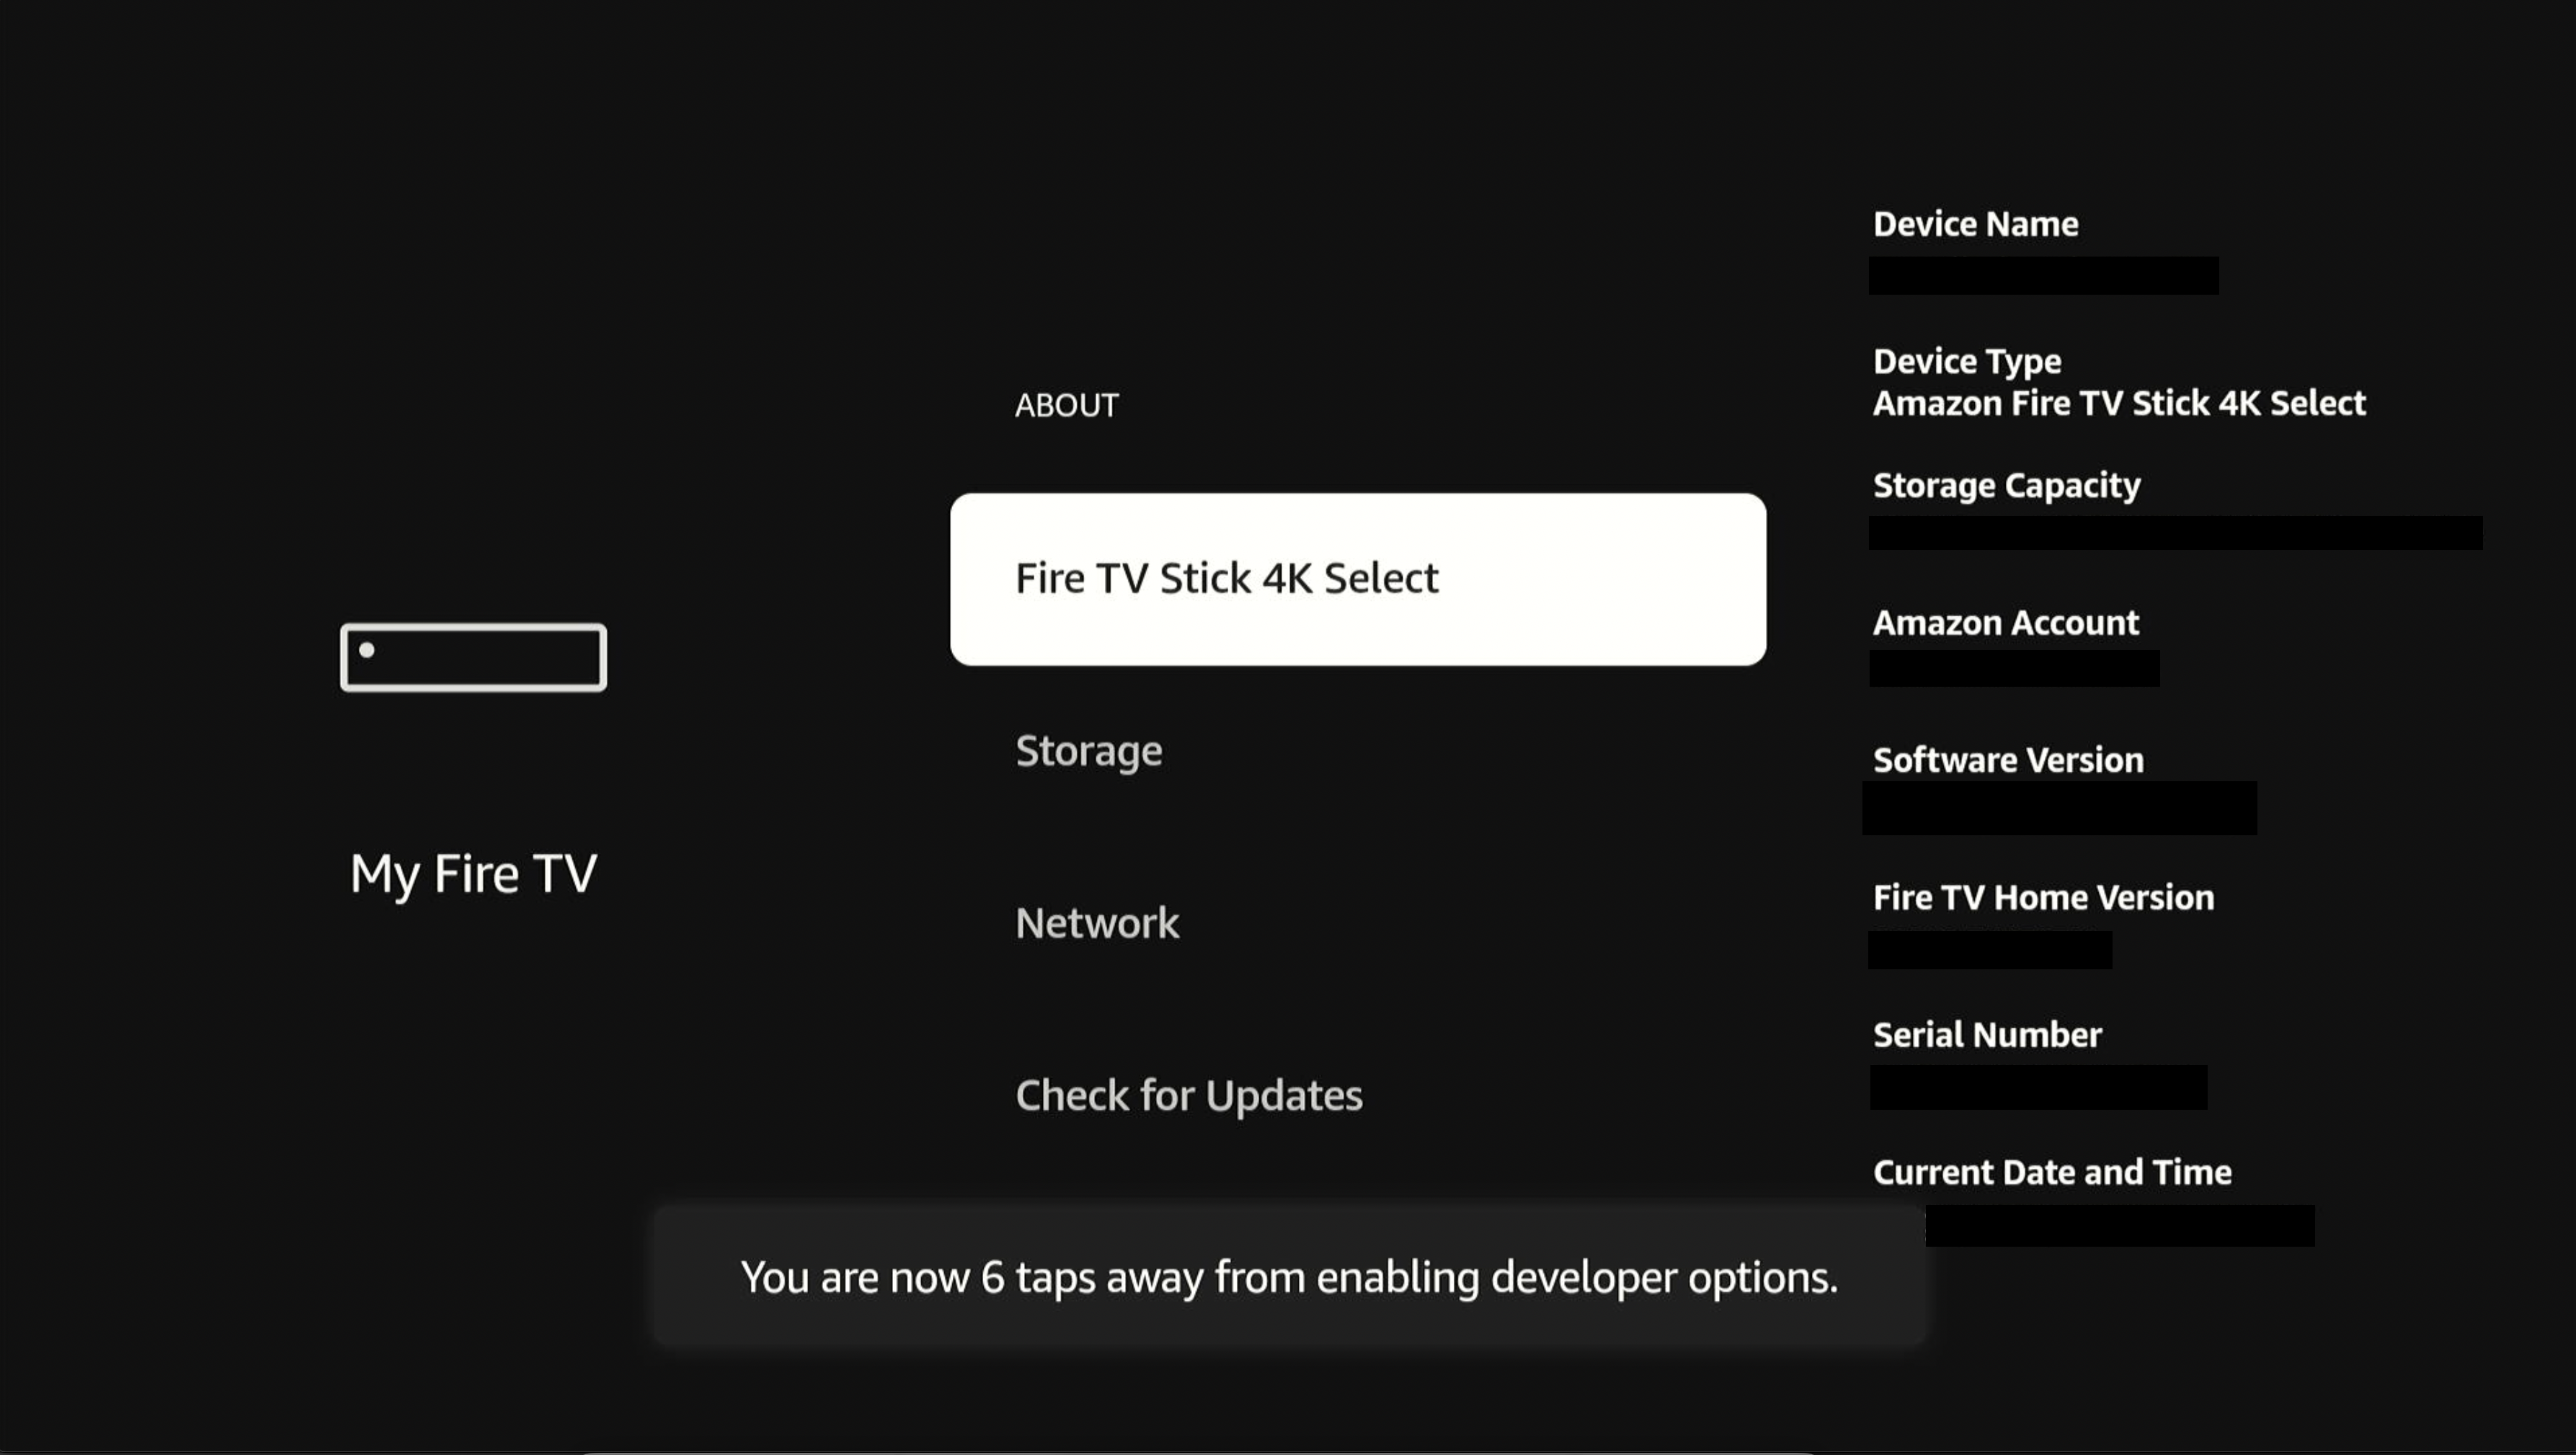
选择您的设备名称(例如Fire TV Stick HD、Fire TV Stick 4K Select或Fire TV流媒体播放器)。
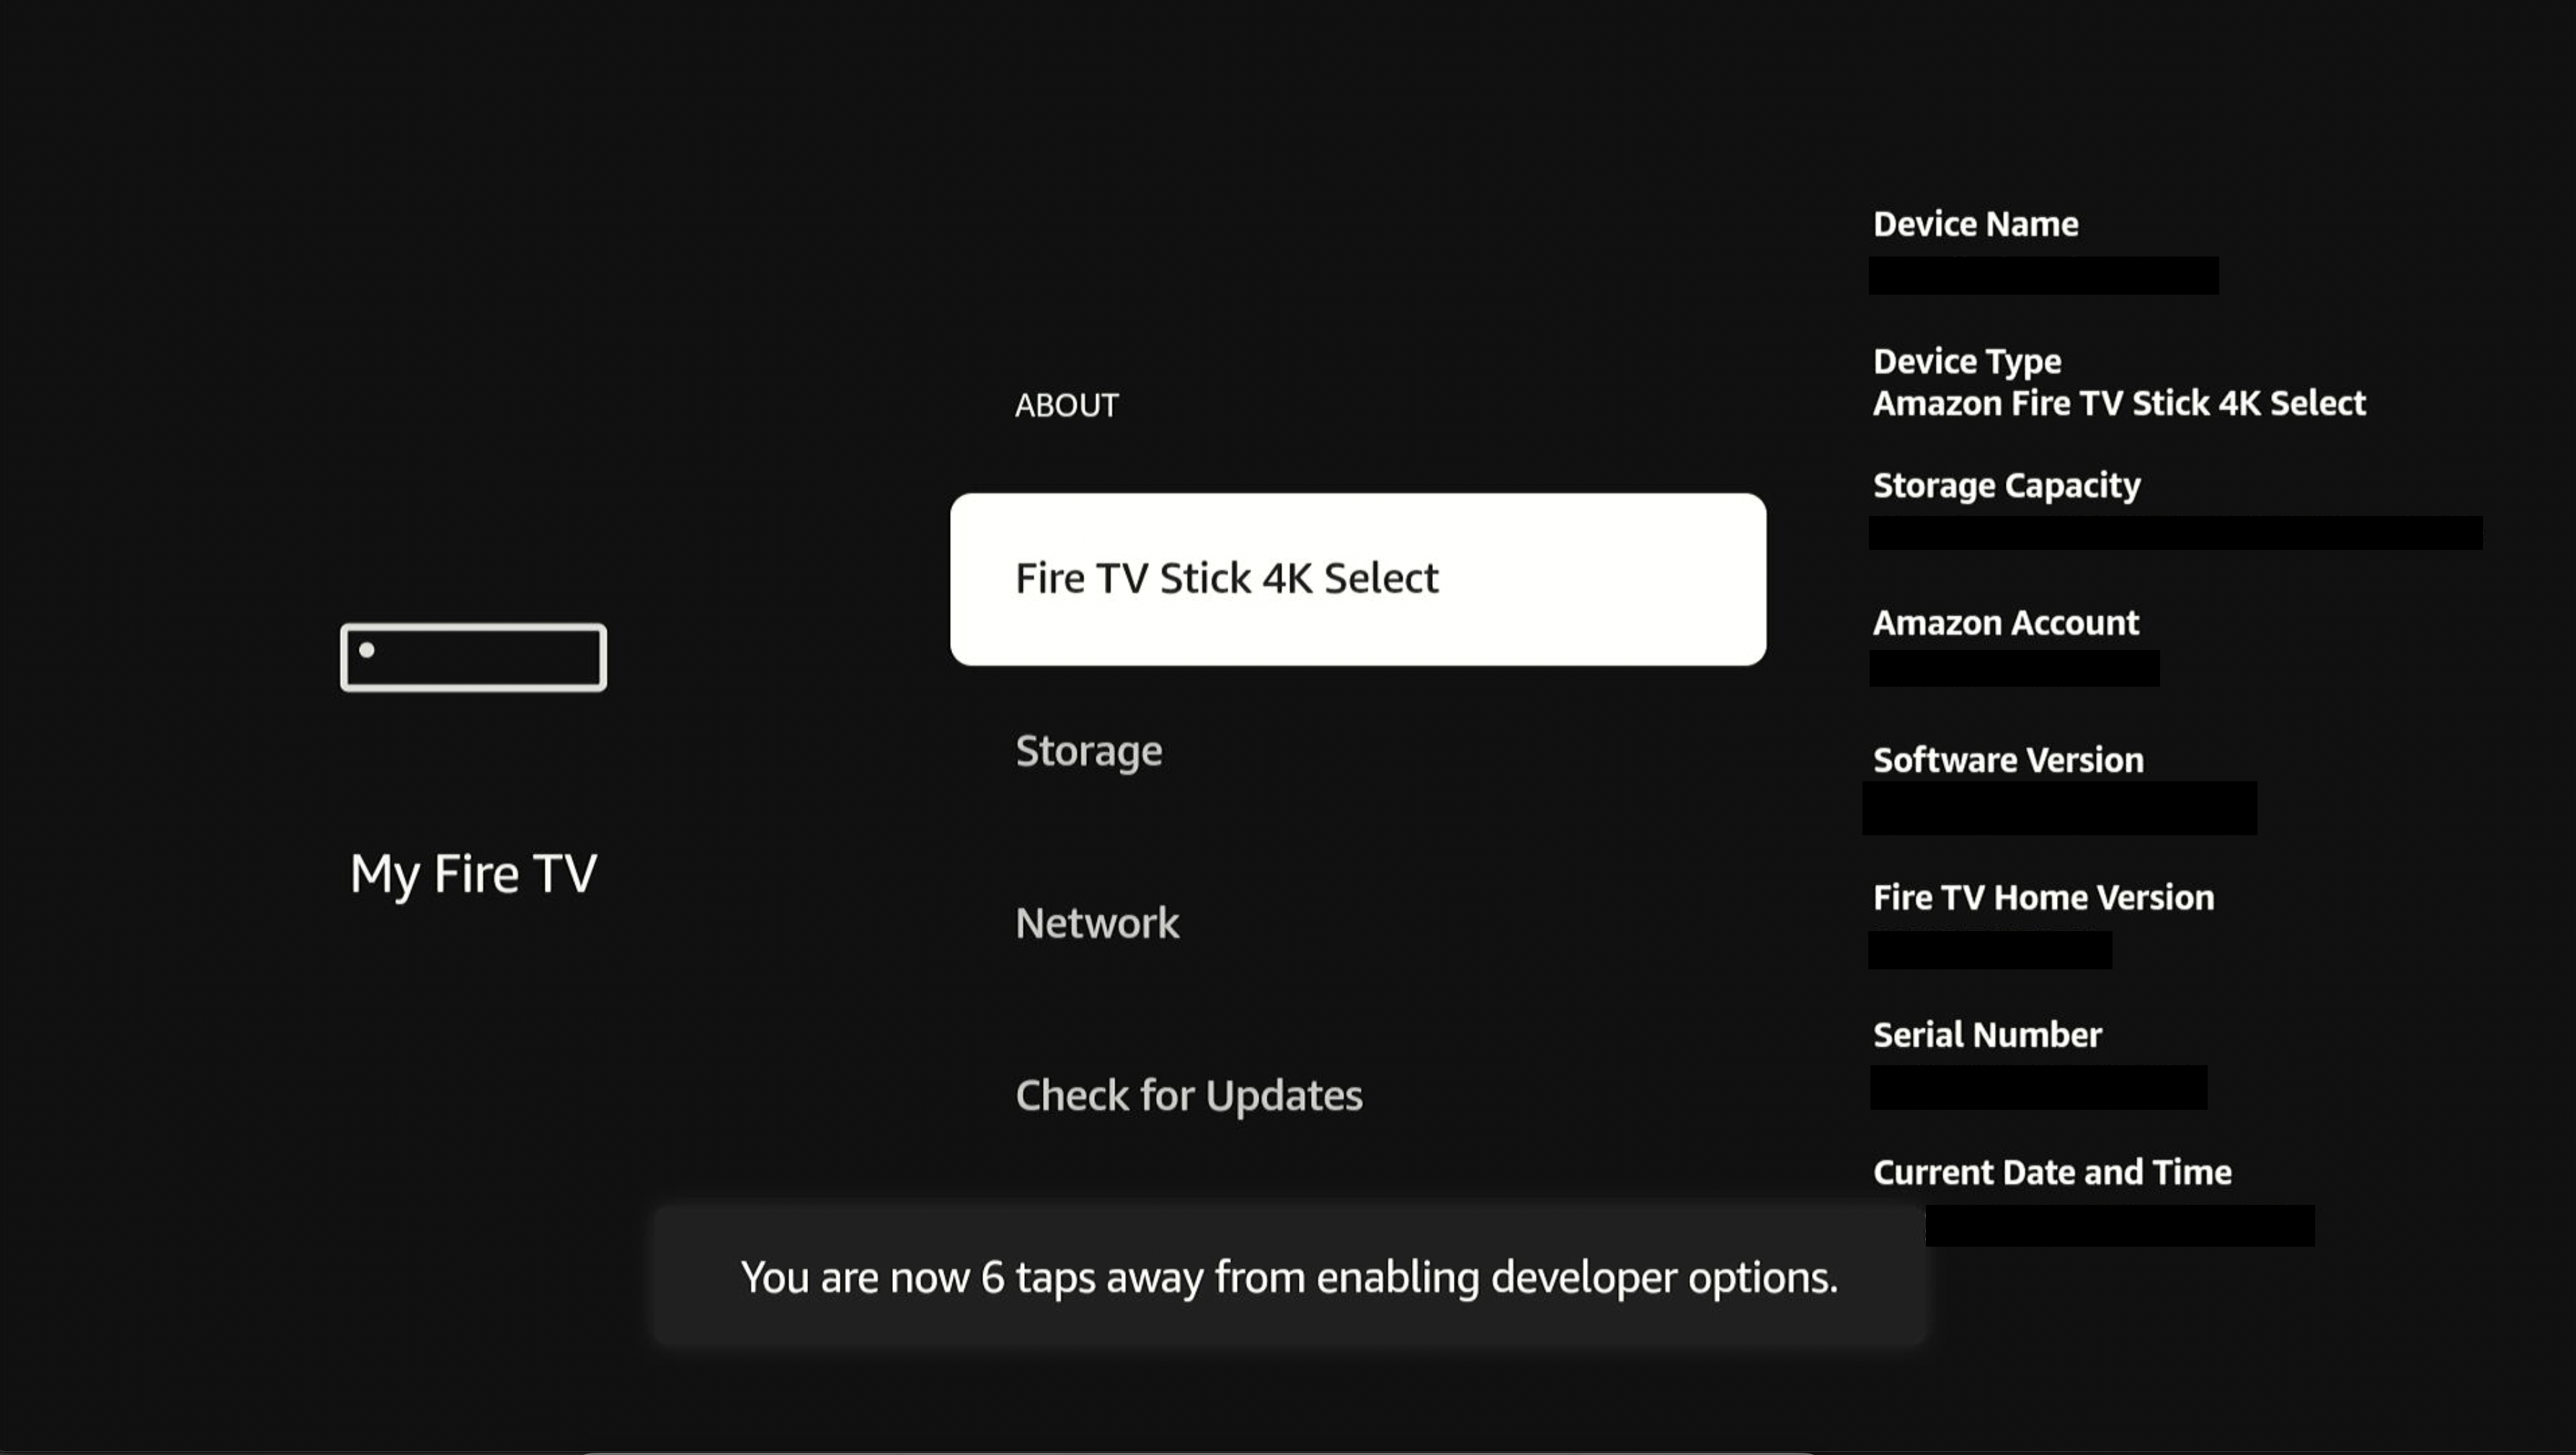
-
连按遥控器上的中心按钮七次。
按完七次后,屏幕上显示简短通知,内容为“You are now a developer”(您已成为开发者)。
-
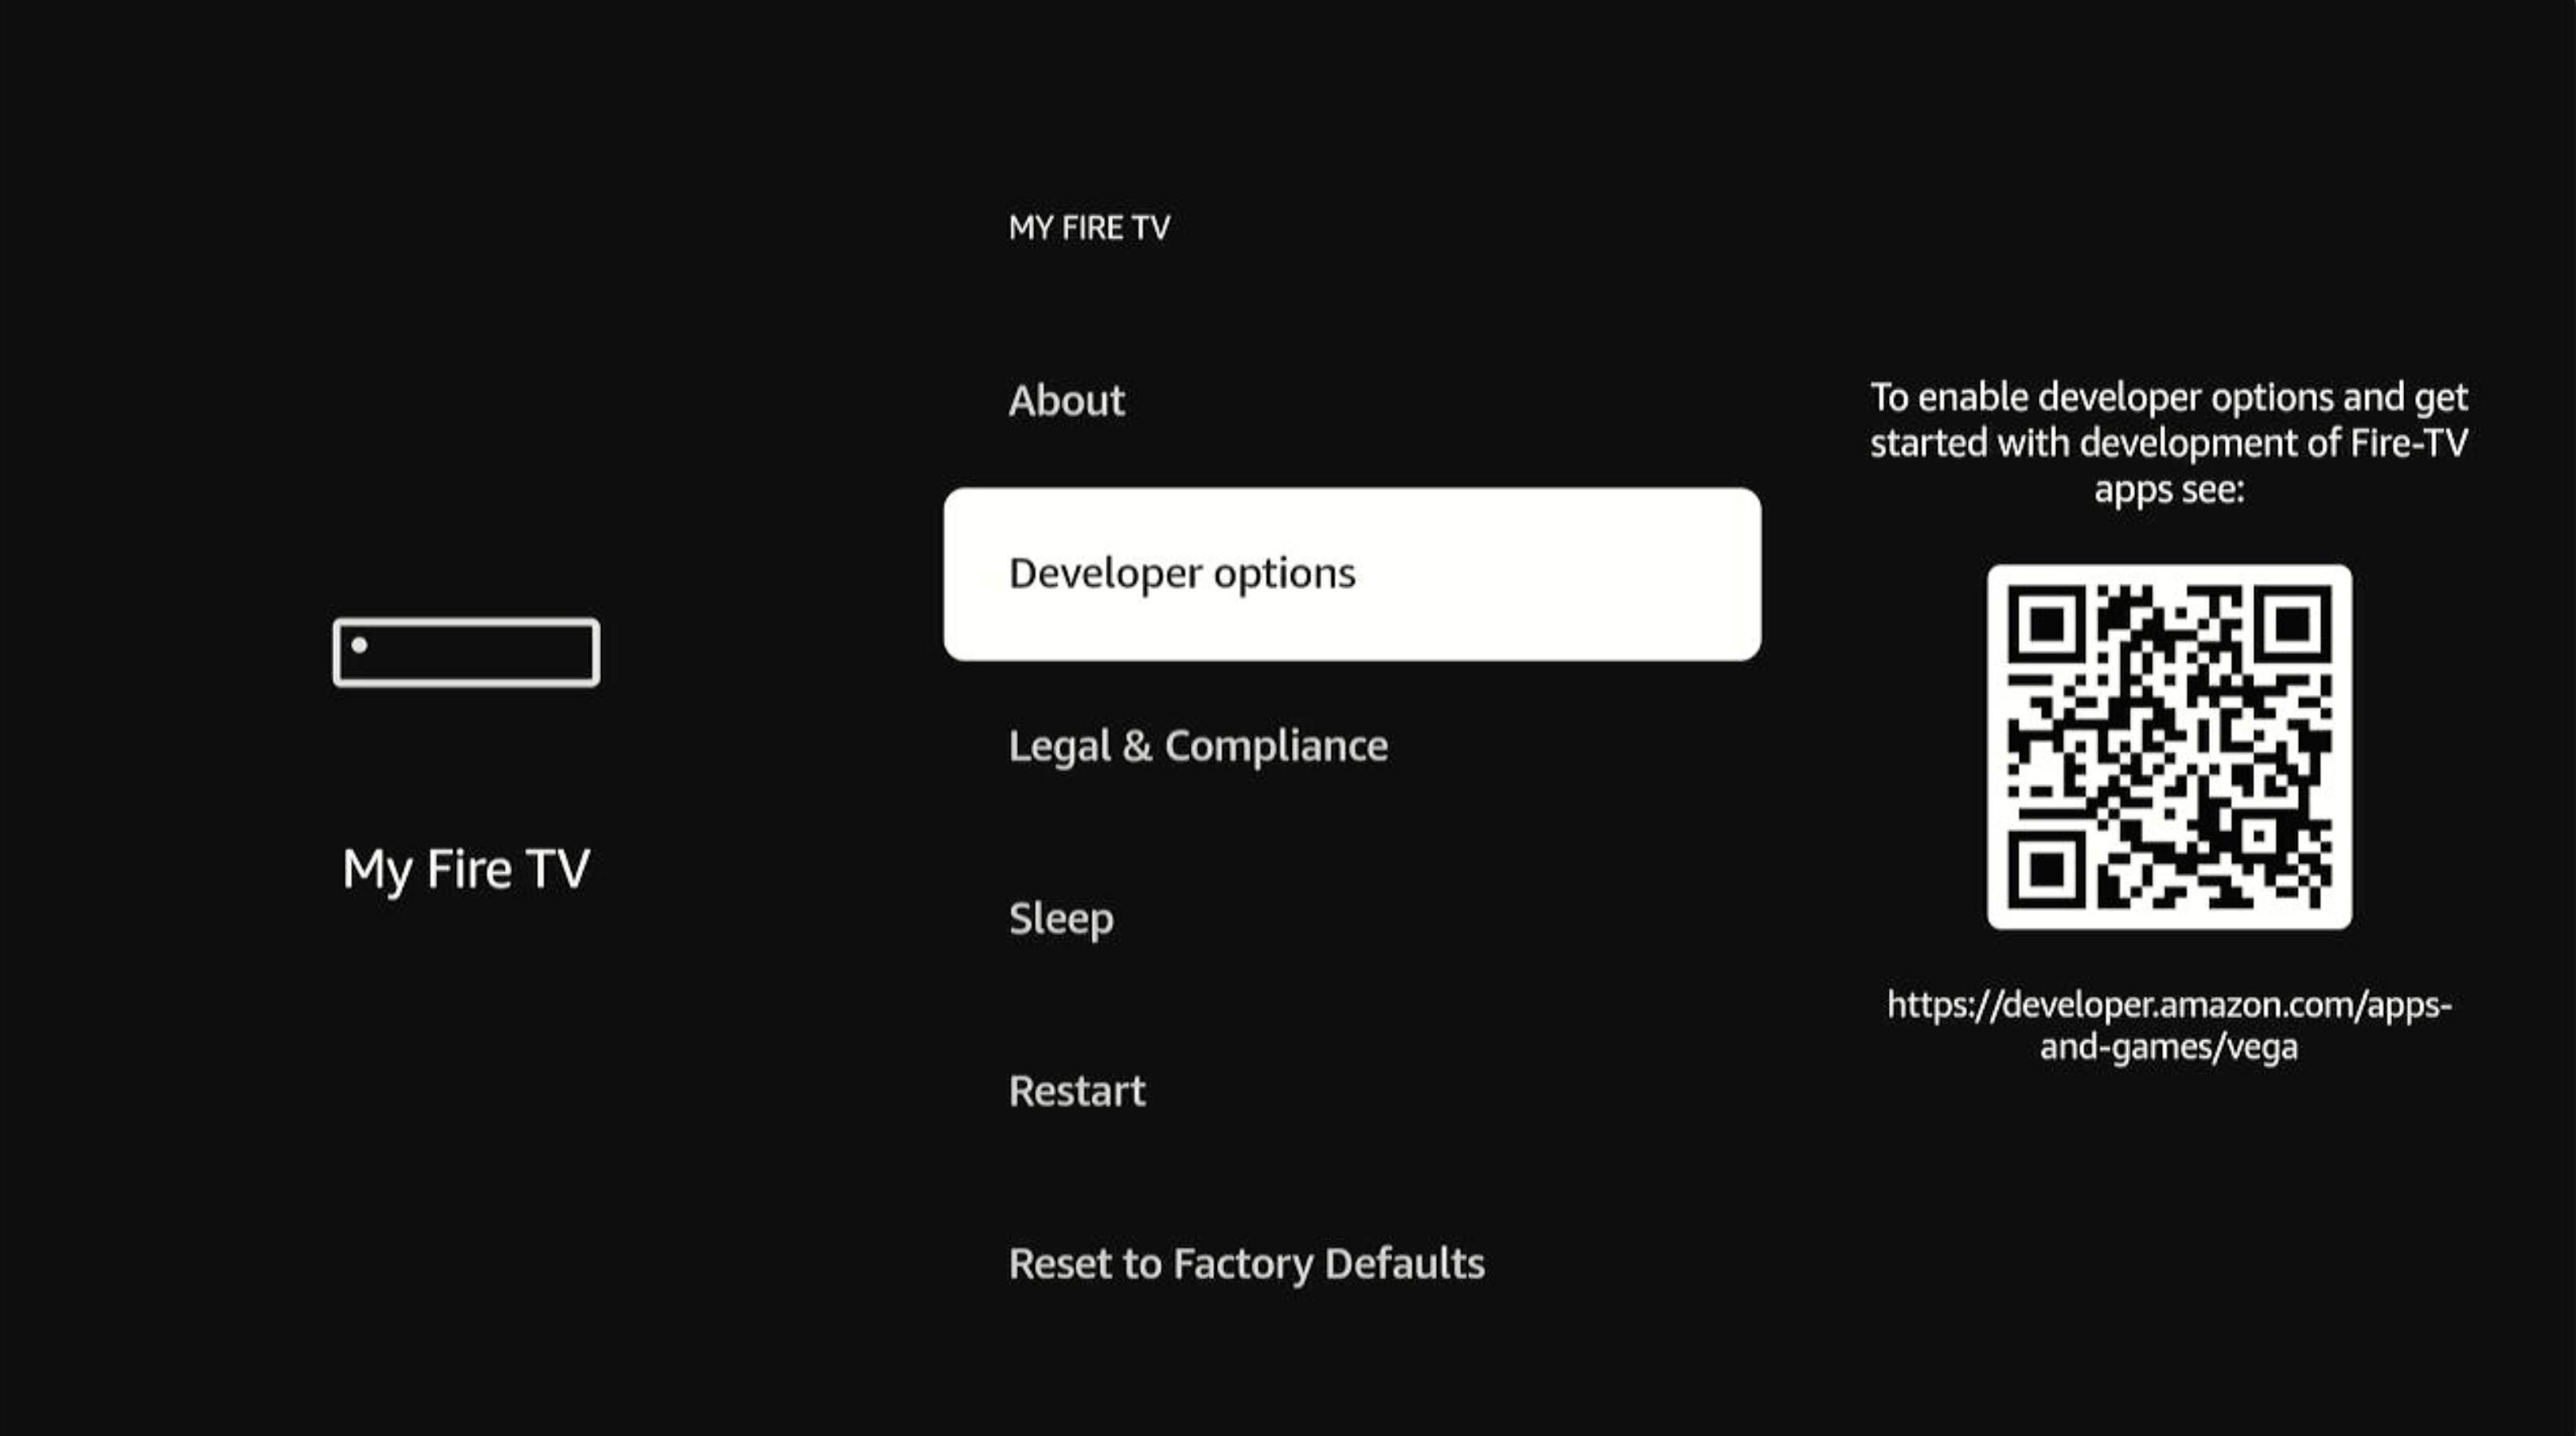
按返回按钮,返回My Fire TV(我的Fire TV)。
Developer Options(开发者选项)出现在列表中。
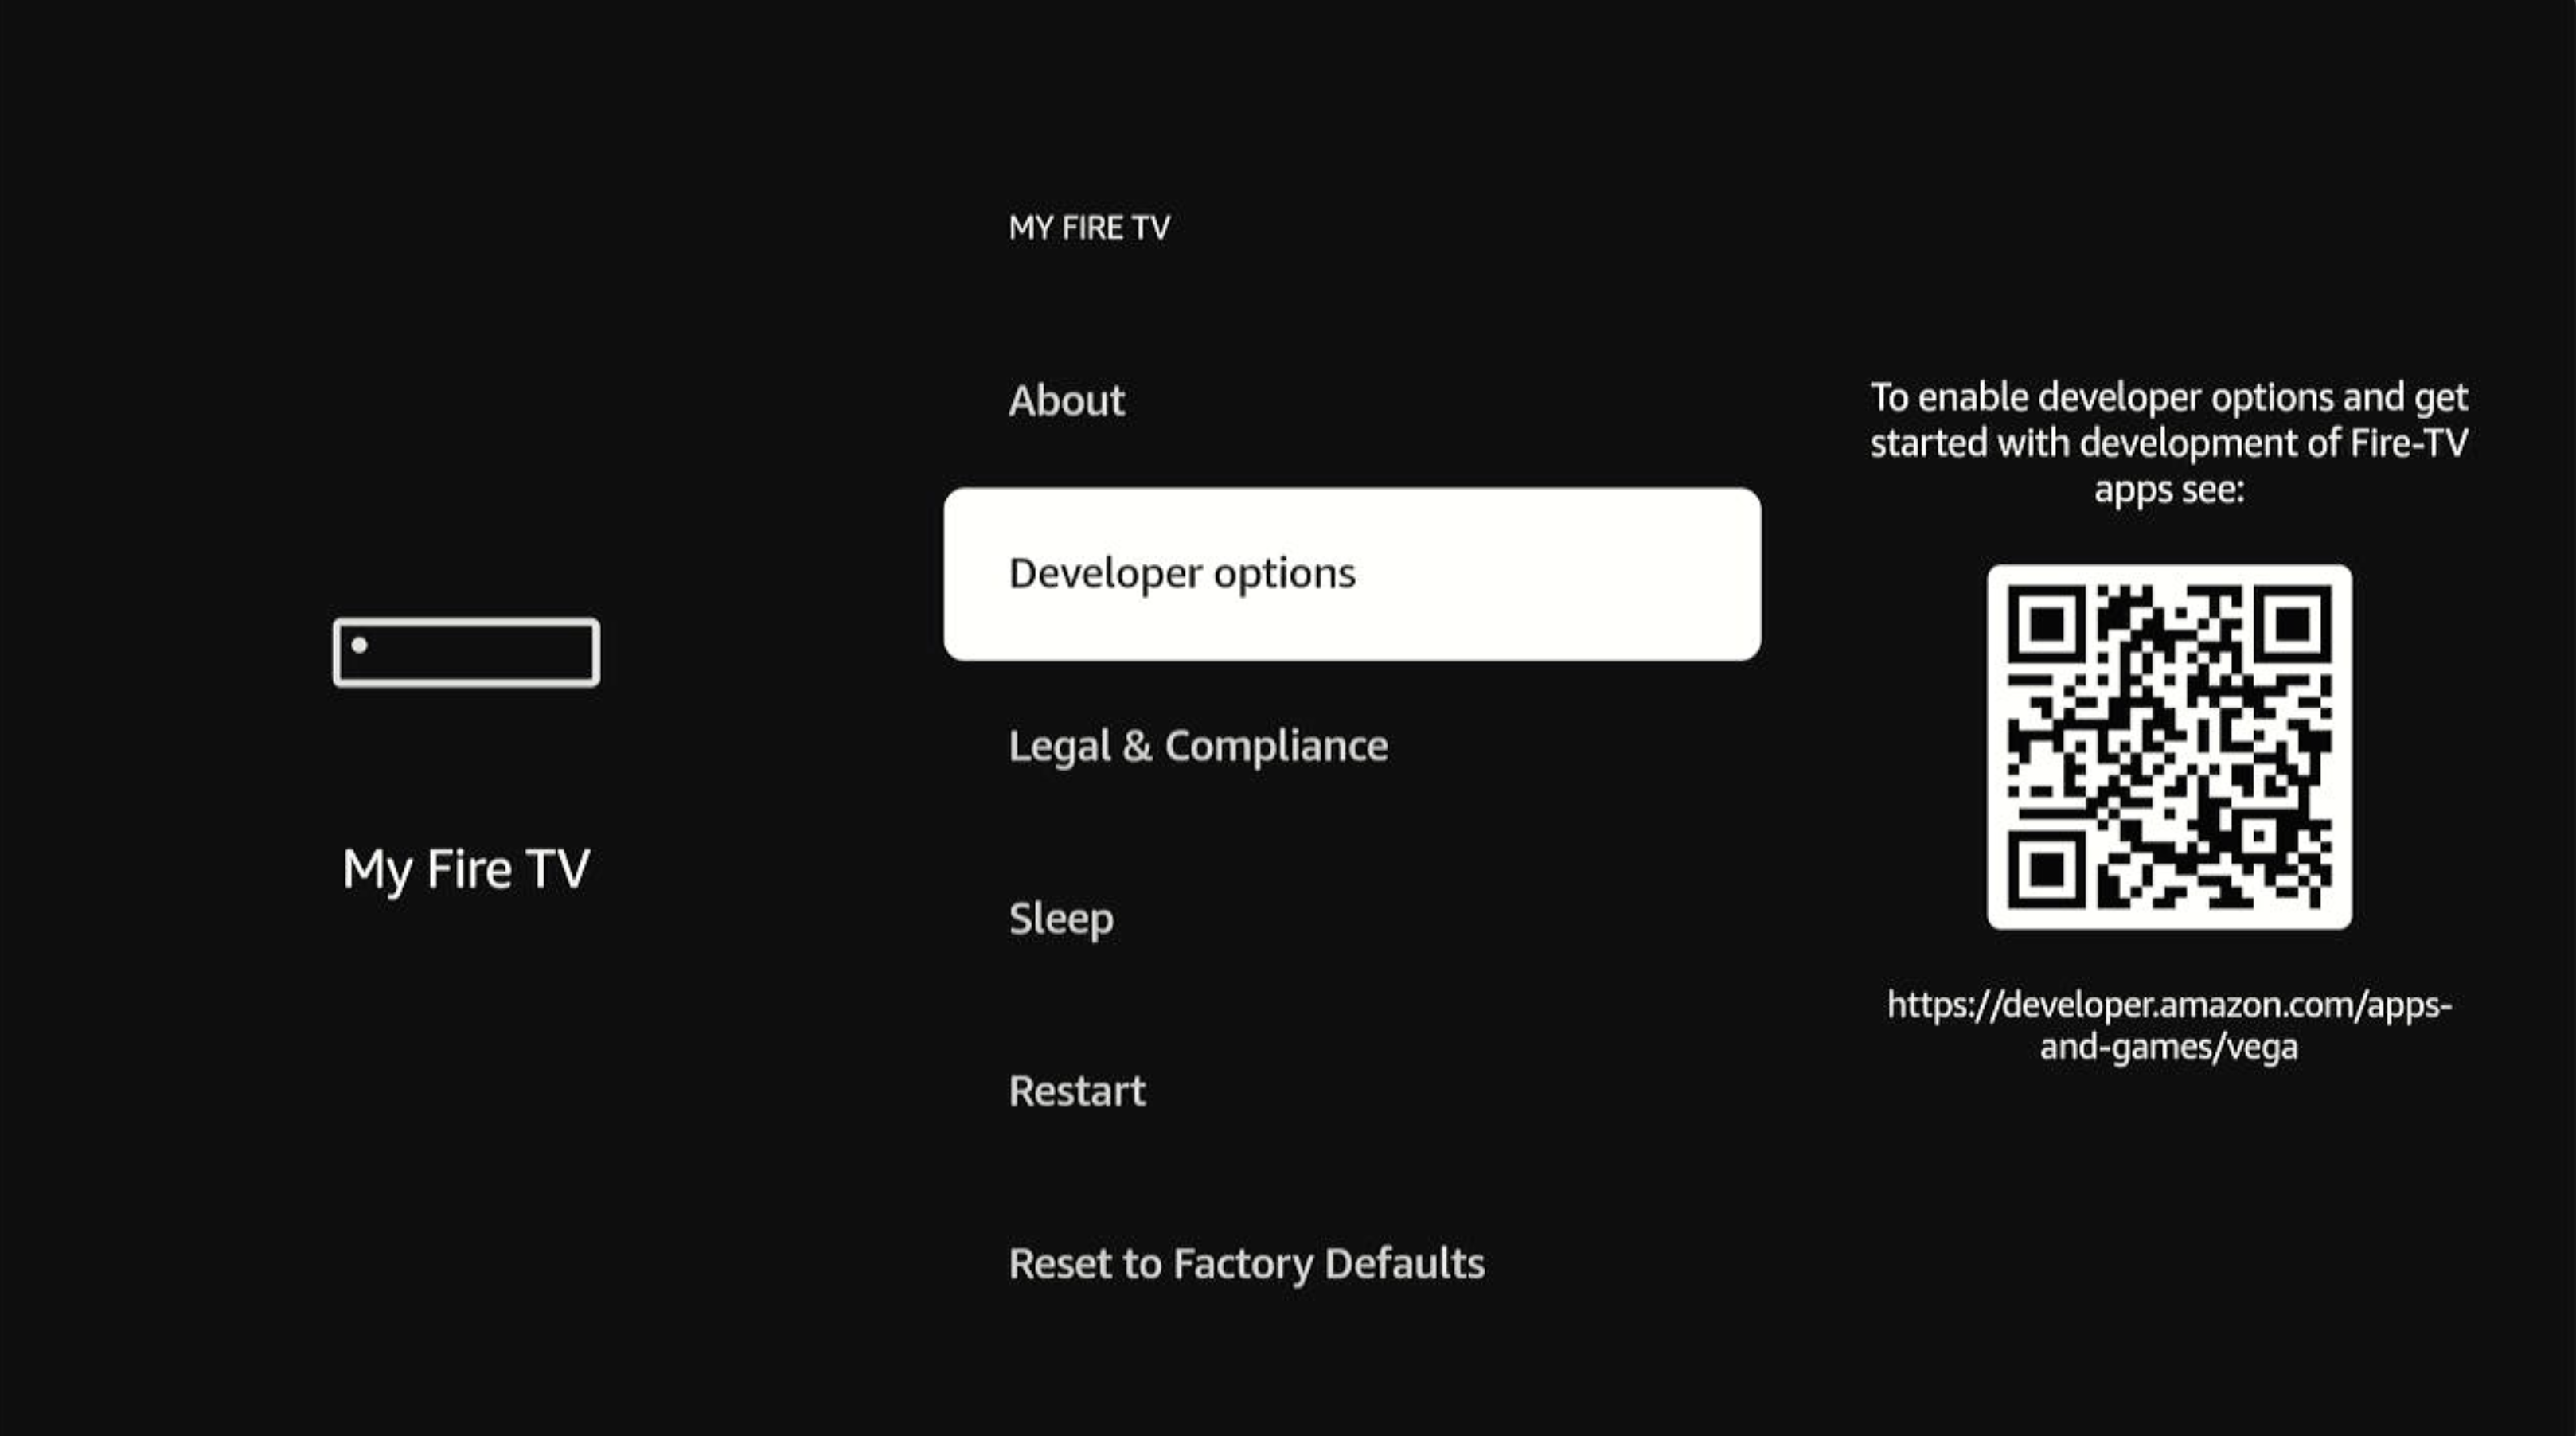
-
选择Developer Options(开发者选项)。
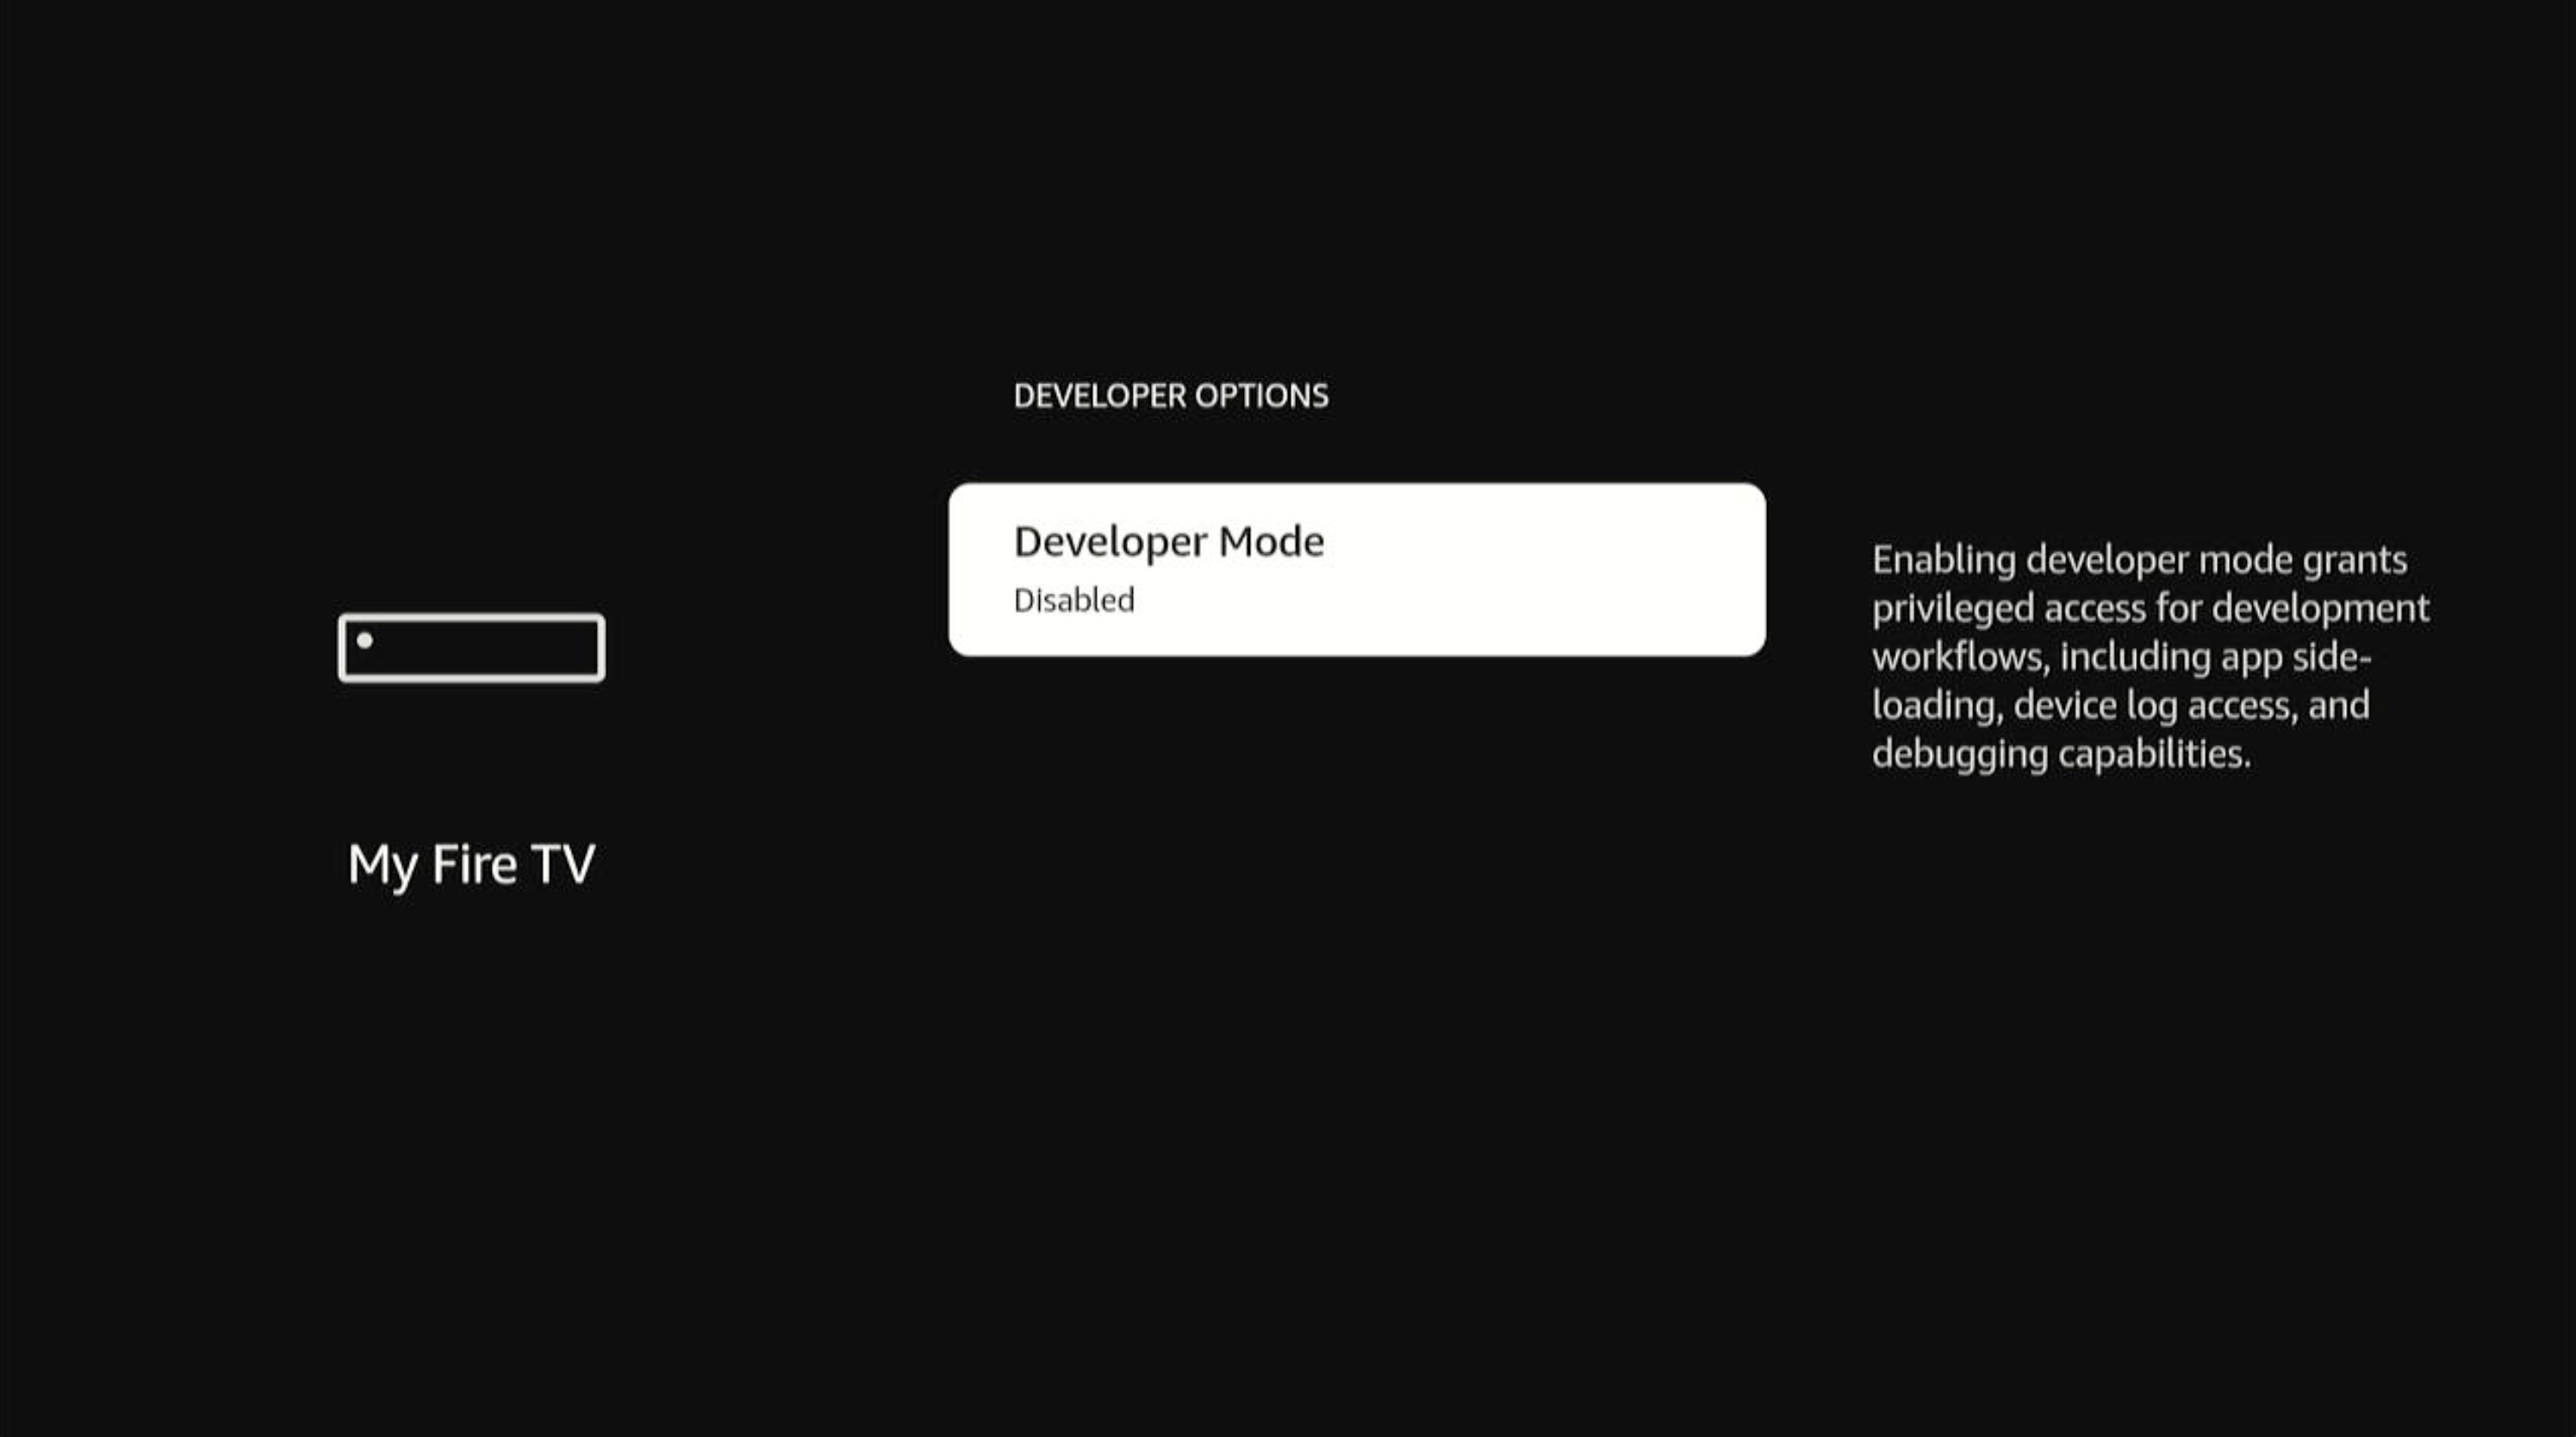
Developer Mode(开发者模式)(默认禁用)出现在菜单列表中。
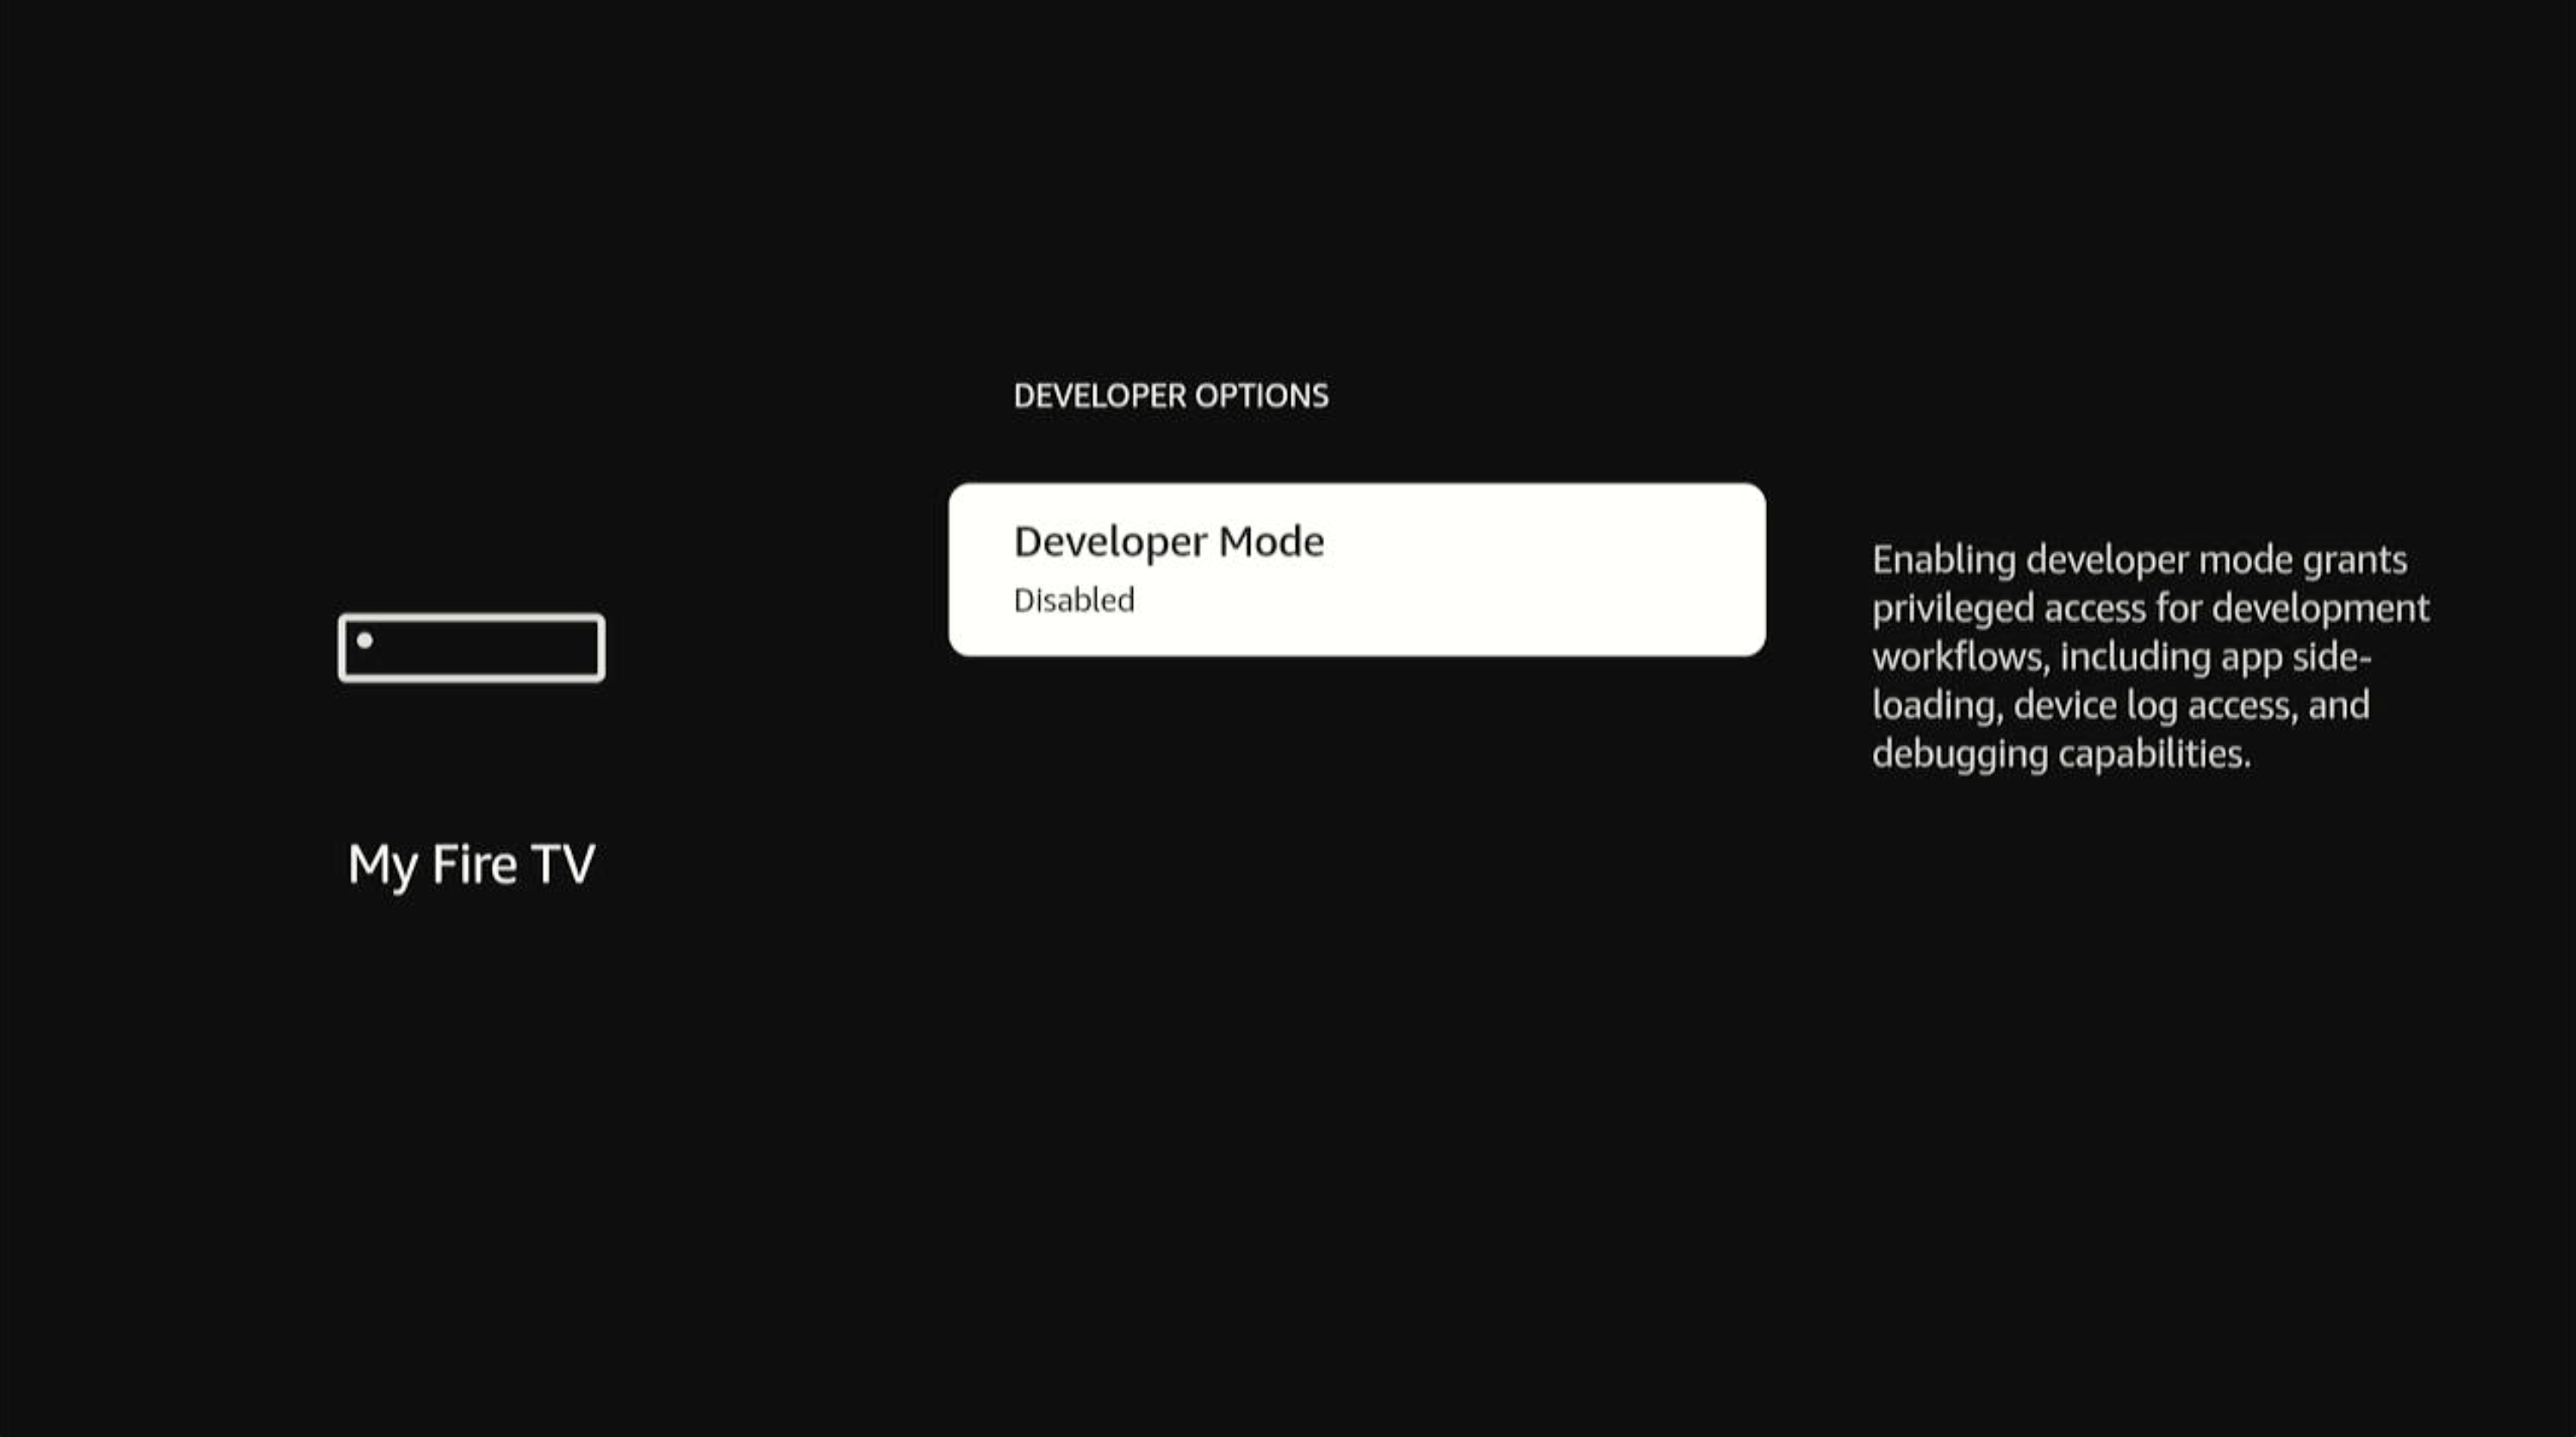
-
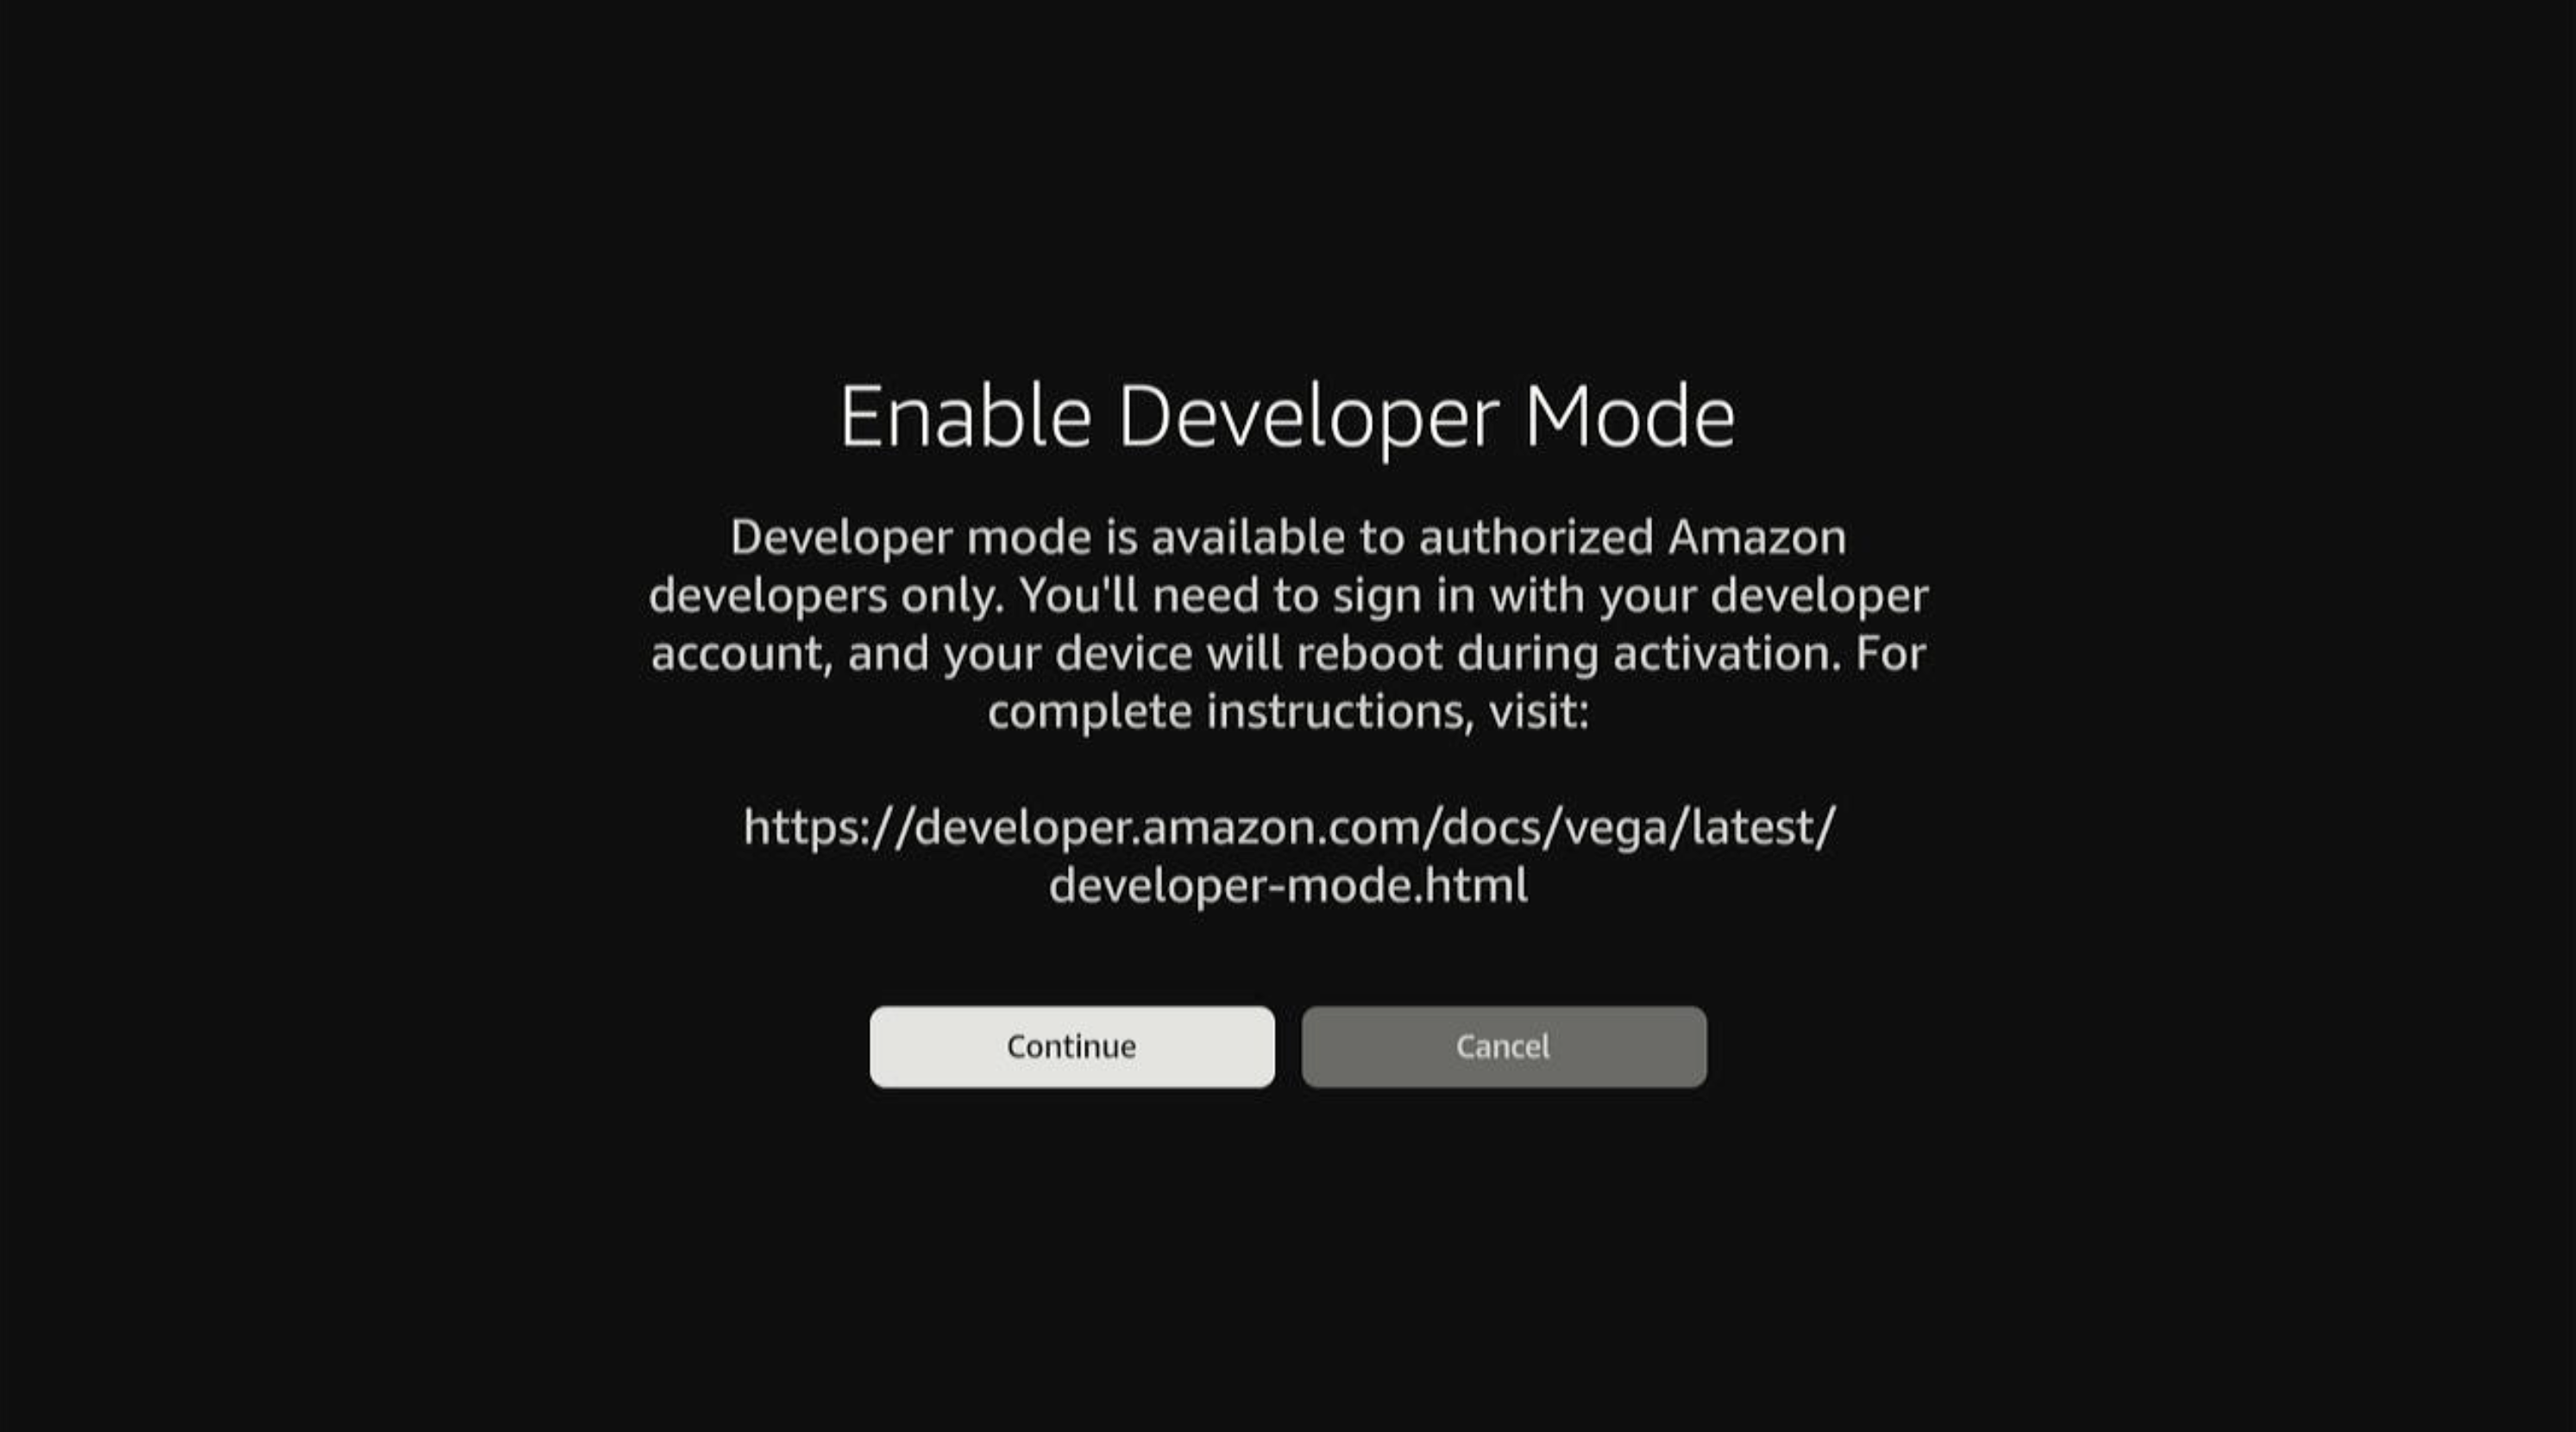
选择Developer Mode(开发者模式),继续操作。
-
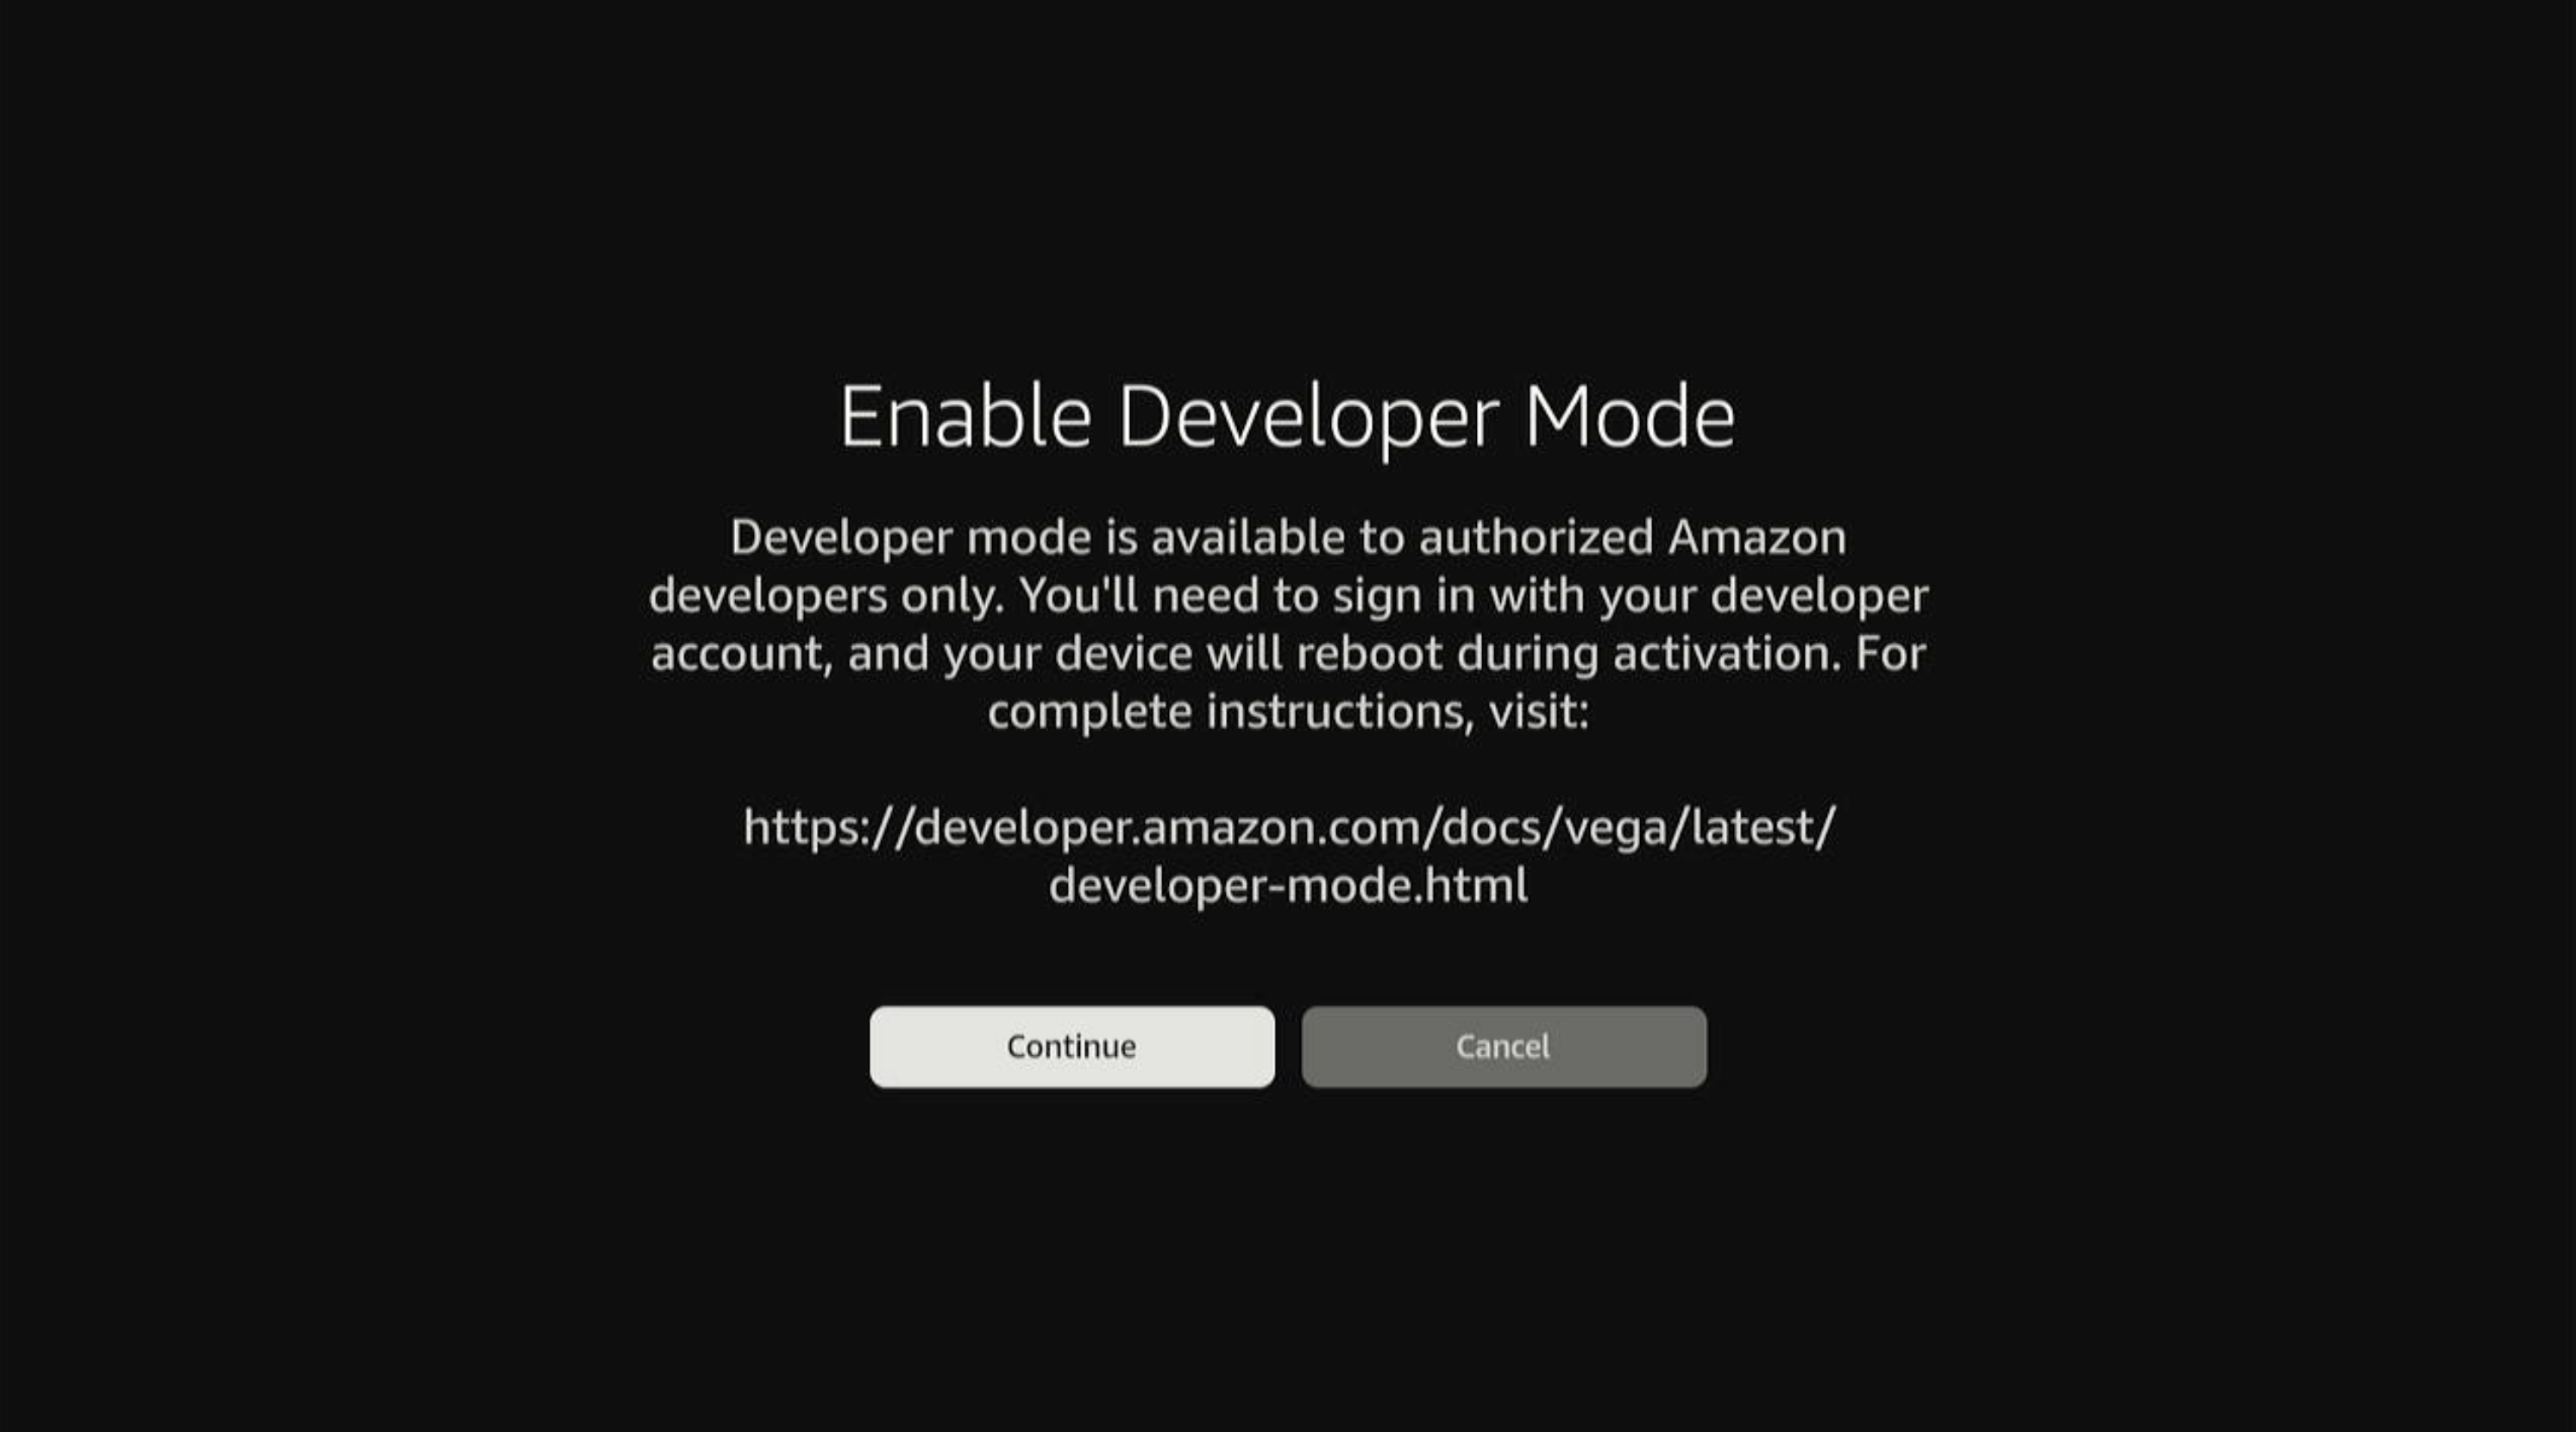
选择Continue(继续),继续操作(或选择Cancel(取消),中止操作)。
如果选择Cancel(取消),则对话框关闭,您将返回Developer Options(开发者选项)屏幕,不作任何更改。
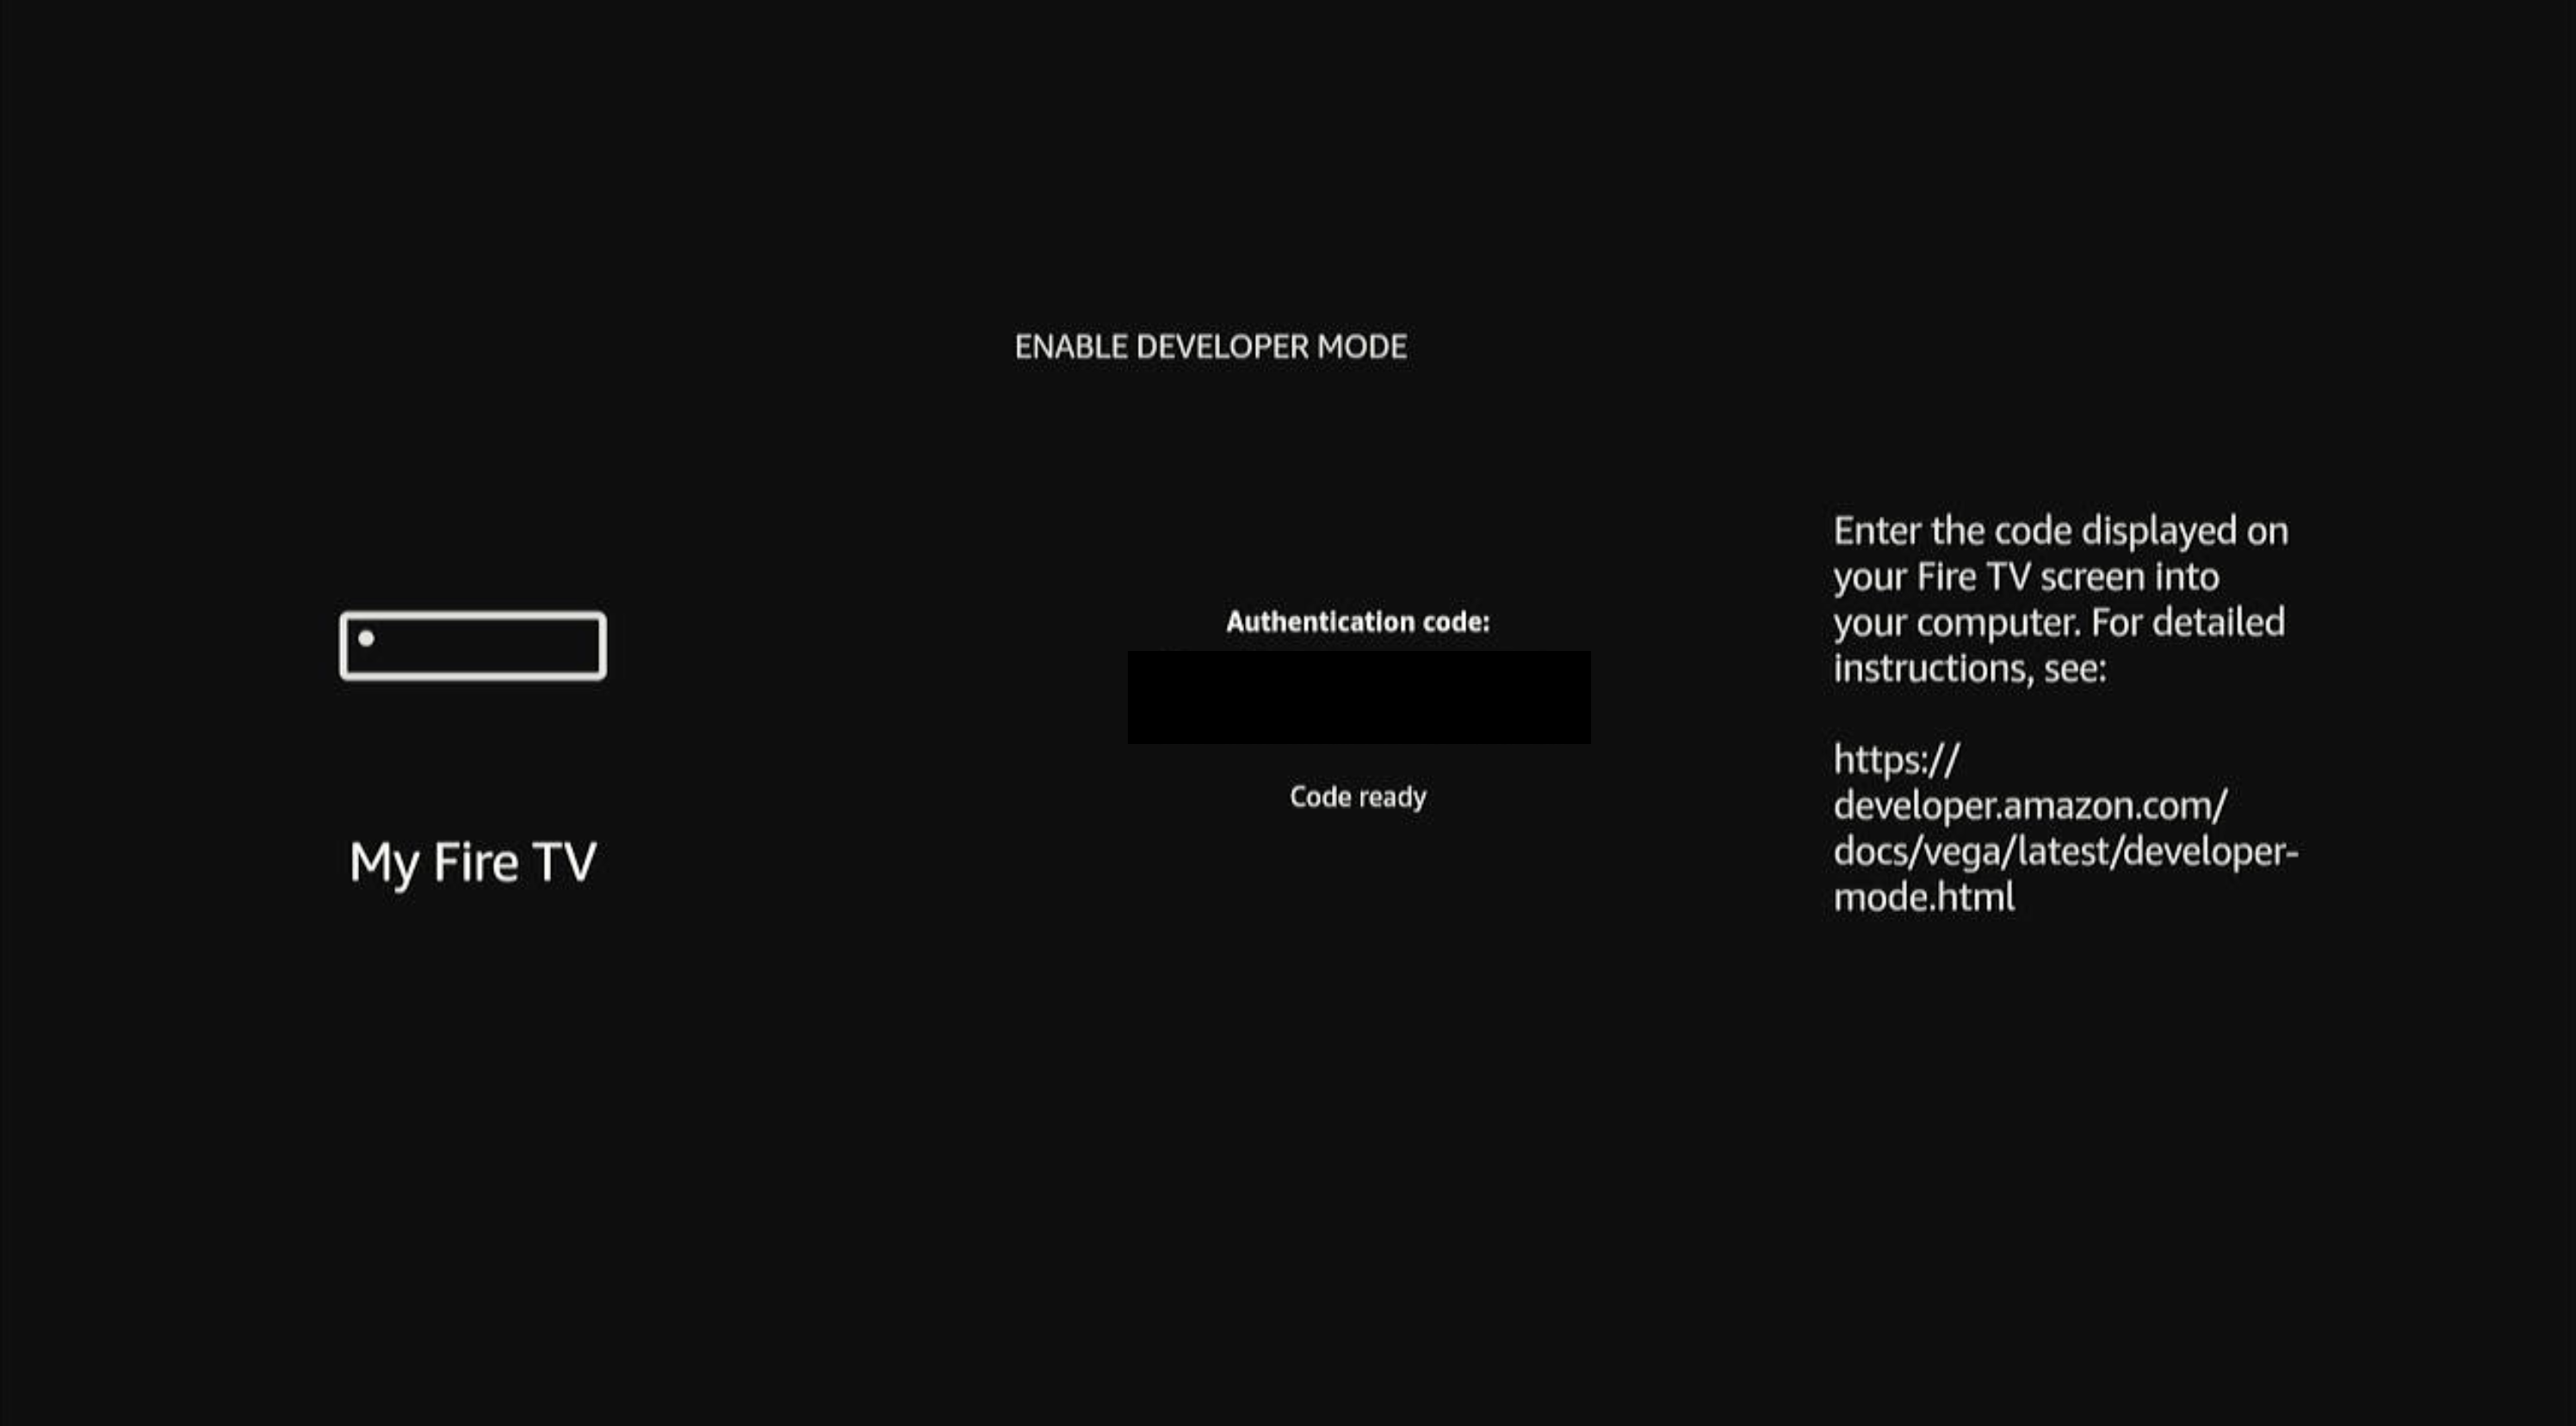
选择Continue(继续)后,Fire TV屏幕上会显示一个6位验证码。第11步会用到此验证码。
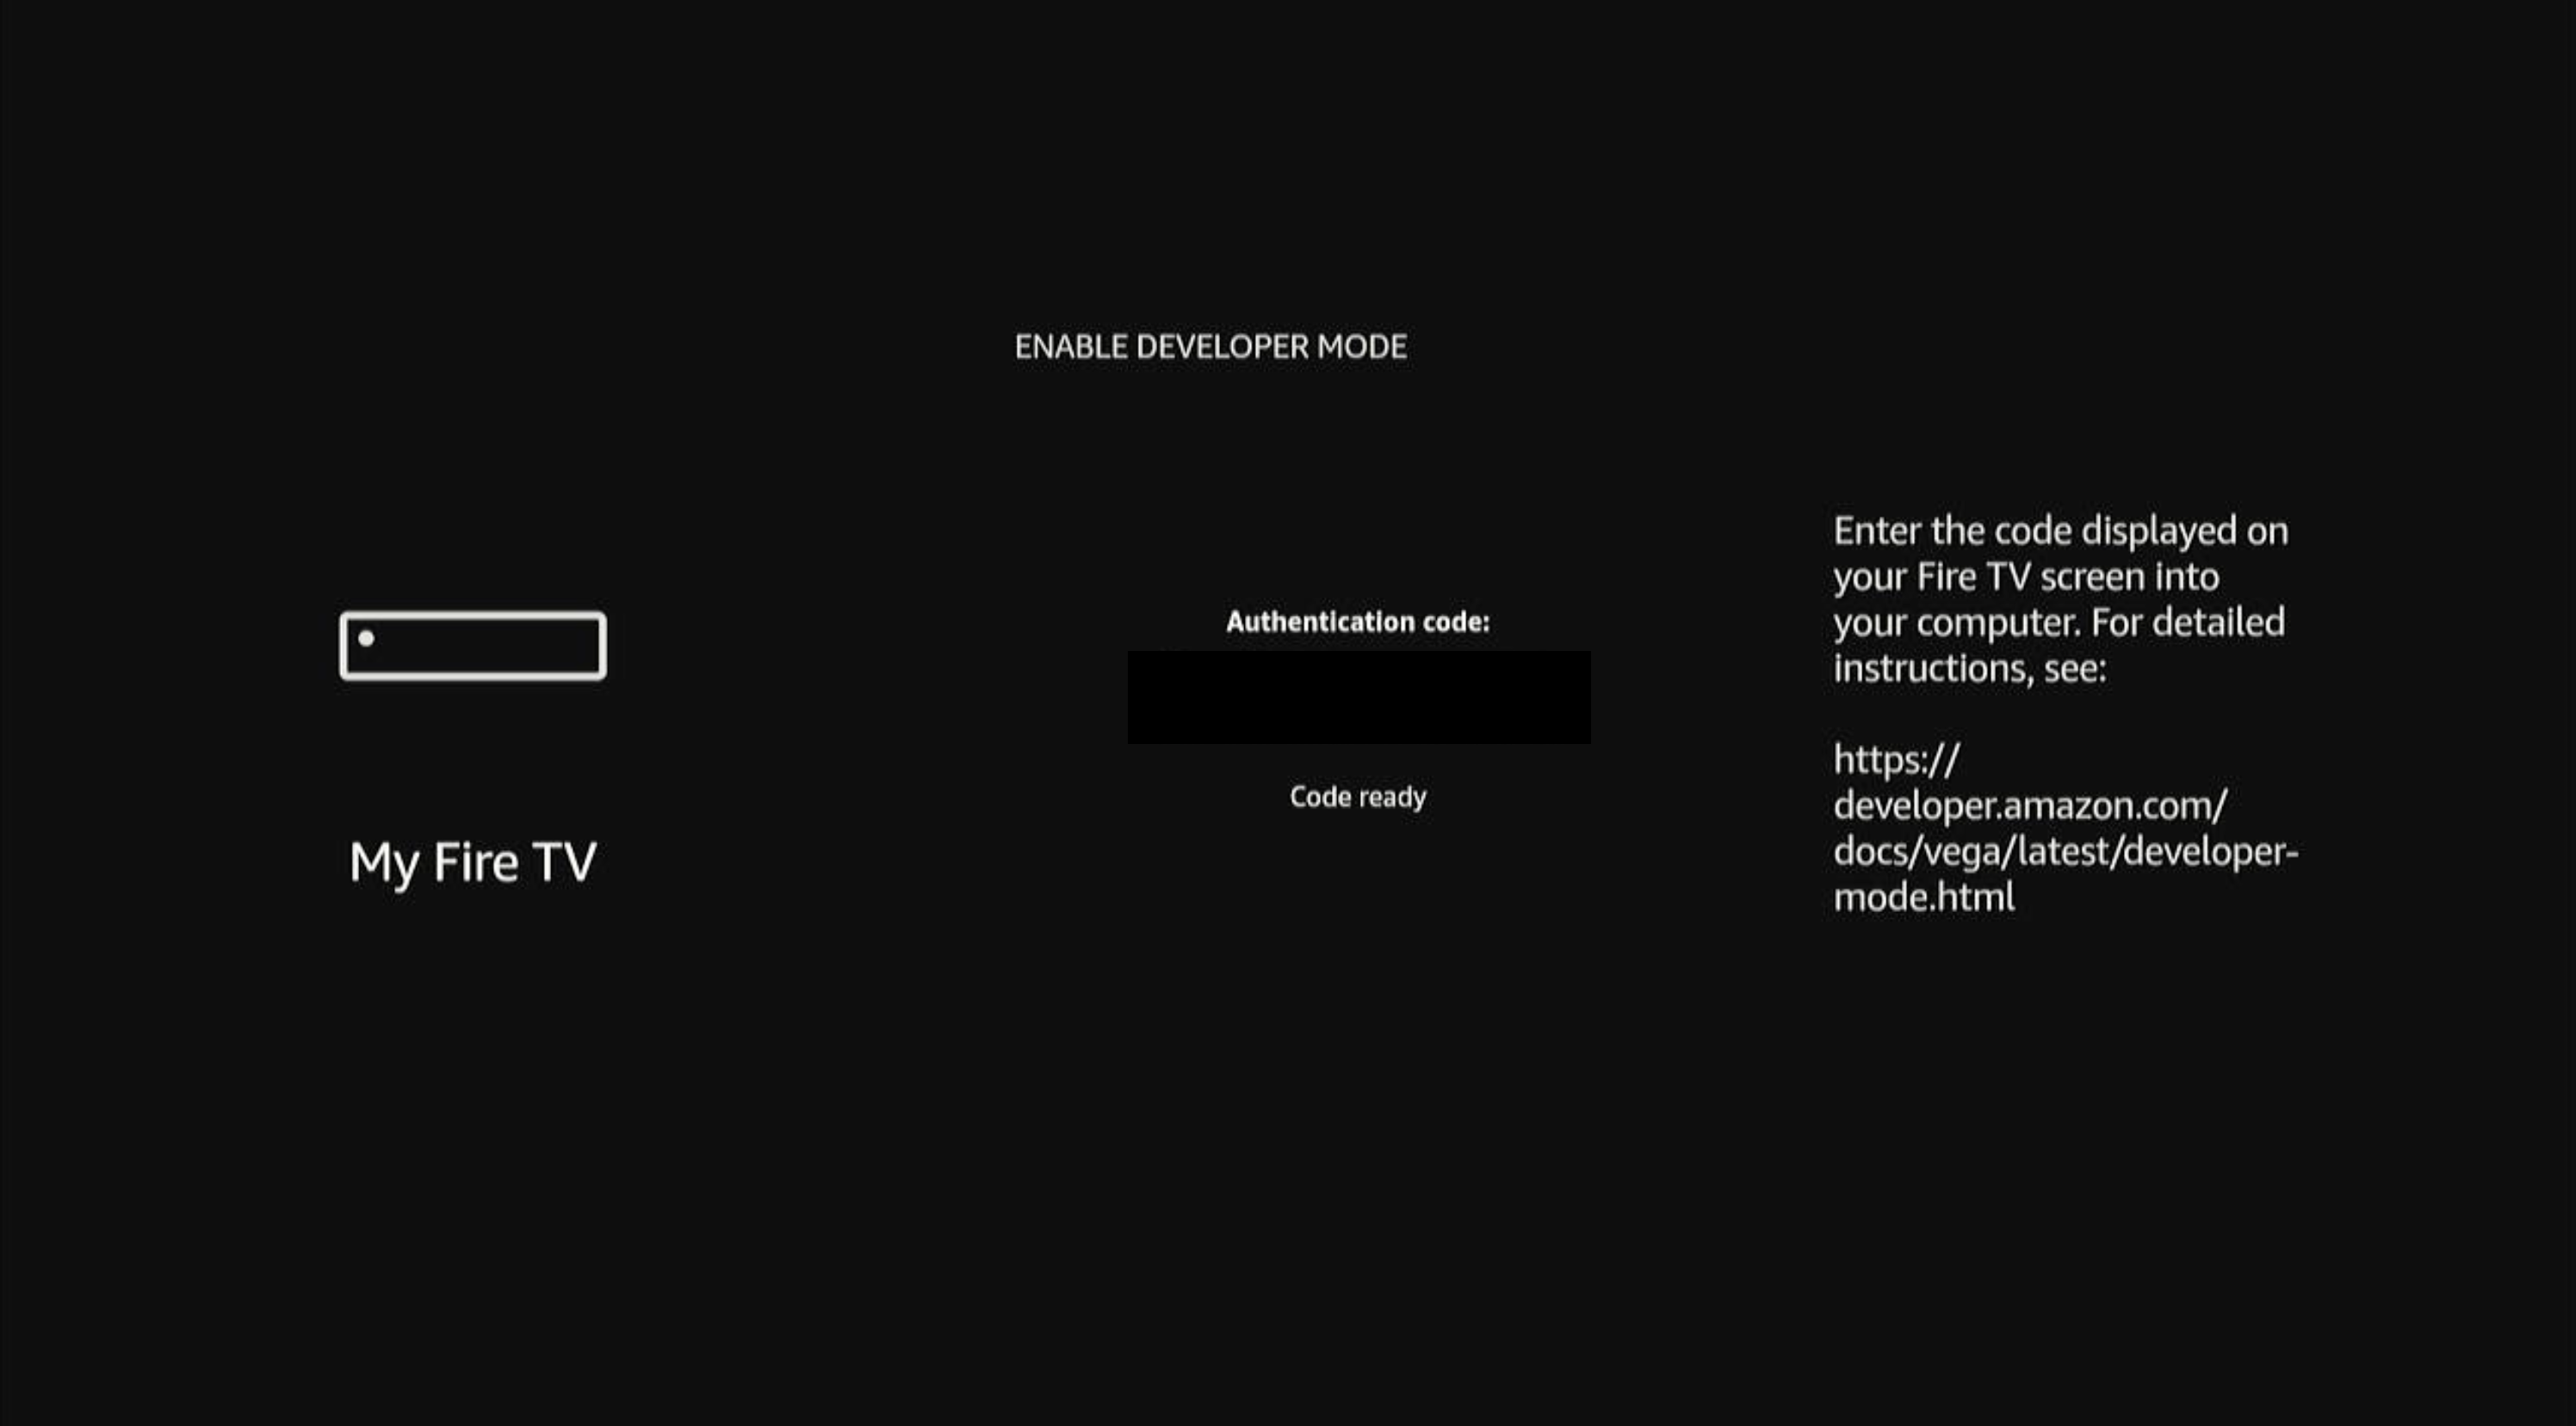 注意: 验证码有效期为5分钟。如未在指定时间内输入代码,请在同一屏幕上选择Request a New Code(申请新验证码),或返回Developer Options(开发者选项),重新执行该流程。
 -
要通过亚马逊开发者账户进行身份验证,请运行登录命令:
vega devmode login按照CLI操作说明完成身份验证。CLI会自动打开默认的网页浏览器,并导航至亚马逊身份验证页面。如果浏览器未自动打开,则手动导航至终端所提供的URL。
-
在浏览器中授权Vega CLI访问。
亚马逊OAuth同意屏幕上显示“Vega Authentication Test would like access to:”(Vega身份验证测试想要访问以下内容:),同时列出您的基本个人资料信息和姓名。
a.查看请求的权限。
b. 选择Allow(允许),授权Vega身份验证测试(或选择Cancel(取消),拒绝授权)。
如果选择Cancel(取消),CLI会拒绝授权并提示身份验证错误。请重新运行
vega devmode login命令,再试一次。选择Allow(允许)后,屏幕上会显示带有勾号图标的确认页面,以及内容为“Device connected to your account”(设备已连接至您的账户)的消息。 您可以关闭此页面。
返回终端。CLI会显示:
Login successful! You are now authenticated with Amazon Developer Services. -
输入Fire TV屏幕上显示的6位验证码以启用设备:
vega devmode enable-device --code <6位验证码>如果亚马逊开发者账户只有一个供应商,CLI会显示:
Using vendor: Amazon
✓ Device enabled successfully
如果账户有多个供应商,CLI会提示您从中选择一个:
Select a vendor:
1.Amazon (XXXXXXXXXX)
2.Amazon (XXXXXXXXXX)
输入供应商对应编号。随后,CLI会显示
✓ Device enabled successfully(✓设备已成功启用)。注意: 供应商即开发者账户,通过亚马逊开发者服务进行内容管理与发布。该身份验证流程可能需要数秒时间,才能同步到设备端。 -
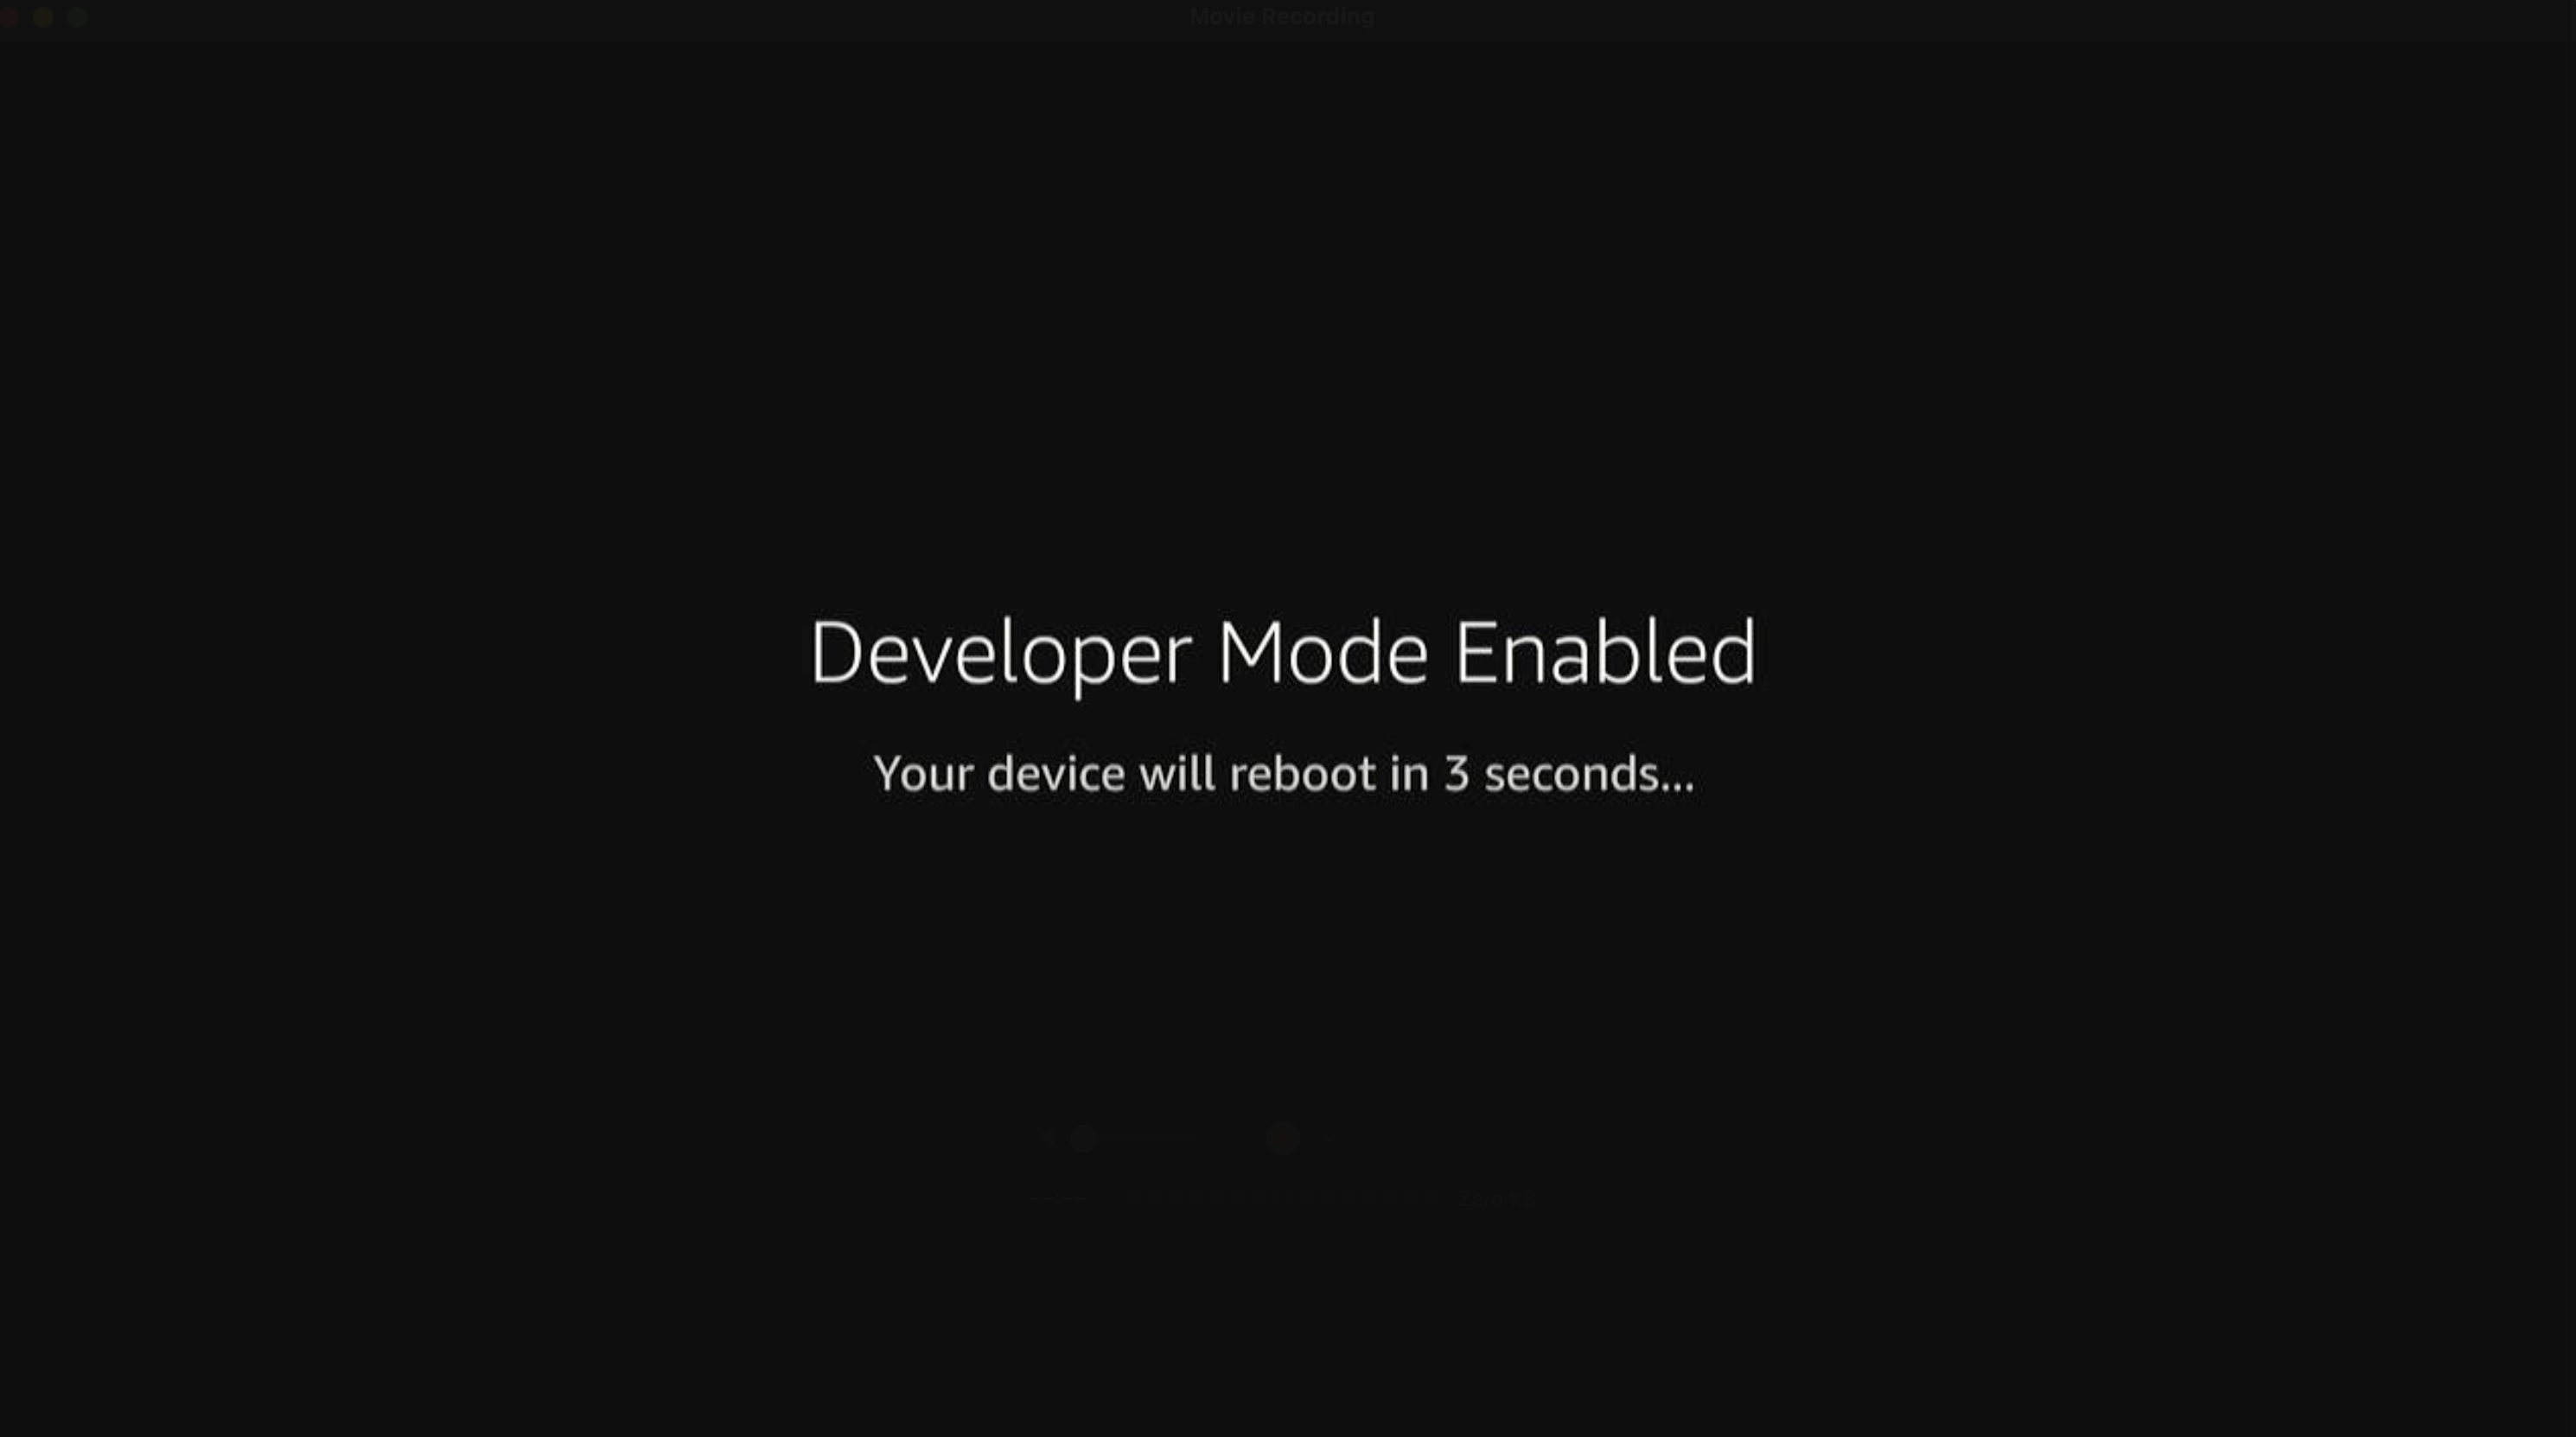
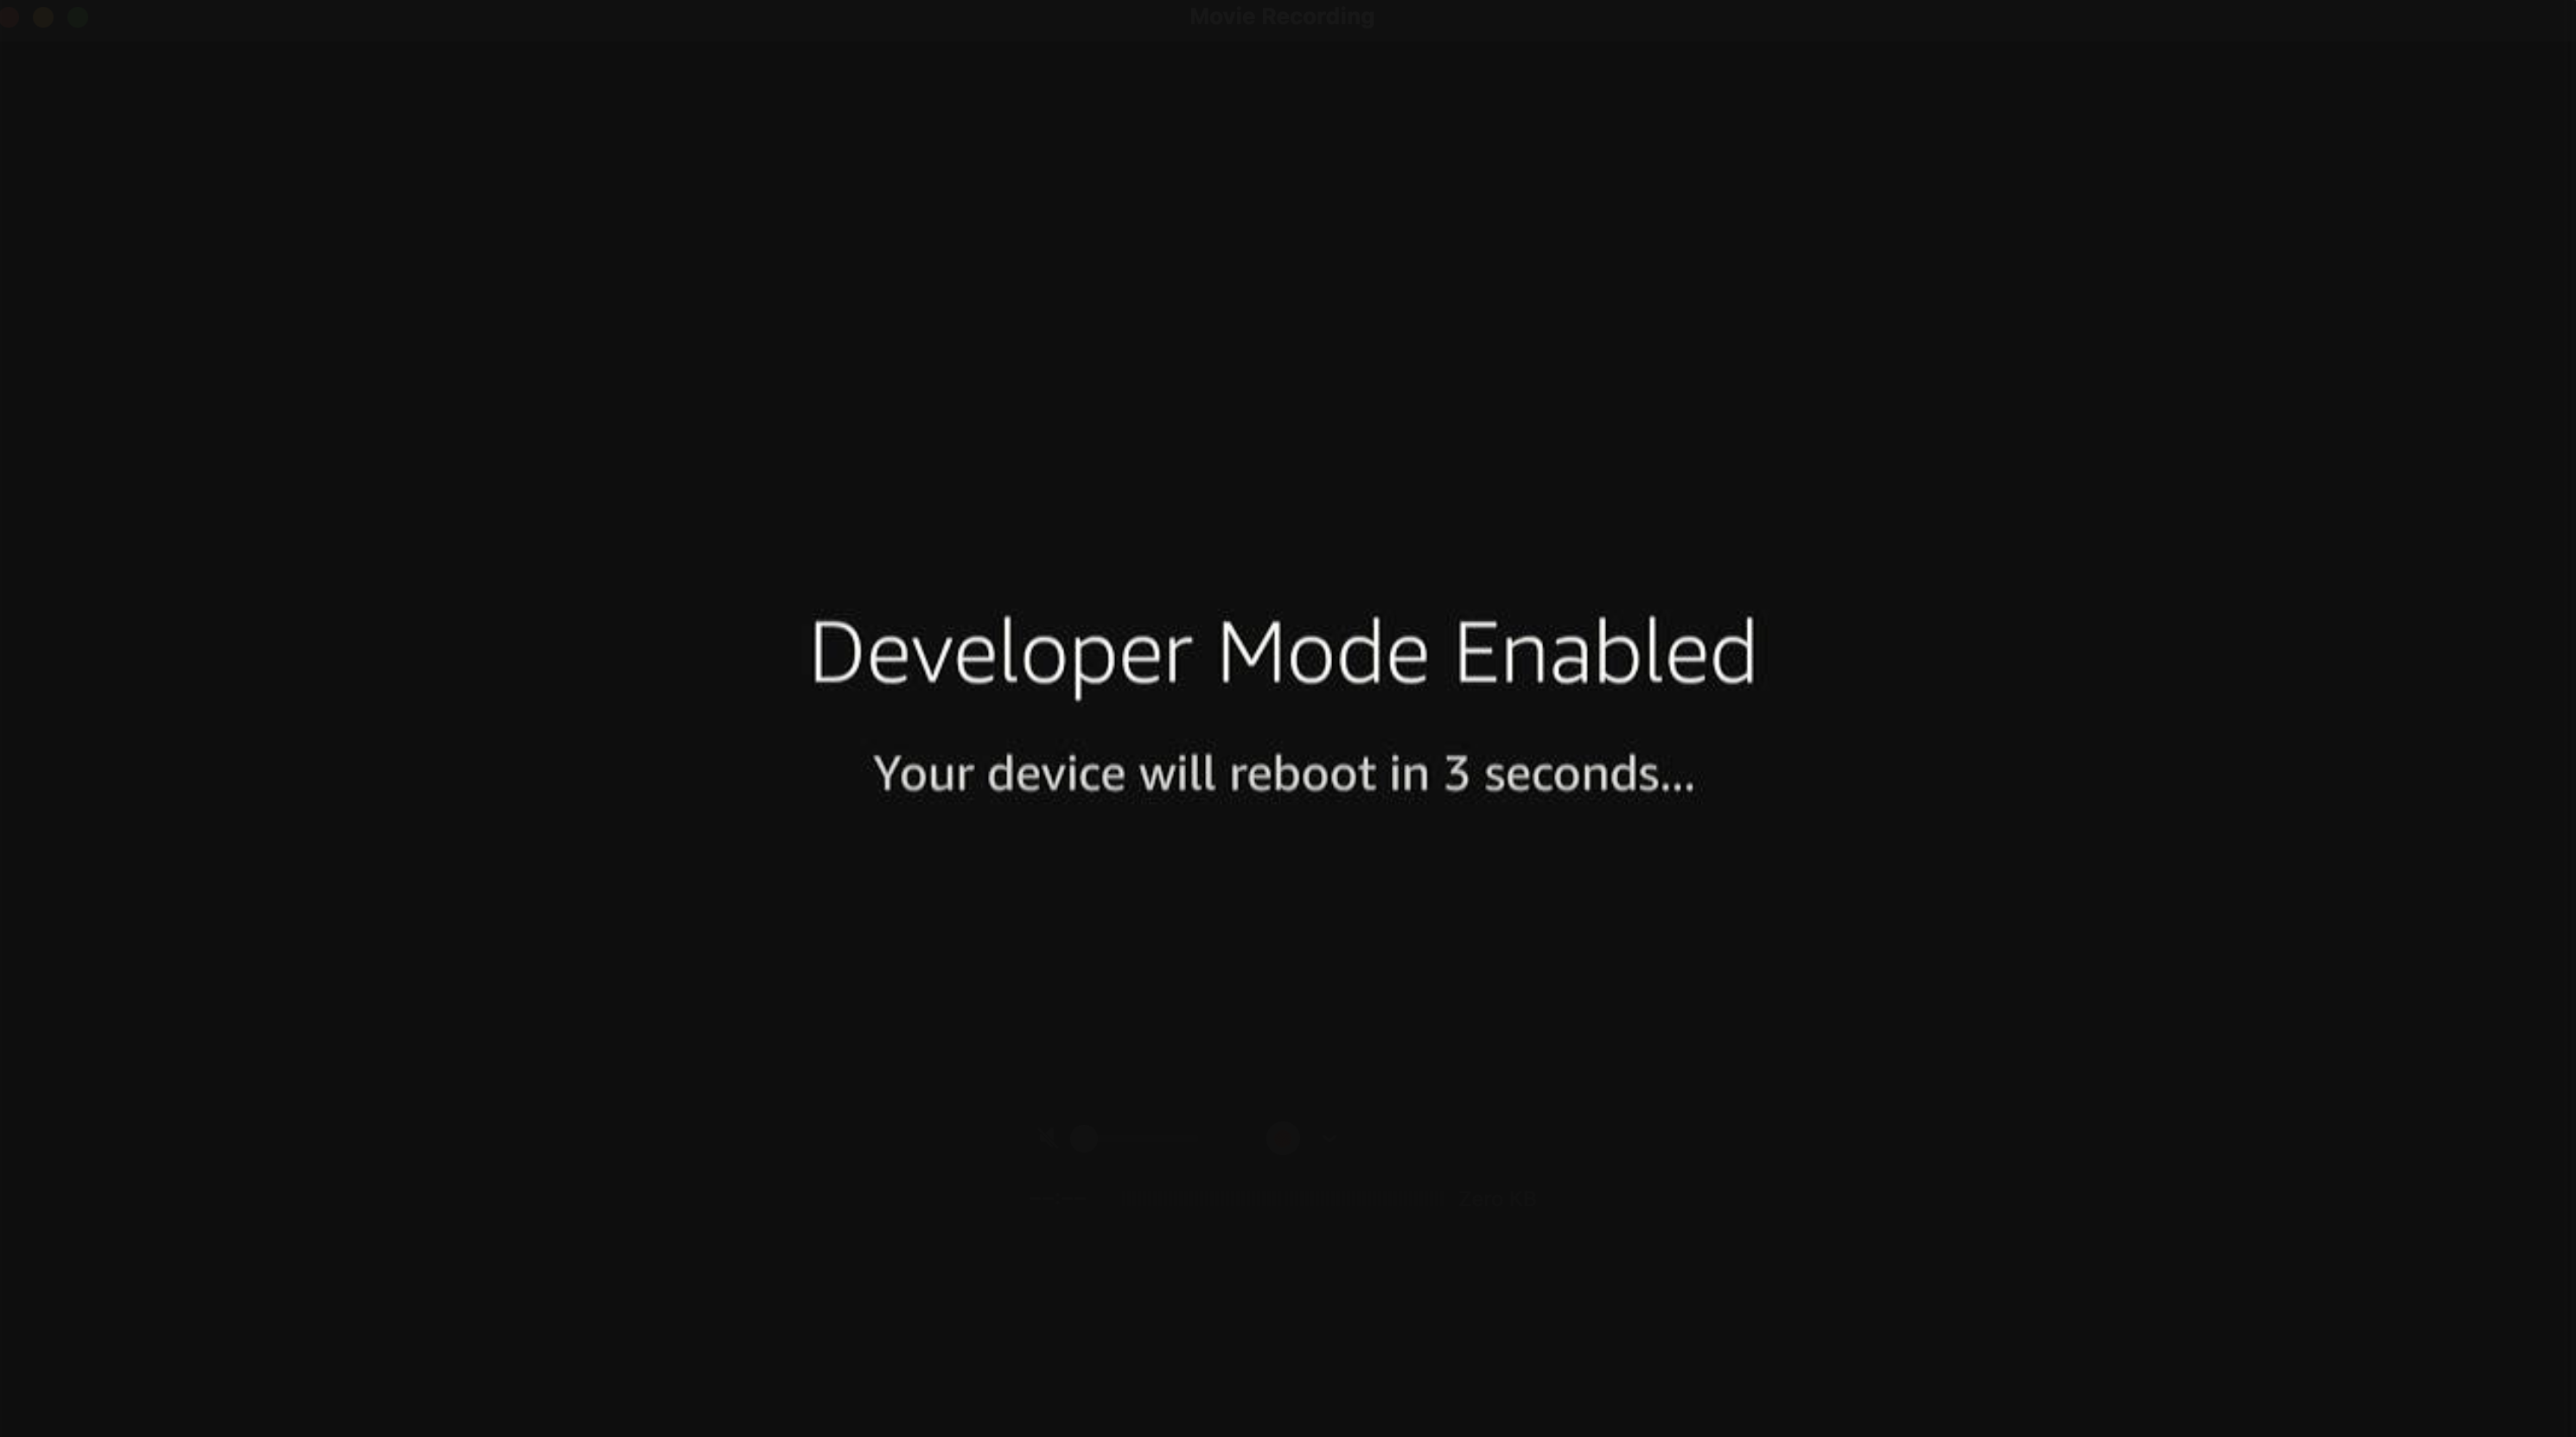
等待设备重启。
-
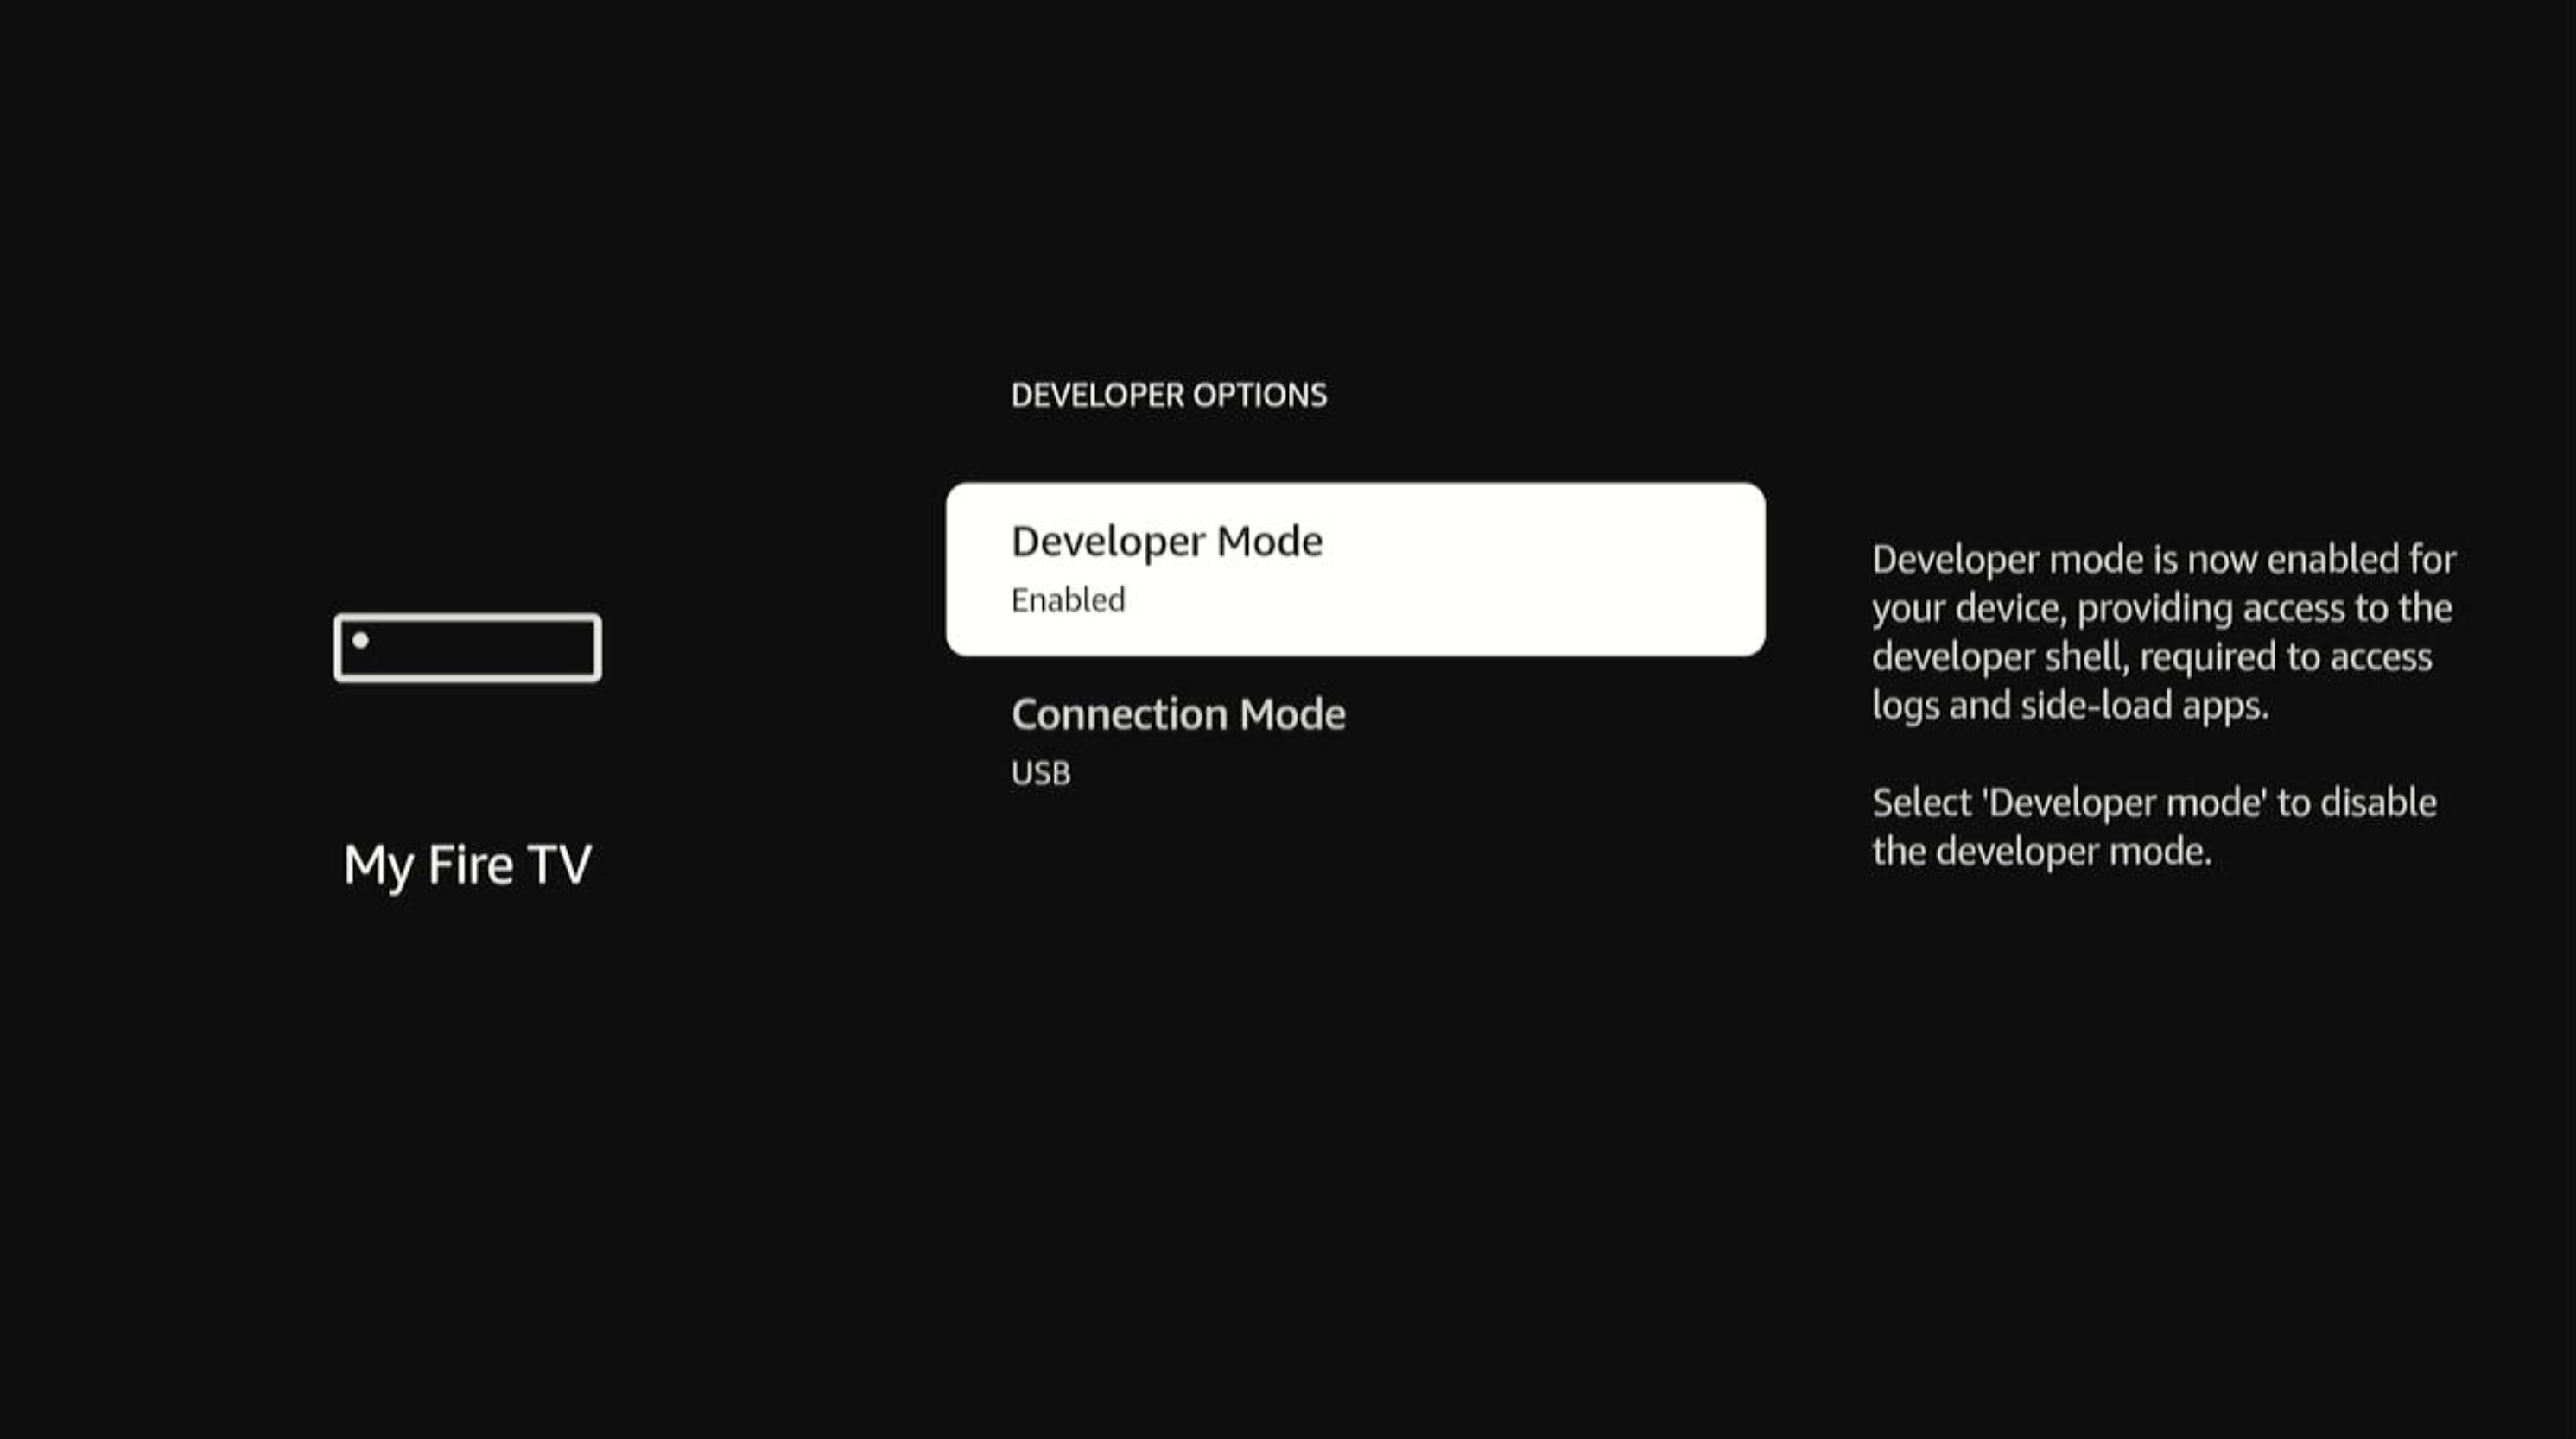
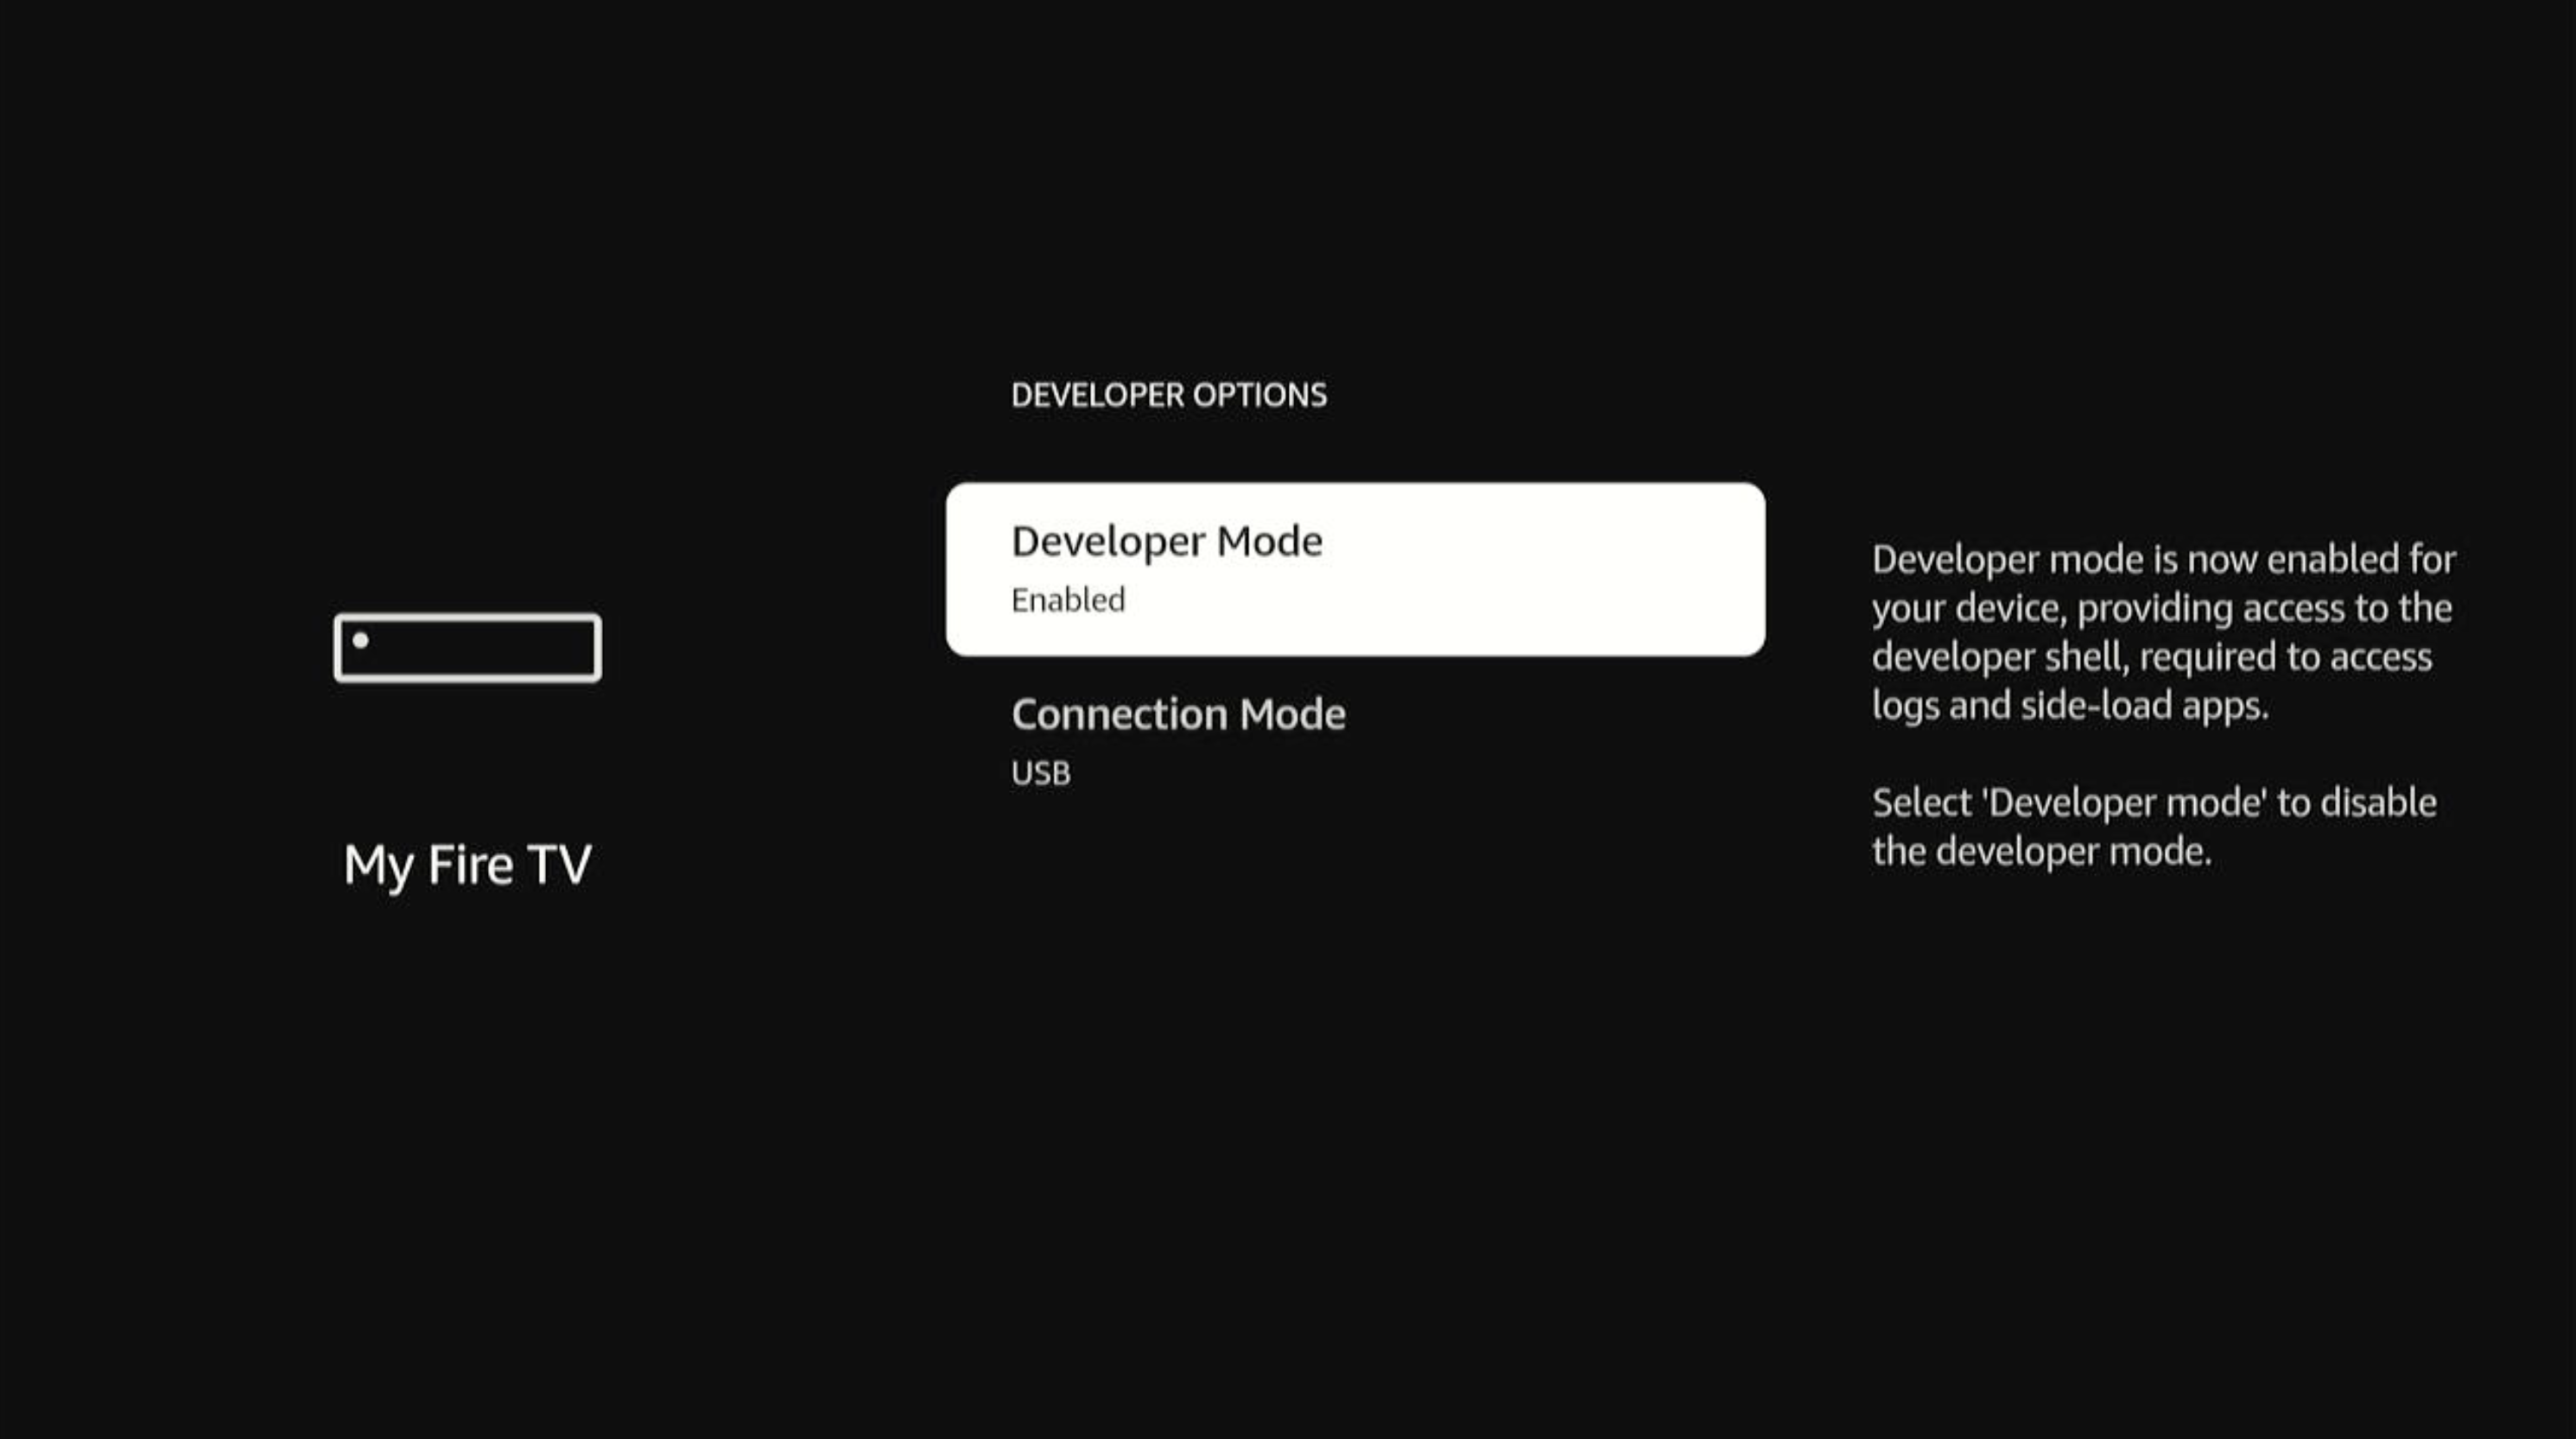
设备重启后,导航至Settings(设置)> My Fire TV(我的Fire TV)> Developer Options(开发者选项)> Developer Mode(开发者模式)。
Developer Mode(开发者模式)的状态显示为Enabled(已启用)。
-
检查设备识别。
vega device list连接一台设备时的输出示例:
Found the following device:
[序列号] : [设备号]
连接多台设备时的输出示例:
Found the following devices: [序列号] : [设备号] [序列号] : [设备号] -
连接到设备。
-
如果您连接了一台设备:
vega device shell -
如果您连接了多台设备,请指定设备序列号:
vega device -d <设备序列号> shell输出示例:
 (hostmachine)% vega device -d <设备序列号> shell

 ##################################################

 ##### Welcome to Developer Mode Shell #####

 ##################################################

 sh(com.amazon.dev.shell):/$
-
开发者模式状态
开发者模式可在启用、身份验证和禁用状态下运行。
启用状态
enable状态表示全部开发者功能都已激活,包括vsh shell访问、通过vpm进行程序包管理以及组件调试功能。
身份验证状态
authenticating状态表示系统正在验证是否拥有启用开发者模式的权限。
禁用状态
禁用状态下,系统会限制对标准用户功能的访问权限。
开发工具
开发者模式提供对用于程序包部署、组件管理和文件操作等核心工具的访问权限。请在正确的上下文中使用,并确保具备相应权限。
Vega CLI
在您的设备上,使用Vega命令行界面 (CLI) 命令来安装、卸载和管理程序包。支持以下程序包操作:
# 安装(需提供程序包文件路径)
vega device install-app --packagePath my-package.vpkg

# 列出程序包
vega device installed-packages

# 程序包信息
vega device run-cmd --command 'vpm info <程序包ID>'

# 卸载(需提供组件ID,而非程序包文件)
vega device uninstall-app --appName <组件ID>
您只能侧载非亚马逊程序包(不带com.amazon前缀的程序包)。
组件管理
要启动、列出和终止您的应用组件,请使用vega device组件管理命令。键盘命令如下:
# 启动
vega device launch-app --appName <c组件ID>

# 列出组件
vega device running-apps

# 终止
vega device terminate-app --appName <组件ID>
文件操作
使用文件操作在开发计算机和设备之间传输文件。默认shell仅允许访问/tmp目录,而组件shell可以访问其特定的/tmp/scratch/<程序包ID>目录。始终在传输后验证您的文件权限,并移除不再需要使用的临时文件,以维护设备存储空间。请记住,文件路径需要区分大小写。
删除文件时,请记住执行以下操作:
- 仅删除从默认开发shell推送到
/tmp的文件。 -
使用以下方法,删除特定组件shell的
/tmp/scratch/<程序包ID>中的文件:- 使用以下命令进入组件shell:
vega exec vda shell -t component-id com.myorg.myapp.main - 导航到
/scratch目录,该目录是组件shell内/tmp/scratch/<程序包ID>的绑定挂载:
 sh(com.myorg.myapp.main):/$ cd scratch
 sh(com.myorg.myapp.main):/scratch$ rm -rf <文件名称>
默认shell推送
 # 推送到默认shell
 vega device copy-to --source <src> --destination /tmp/

 # 查看文件
 vega device shell
 sh(com.amazon.dev.shell):/$ ls -al /tmp
组件shell推送
 vega device copy-to --source <src> --destination /tmp/scratch/<程序包ID>/

 示例:
 (hostmachine)% vega device copy-to --source myfile_cloud.sh --destination /tmp/scratch/com.myorg.myapp

 # 查找组件清单
 vega device installed-apps

 输出示例:
 com.myorg.myapp.main
 com.myorg.otad.main
 com.myorg.dev.shell.service

 # 查找设备上安装的程序包清单
 vega device installed-packages

 输出示例:
 com.myorg.myapp
 com.myorg.test.lifecycleobserver
 com.myorg.TESSERACT.TEST
 com.myorg.sm-sample.client
 com.myorg.samplepkg
 com.myorg.security.manager.unprivileged-test
 com.myorg.nmunprivileged.task
 com.myorg.messaging.mr33.okidl.ac

 # 启动组件shell
 (hostmachine)% vega exec vda shell -t component-id com.myorg.myapp.main

 # 查看推送的文件
 sh(com.myorg.myapp):/$ ls -al scratch/

 输出示例:
 total 4
 drwxr-xr-x  2 app_user app_user  60 2024-07-16 03:03 .
 drwxr-xr-x 19 app_user app_user 400 2024-07-16 03:03 ..
 -rwxrwxrwx  1 app_user 30086    650 2024-07-16 03:03 myfile_cloud.sh
从设备中拉取
# 从设备中拉取 vega device copy-from --source <设备路径> --destination <本地路径> - 使用以下命令进入组件shell:
最佳实践
使用开发者模式时,在常规开发工作流程中采取以下做法,以防发生意外的系统修改:
- 仅侧载具有非亚马逊程序包ID的应用(确认您的程序包ID不是以
com.amazon开头)。 - 使用任务所需的最低访问级别。
- 遵循最小权限原则。
- 请注意,您的操作可能会影响设备的稳定性和安全性。
故障排除和支持
开发过程中出现问题时,首先确定受影响的方面(身份验证、shell访问、程序包管理、组件启动或文件操作)。常见问题的原因包括权限不正确或设备状态限制。
如果以下各节中描述的解决方案无法解决您的问题,请在寻求支持之前使用loggingctl log收集相关日志。
身份验证问题
| 问题 | 解决方法 |
|---|---|
| 身份验证失败。 | 验证设备和计算机是否连接至同一网络。请确认您具备有效的亚马逊开发者账户。核对输入的验证码是否与屏幕上显示的验证码完全一致。 |
| 验证码过期 | 如果超过5分钟有效期,请在同一屏幕上选择Request a New Code(申请新验证码),或返回Developer Options(开发者选项),重新执行该流程。 |
| CLI无响应 | 确保当前使用的是最新版CLI。验证Vega CLI是否已正确安装:vega --version。核对设备IP地址是否正确。确保没有防火墙阻止连接。 |
| 验证超时 | 如果看到内容为”Validation check timed out“(验证检查超时)的消息,则系统会自动重试。请耐心等待系统完成重试尝试。如果反复失败,请从Developer Options(开发者选项)重新执行。 |
| 设备无法重启 | 如果您在确认对话框中选择了Cancel(取消),则该流程已中止。请从Developer Options(开发者选项)重新执行,然后重试。 |
| 浏览器无法自动打开 | 请手动导航至终端中显示的URL。将URL复制粘贴到浏览器中,然后按提示输入验证码。 |
常见开发问题
| 问题 | 可能的原因 | 分辨率 | 预防措施 |
|---|---|---|---|
| 程序包安装失败 | 目录错误或格式有问题。 | 检查/tmp位置或验证程序包格式。 |
遵循程序包指南。 |
| 组件启动问题 | 缺少清单条目。 | 验证清单配置或检查组件ID。 | 包括正确的清单条目。 |
调试工具
使用loggingctl log收集系统日志并监控组件状态。根据您的设备状态,每个调试工具都有特定的访问级别。
| 工具 | 目的 | 所需的访问级别 | 常见用例 |
|---|---|---|---|
loggingctl |
系统和组件日志 | 因shell类型而异 | 调试崩溃或验证行为。 |
vlcm list |
组件监控 | 默认shell | 跟踪正在运行的组件或验证状态。 |
ps -efZ |
进程和安全上下文 | 组件shell | 验证权限或检查进程状态。 |
相关主题
Last updated: 2026年8月7日
