
Run Your App on Vega Virtual Device or Fire TV
Learn how to use Vega Virtual Device or a Fire TV device to run your Vega apps. Each tool serves different development needs: Vega Virtual Device for rapid iterations and Fire TV Device for production-ready execution.
Run your app on Vega Virtual Device
The Vega Developer Tools (VDT) features a Vega Virtual Device that lets you test and run Vega apps without a physical device, giving you the following control options:
- Mouse interaction directly on the virtual device
- Virtual remote control interface
- Keyboard shortcuts and commands
Prerequisites
-
Warning: If your app uses
@amazon-devices/kepler-ui-components, you must use the latest SDK version (0.22 or later) for VVD testing. Older VVD versions don't include the required native modules and will fail with module dependency errors. For apps built with older SDKs, test on a physical Fire TV Stick instead. -
A Vega app ready to test.
You can use an app you created from Vega SDK project templates, downloaded from a sample app, or built yourself.
-
(Optional) Register your Vega Virtual Device to use Amazon Services for testing.
Options for running apps on Vega Virtual Device
You can run your Vega app using Vega Studio's user interface (UI) or Vega CLI.
Option 1: Using Vega Studio UI
-
Navigate to Vega Studio > Devices and select
VirtualDevice:Tv. -
Select the play button to start the virtual device.
-
Wait for the VVD window to open and the device to finish loading (VirtualDevice:Tv status should be ready, not 'Loading…')
-
Select the play button next to your project name.
Option 2: Using Vega CLI
-
At the command prompt, start the Vega Virtual Device:
vega virtual-device startThe command waits until the Vega Virtual Device has booted.
Launching virtual device.
Waiting for virtual device to boot.
Virtual device ready.
The Vega Virtual Device might:
- Request microphone access on first launch.
- Time out during boot. Use the
--timeoutflag to extend the wait time if needed.
Example:
vega virtual-device start --timeout 120This command allows the virtual device to wait 120 seconds to complete the boot process.
After you start the Vega Virtual Device, the UI opens in a new window.
-
Load and run your app:
vega run-app <vpkg-path> <app-id> -d VirtualDeviceExample output:
vega run-app sampleapp.vpkg com.amazon.sampleapp.main -d VirtualDeviceThe
-dflag specifies that you're running the app on the Vega Virtual Device.Architecture-specific commands
The architecture of the virtual package (
vpkg) must match the architecture of your development machine for proper execution. For example:Mac M-series devices:
vega run-app build/aarch64-release/sampleapp_aarch64.vpkg com.amazondeveloper.sampleapp.main -d VirtualDevicex86_64 devices:
vega run-app build/x86_64-release/sampleapp_x86_64.vpkg com.amazondeveloper.sampleapp.main -d VirtualDeviceTip: After initial installation, usevega device launch-appfor subsequent launches. App data persists between launches.
Options for stopping apps on Vega Virtual Device
You can stop your Vega app using Vega Studio's UI or the command line.
Option 1: Using Vega Studio UI
-
Navigate to Vega Studio > Devices and select
VirtualDevice:Tv. -
Select the stop button.
Option 2: Using Vega CLI
To stop the Vega Virtual Device, close your virtual device window, or run:
vega virtual-device stop
Optional configurations
Register the Vega Virtual Device (only if you're using Amazon services for testing)
To use Amazon Services for testing, register your Vega Virtual Device. When you see the Vega Virtual Device has launched, follow these steps:
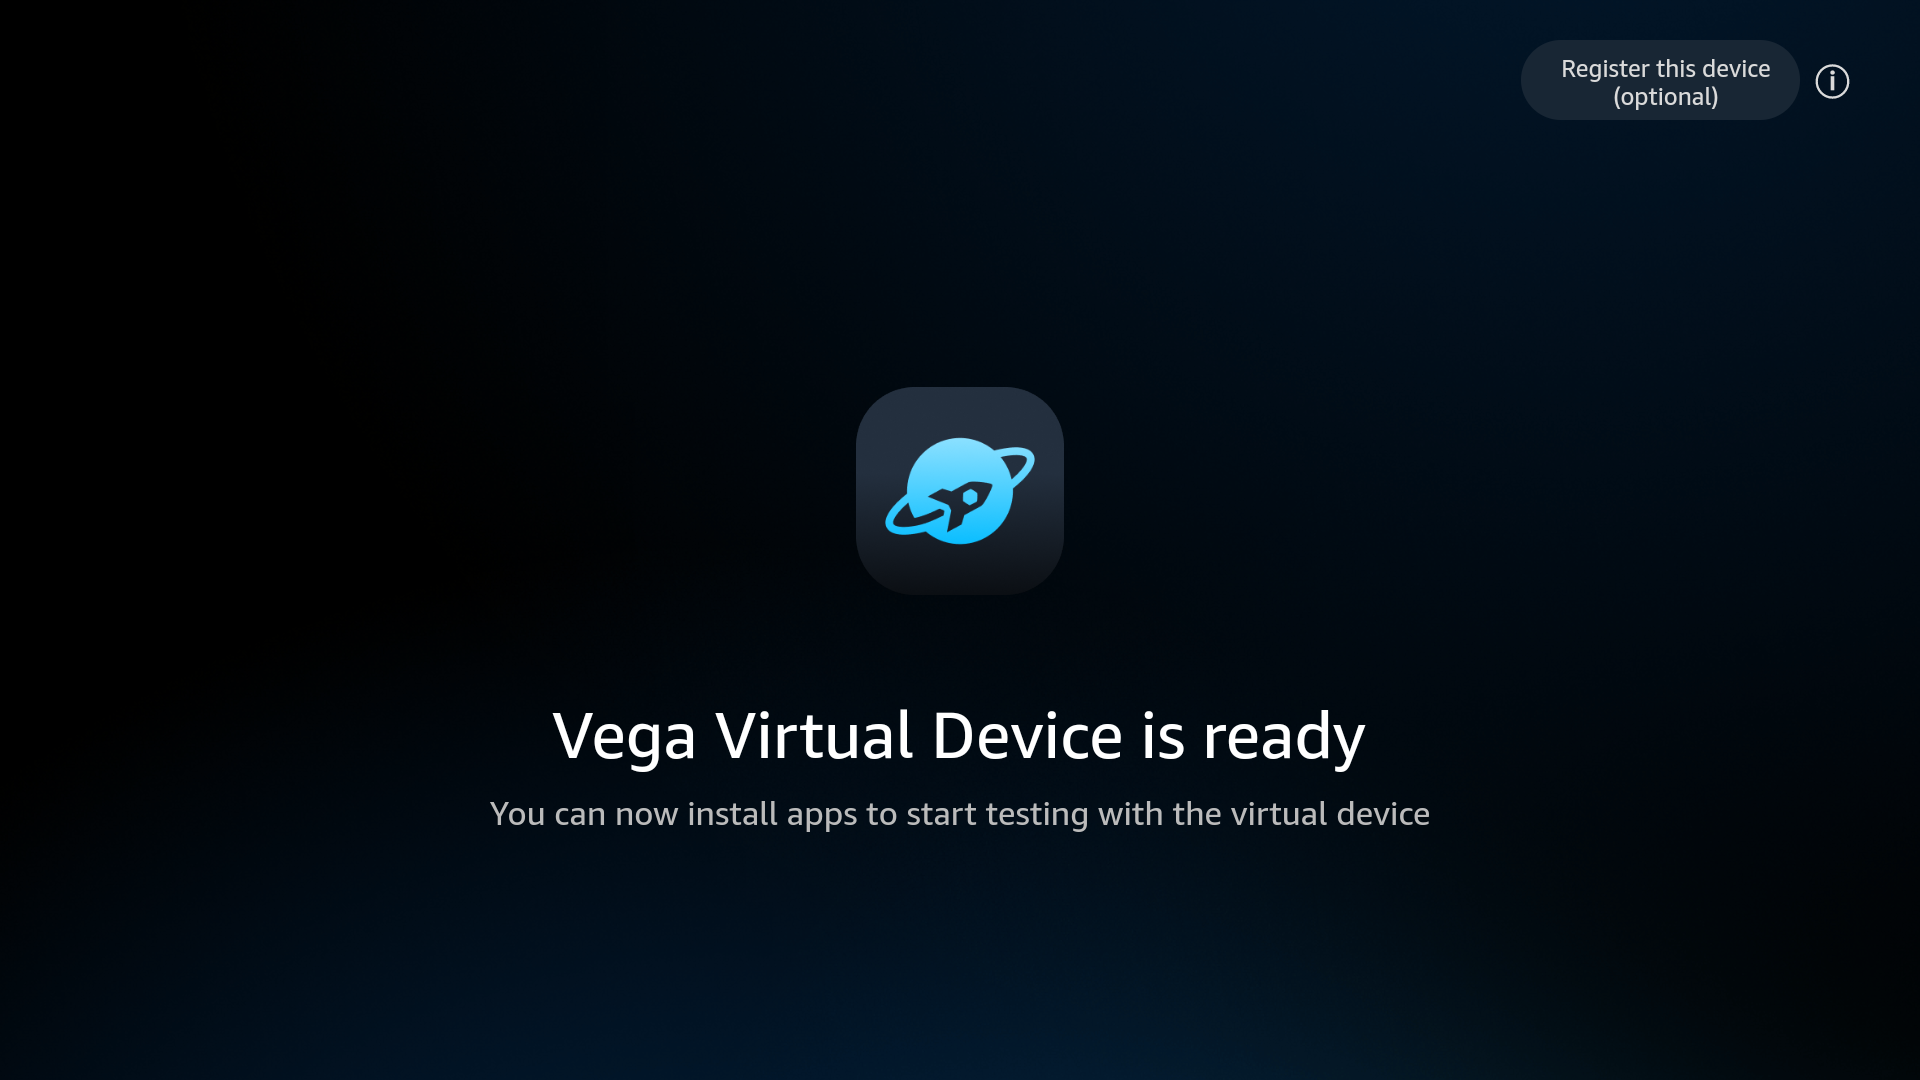
- Select "Register this device" on the top right.
- Record the registration code shown on screen.
- Go to www.amazon.com/code and enter the code.
-
Look for this message to confirm registration:
Your device has successfully been registered
Customize the Vega Virtual Device on launch
The Vega Virtual Device provides customization options on launch. When running the start command:
-
Suppress the graphical user interface (GUI):
vega virtual-device start --no-gui -
Turn off OpenGL acceleration (Ubuntu x86 only):
vega virtual-device start --no-gl-accelTip: OpenGL acceleration improves graphics performance. Turn it off only when troubleshooting display issues on Ubuntu x86 systems. -
Modify the default display resolution:
vega virtual-device start --display-res=1920,1080
Enable Developer Mode for full inputd-cli functionality
The Vega Virtual Device provides limited inputd-cli commands by default. Enable Developer Mode to access the full command set for automation and testing:
-
Open the virtual device's shell:
vega device shell -d VirtualDevice -
Enable Developer Mode:
vsm developer-mode enableThe VVD reboots after this command. Repeat step 1 to reconnect to the virtual device's shell.
-
Verify full functionality:
inputd-cli --help
inputd-cli commands like touch, swipe, button_press, and send_text. Without Developer Mode, you can only use basic commands (get_camera_cover_open_close, get_mic_state, get_screen_size).Keyboard shortcuts
Use these keyboard shortcuts to control the Vega Virtual Device instead of clicking with your mouse:
| Fire TV Stick remote button | Vega Virtual Device keyboard key |
|---|---|
| Select | ENTER |
| Up, Down, Right, Left | Arrow keys |
| Back | ESC |
| Homepage | F1 |
| Menu | F2 |
| Rewind | F3 |
| Play/Pause | F4 |
| Fast Forward | F5 |
Set up Fast Refresh
To automatically detect code changes and display updates in real-time on your Vega Virtual Device, you can set up Fast Refresh.
Troubleshoot
If you encounter issues with the Vega Virtual Device, see Troubleshoot Vega Virtual Device Issues.
Run your app on Fire TV
Running your Vega app on a Fire TV device is essential for testing real device performance and ensuring compatibility before submitting to the Amazon Appstore. This section walks you through setting up your Fire TV device for development, enabling Developer Mode, and sideloading your Vega app for testing.
Developer Mode allows you to sideload apps and test development builds on your device. All Vega Fire TV devices use the same Developer Mode enablement process.
Prerequisites
- Install the Vega SDK.
- Ensure you have the latest SDK Manager installed (run
vega updateto get the latest version). -
A Fire TV device running Vega OS (for example, Fire TV Stick HD, Fire TV Stick 4K Select, or Fire TV Streaming Media Player).
For a full list of supported devices, see Fire TV device specifications.
Step 1: Set up and register your Fire TV device
Before you proceed, ensure you're using the remote that came with your Fire TV device. Remotes from other Fire TV devices cause pairing issues during development and testing.
-
Connect your Fire TV device:
a. To your development machine using a USB cable.
b. To a display using the HDMI adapter.
The remote pairing screen displays.
-
Complete remote pairing:
a. Press the Home button when prompted.
b. Follow on-screen instructions.
c. Wait for the Fire TV logo.
If the Fire TV logo doesn't appear within a few minutes, see Resolve Fire TV Stick Issues for troubleshooting steps.
-
Configure settings:
a. Press the Play/Pause button on your remote.
b. Select your preferred language.
c. Connect to your network.
d. Enter your network credentials.
Warning: The device checks for over-the-air (OTA) updates. Don't power off or restart your device until the updates complete. Interrupting the update might prevent network discovery. -
Complete device registration:
a. Sign in to your Amazon account either online or through QR code.
b. Follow on-screen instructions.
c. Wait for the "Successfully registered" message.
-
Press OK when you see "Your Fire TV remote is now successfully set up."
Step 2: Configure Developer Mode
Developer Mode requires authentication with your Amazon Developer Account using the Vega CLI. The process involves retrieving an authentication code from your Fire TV device, authenticating through your browser, and completing device enablement from the terminal. Your device reboots automatically after enablement.
-
Access the Fire TV Settings menu:
Option 1: Using Home button
a. Press the Home button on your remote to go to the Home screen.
b. Navigate to the top menu bar.
c. Scroll right to find and select the Settings icon (gear symbol).
Option 2: Using Home button shortcut (faster)
a. Press and hold the Home button on your remote for 3 seconds.
b. Select Settings from the quick menu that appears.
-
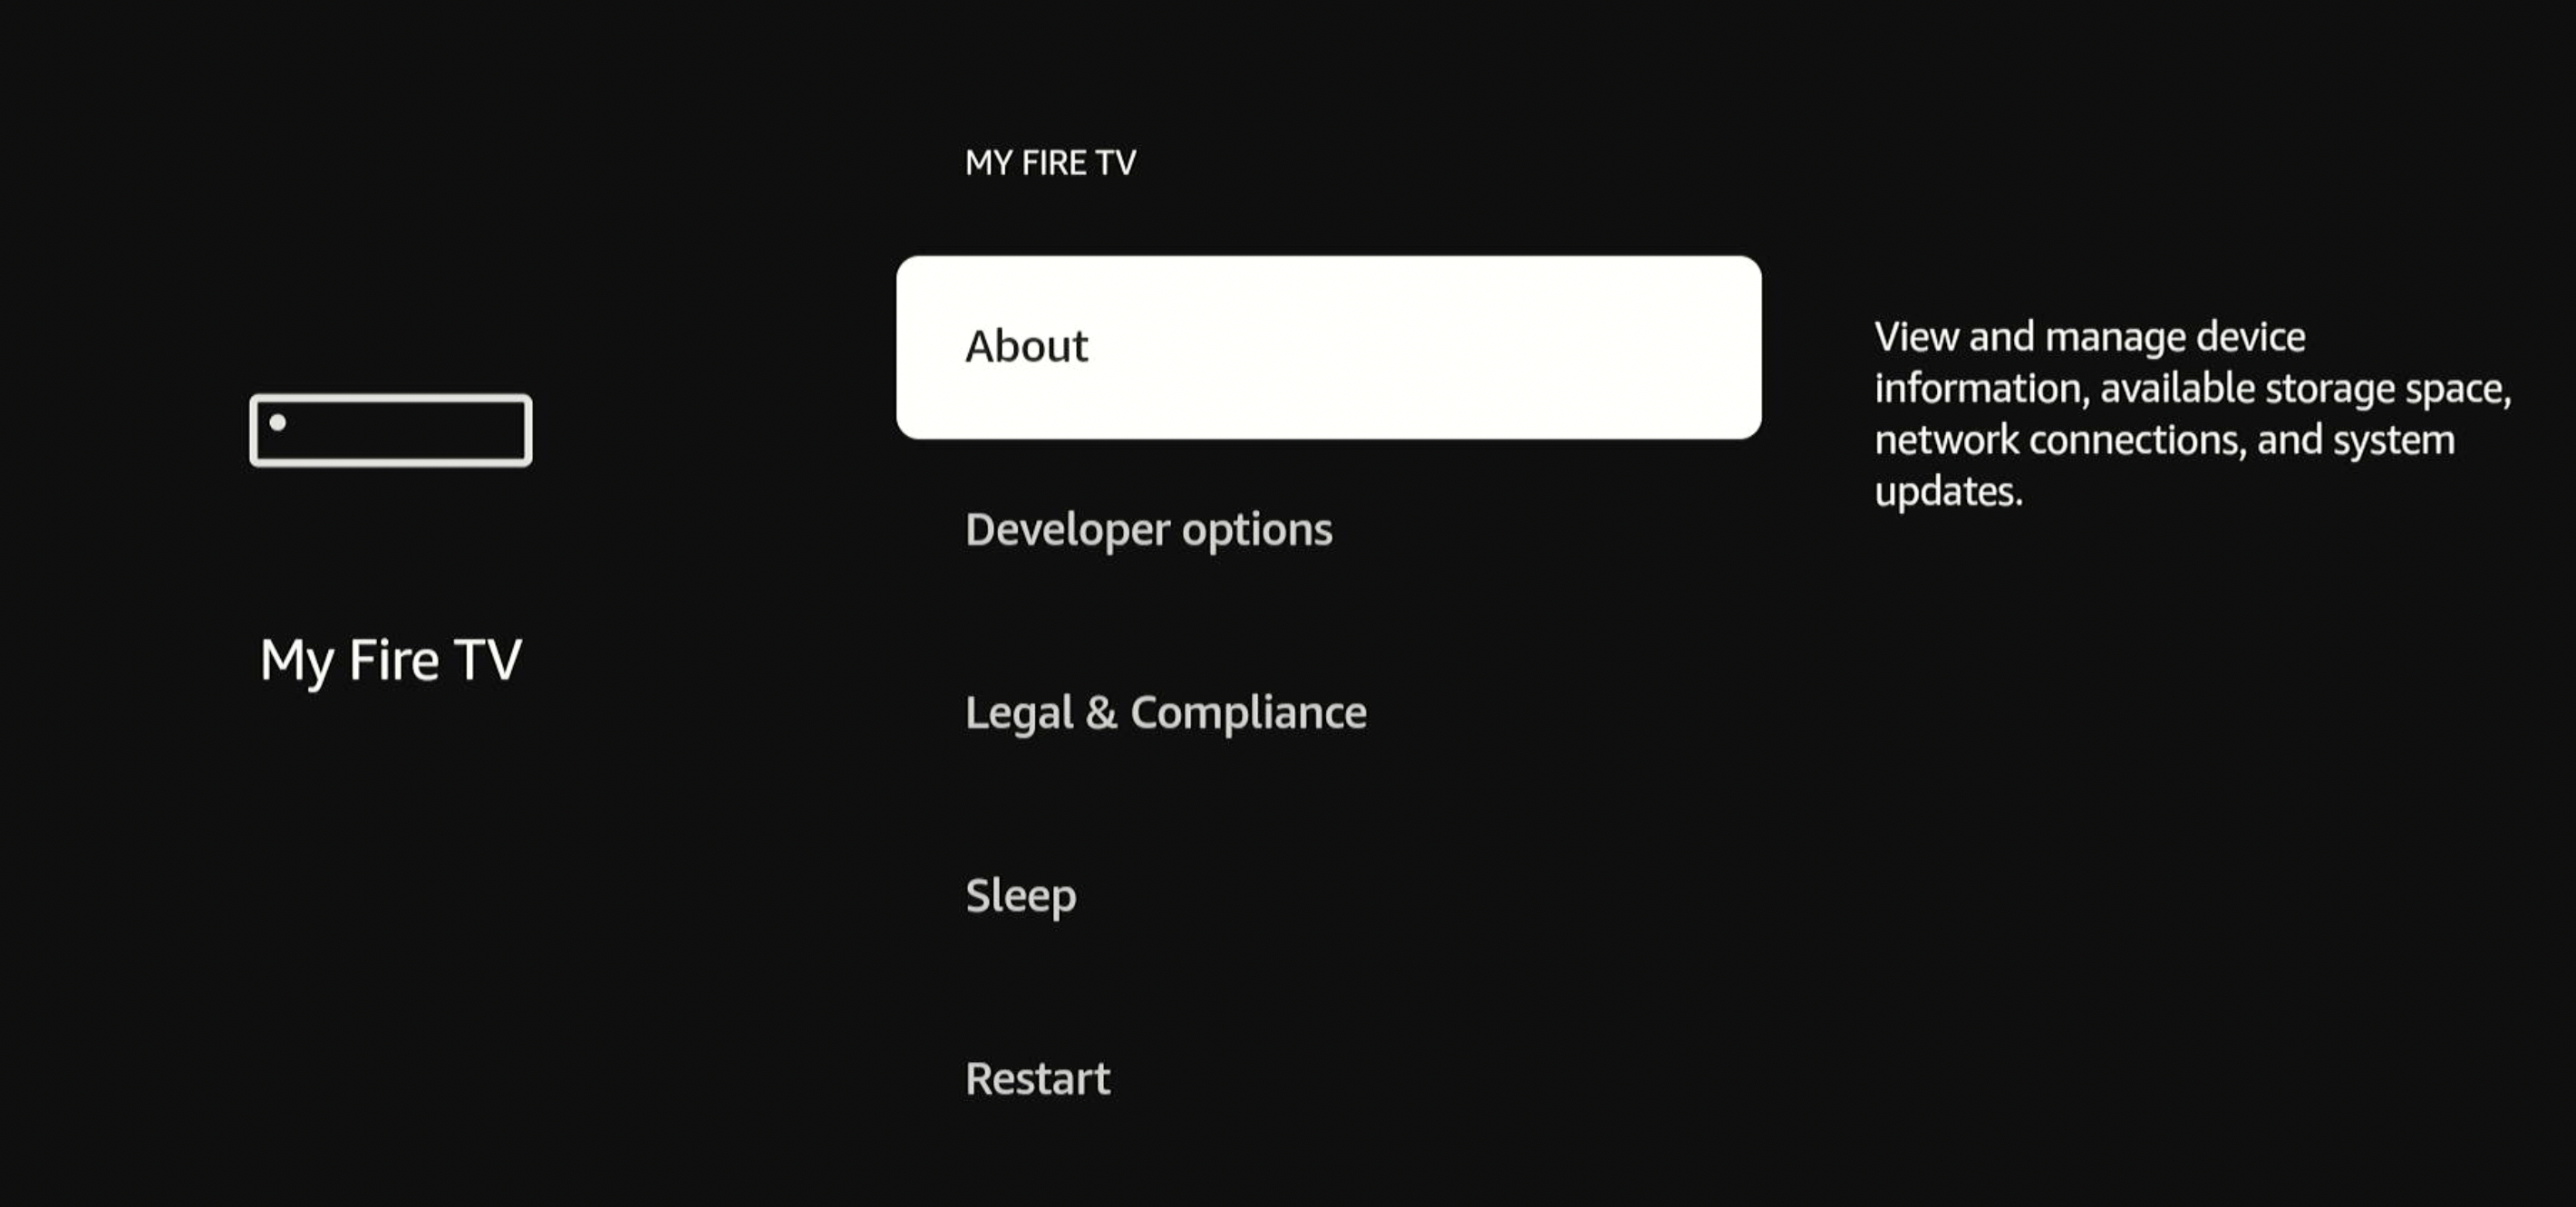
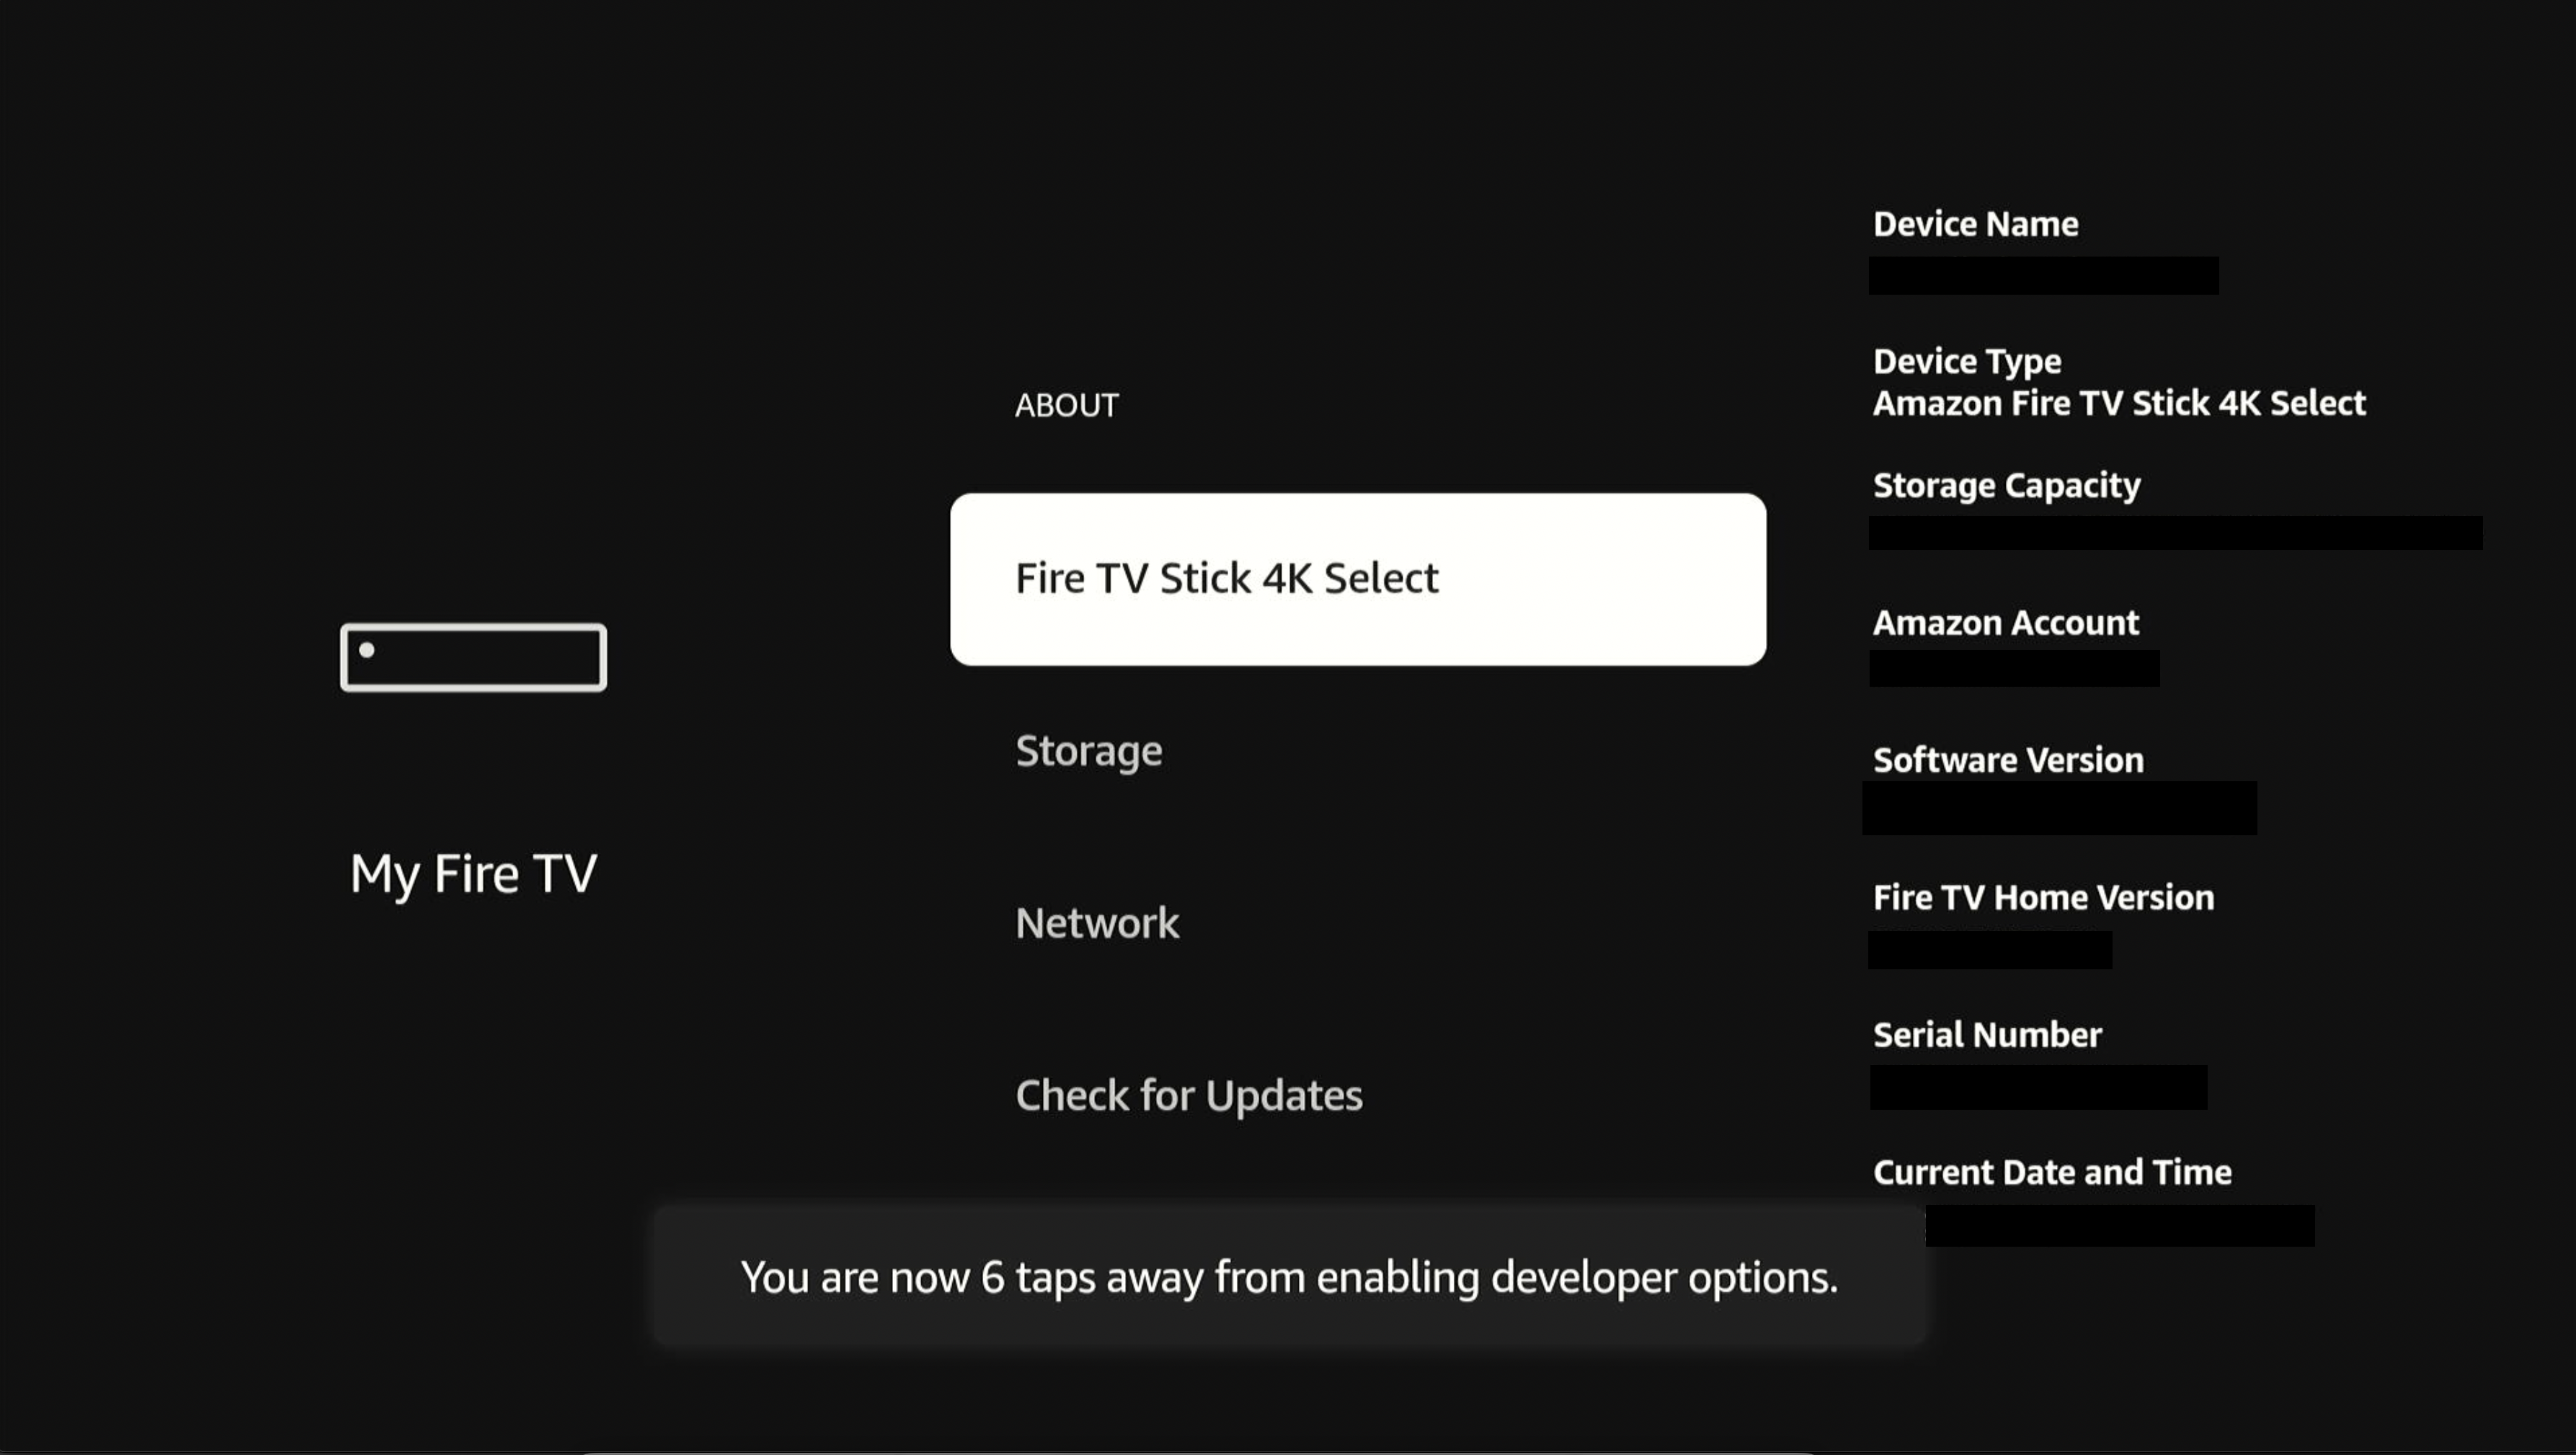
Go to Settings > My Fire TV > About.
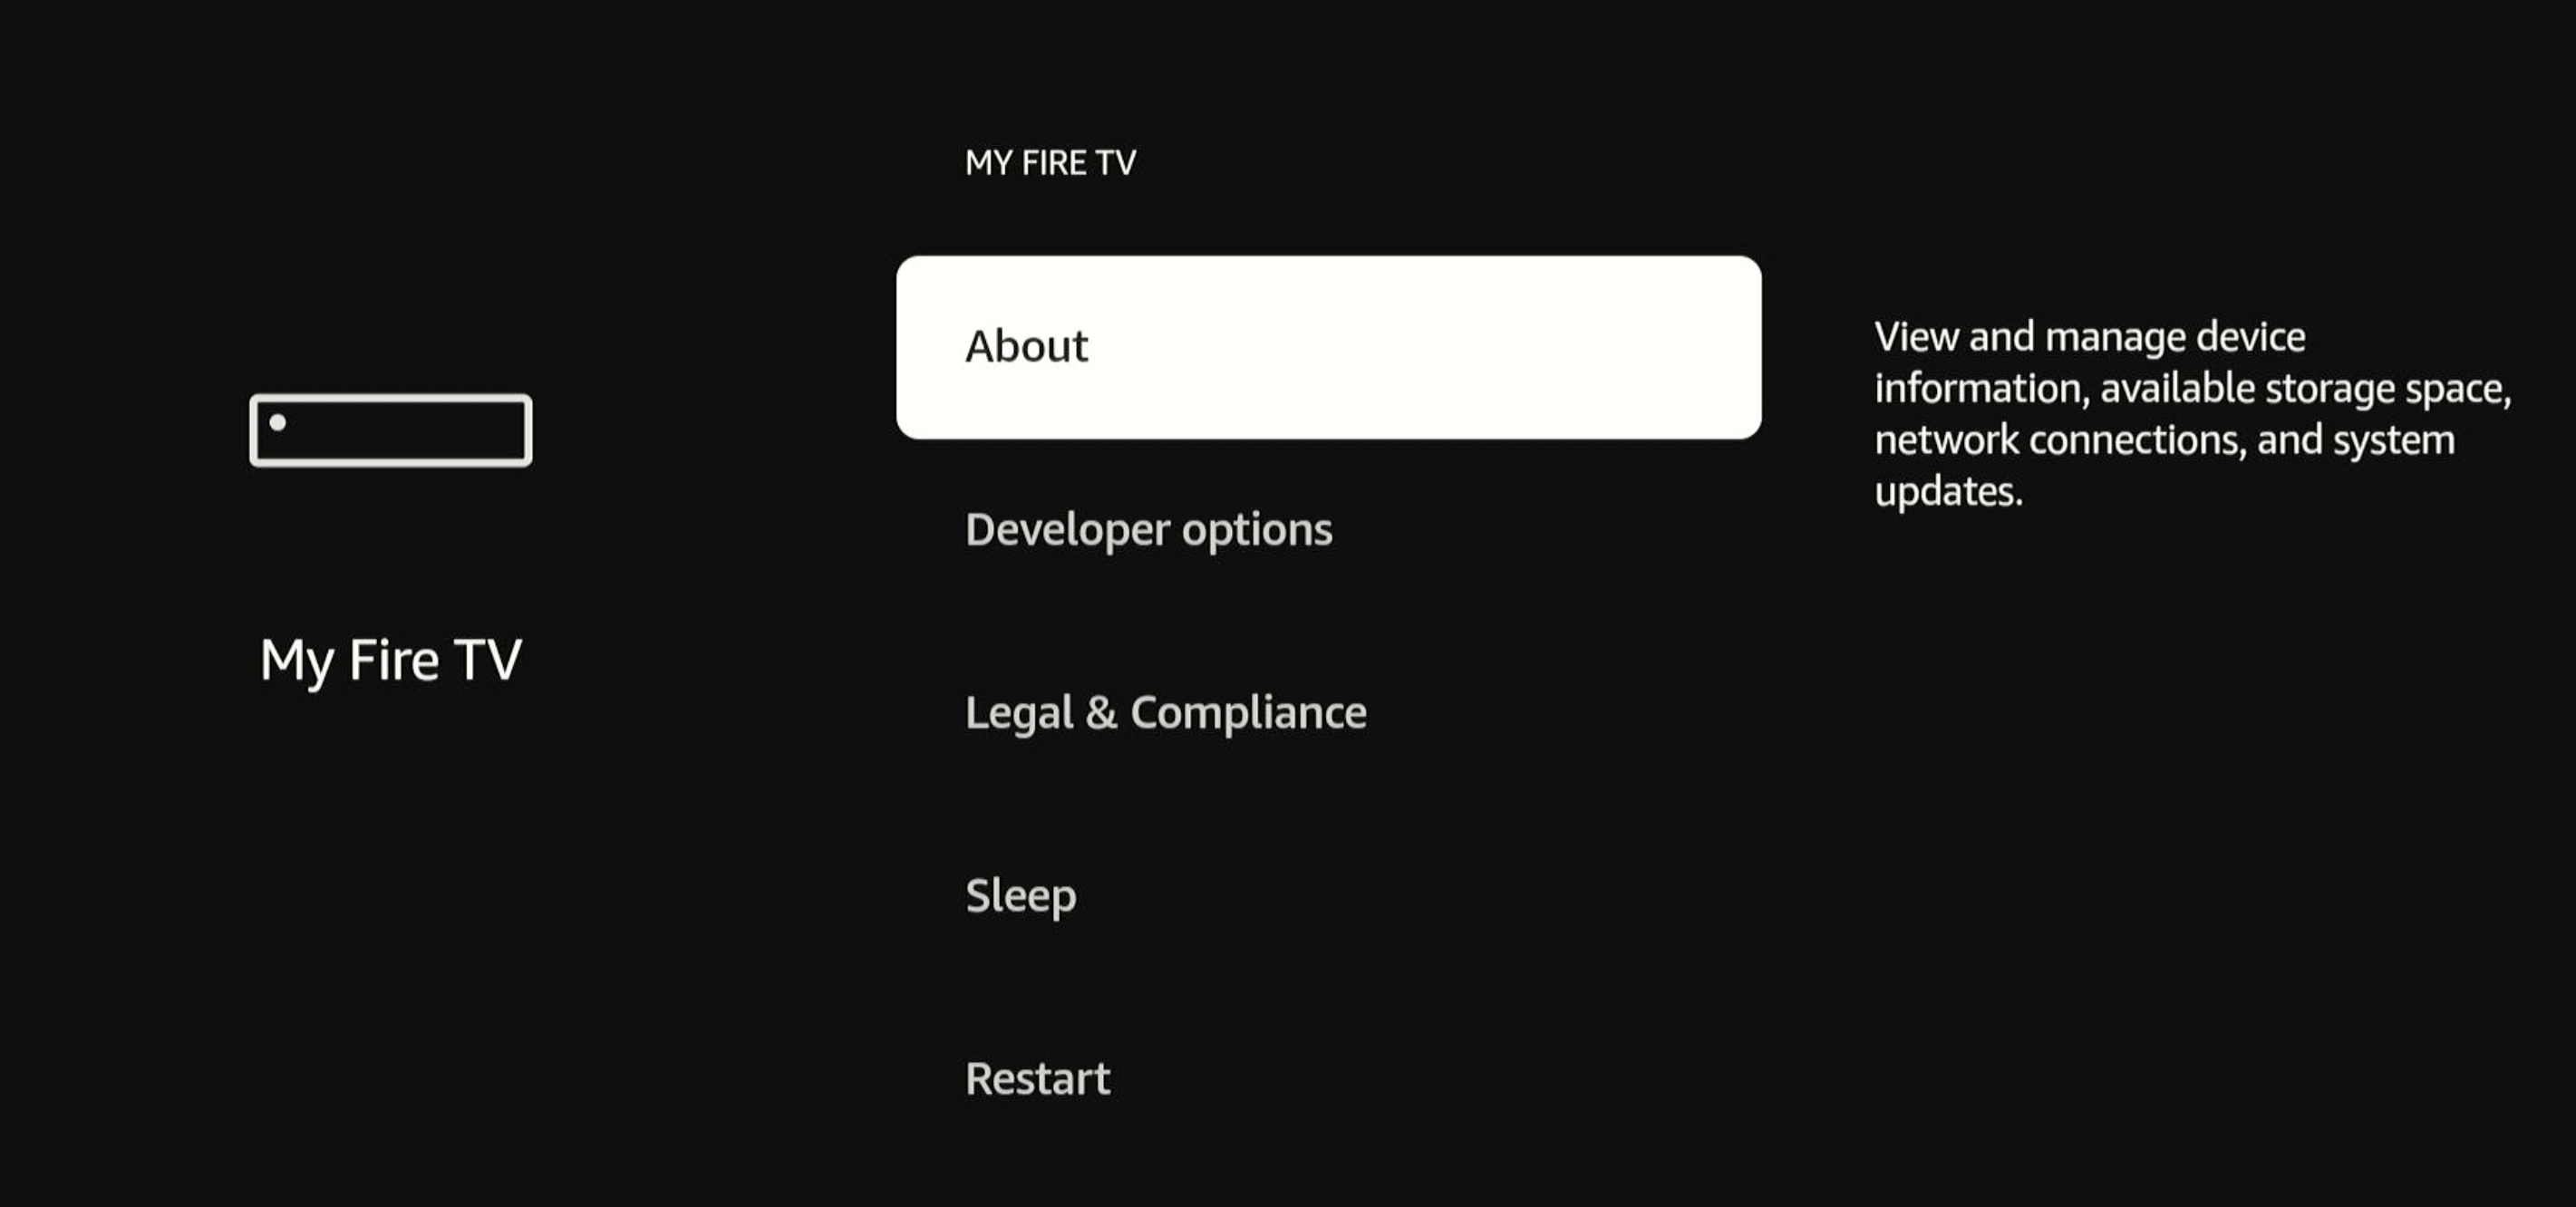
-
Select your device name (for example, Fire TV Stick HD, Fire TV Stick 4K Select, or Fire TV Streaming Media Player).
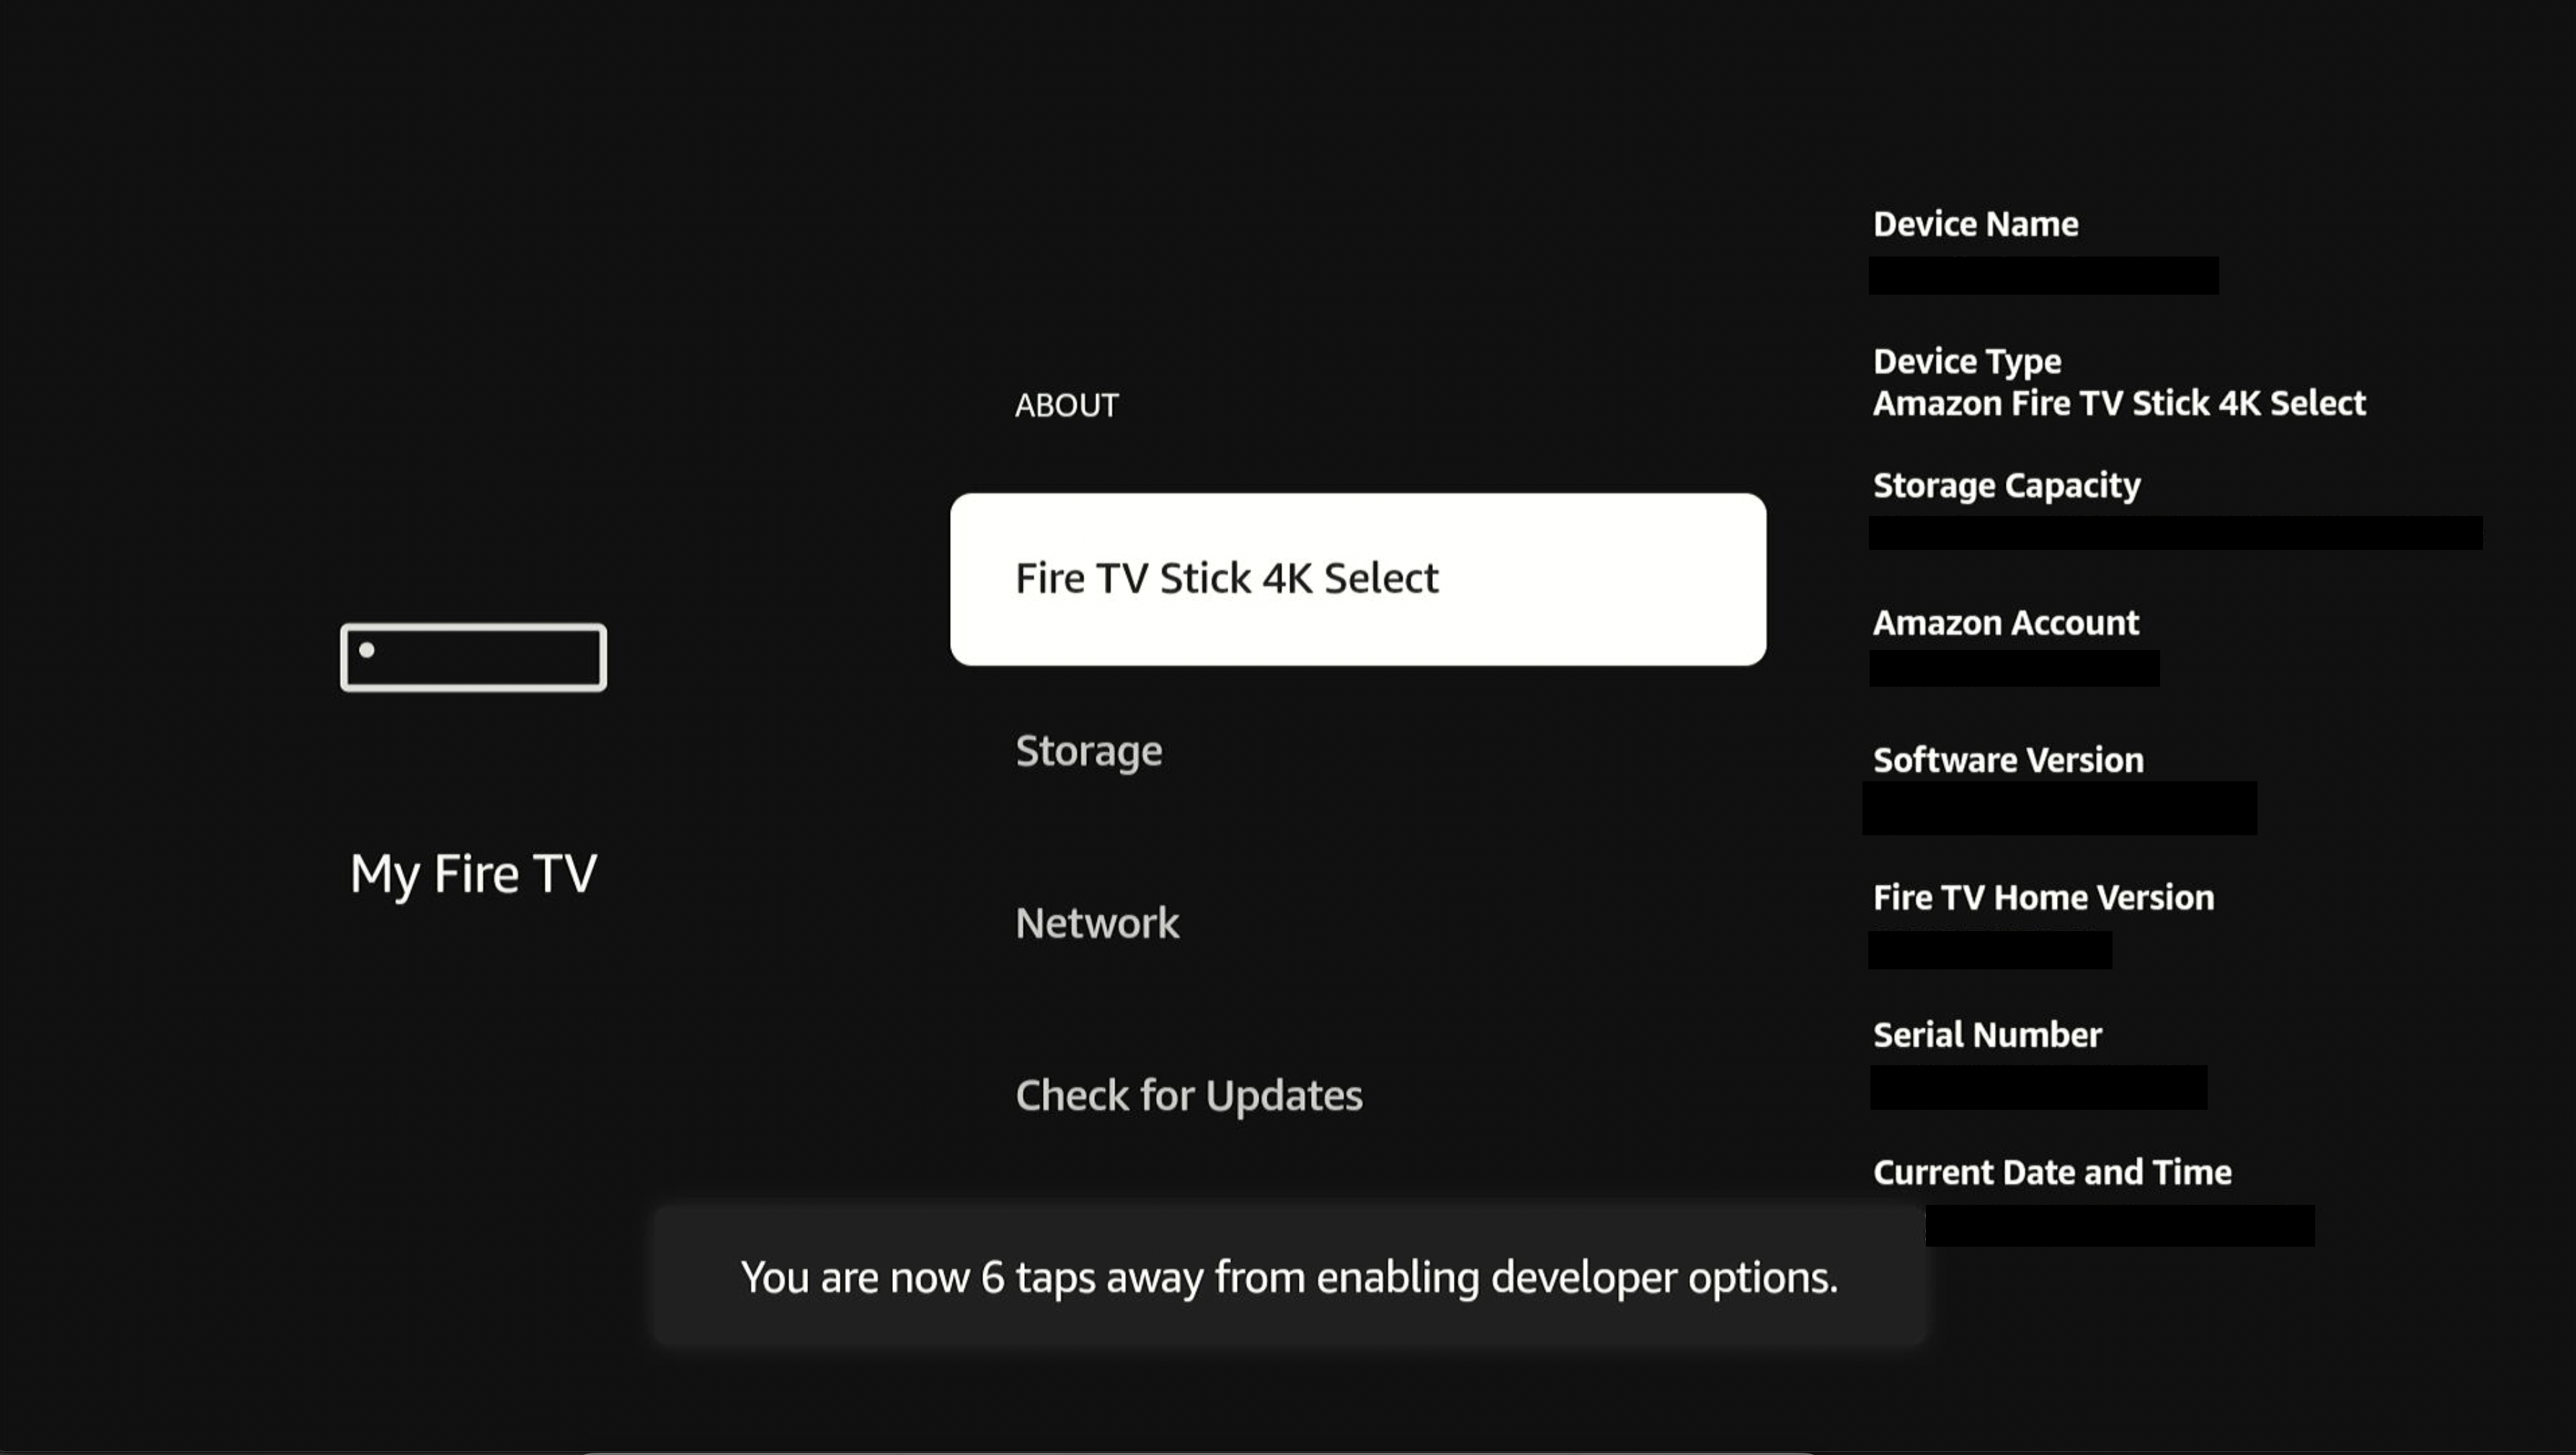
-
Press the center button on the remote control seven times.
A brief "You are now a developer" notification appears on screen after the seventh press.
-
Press the Back button to return to My Fire TV.
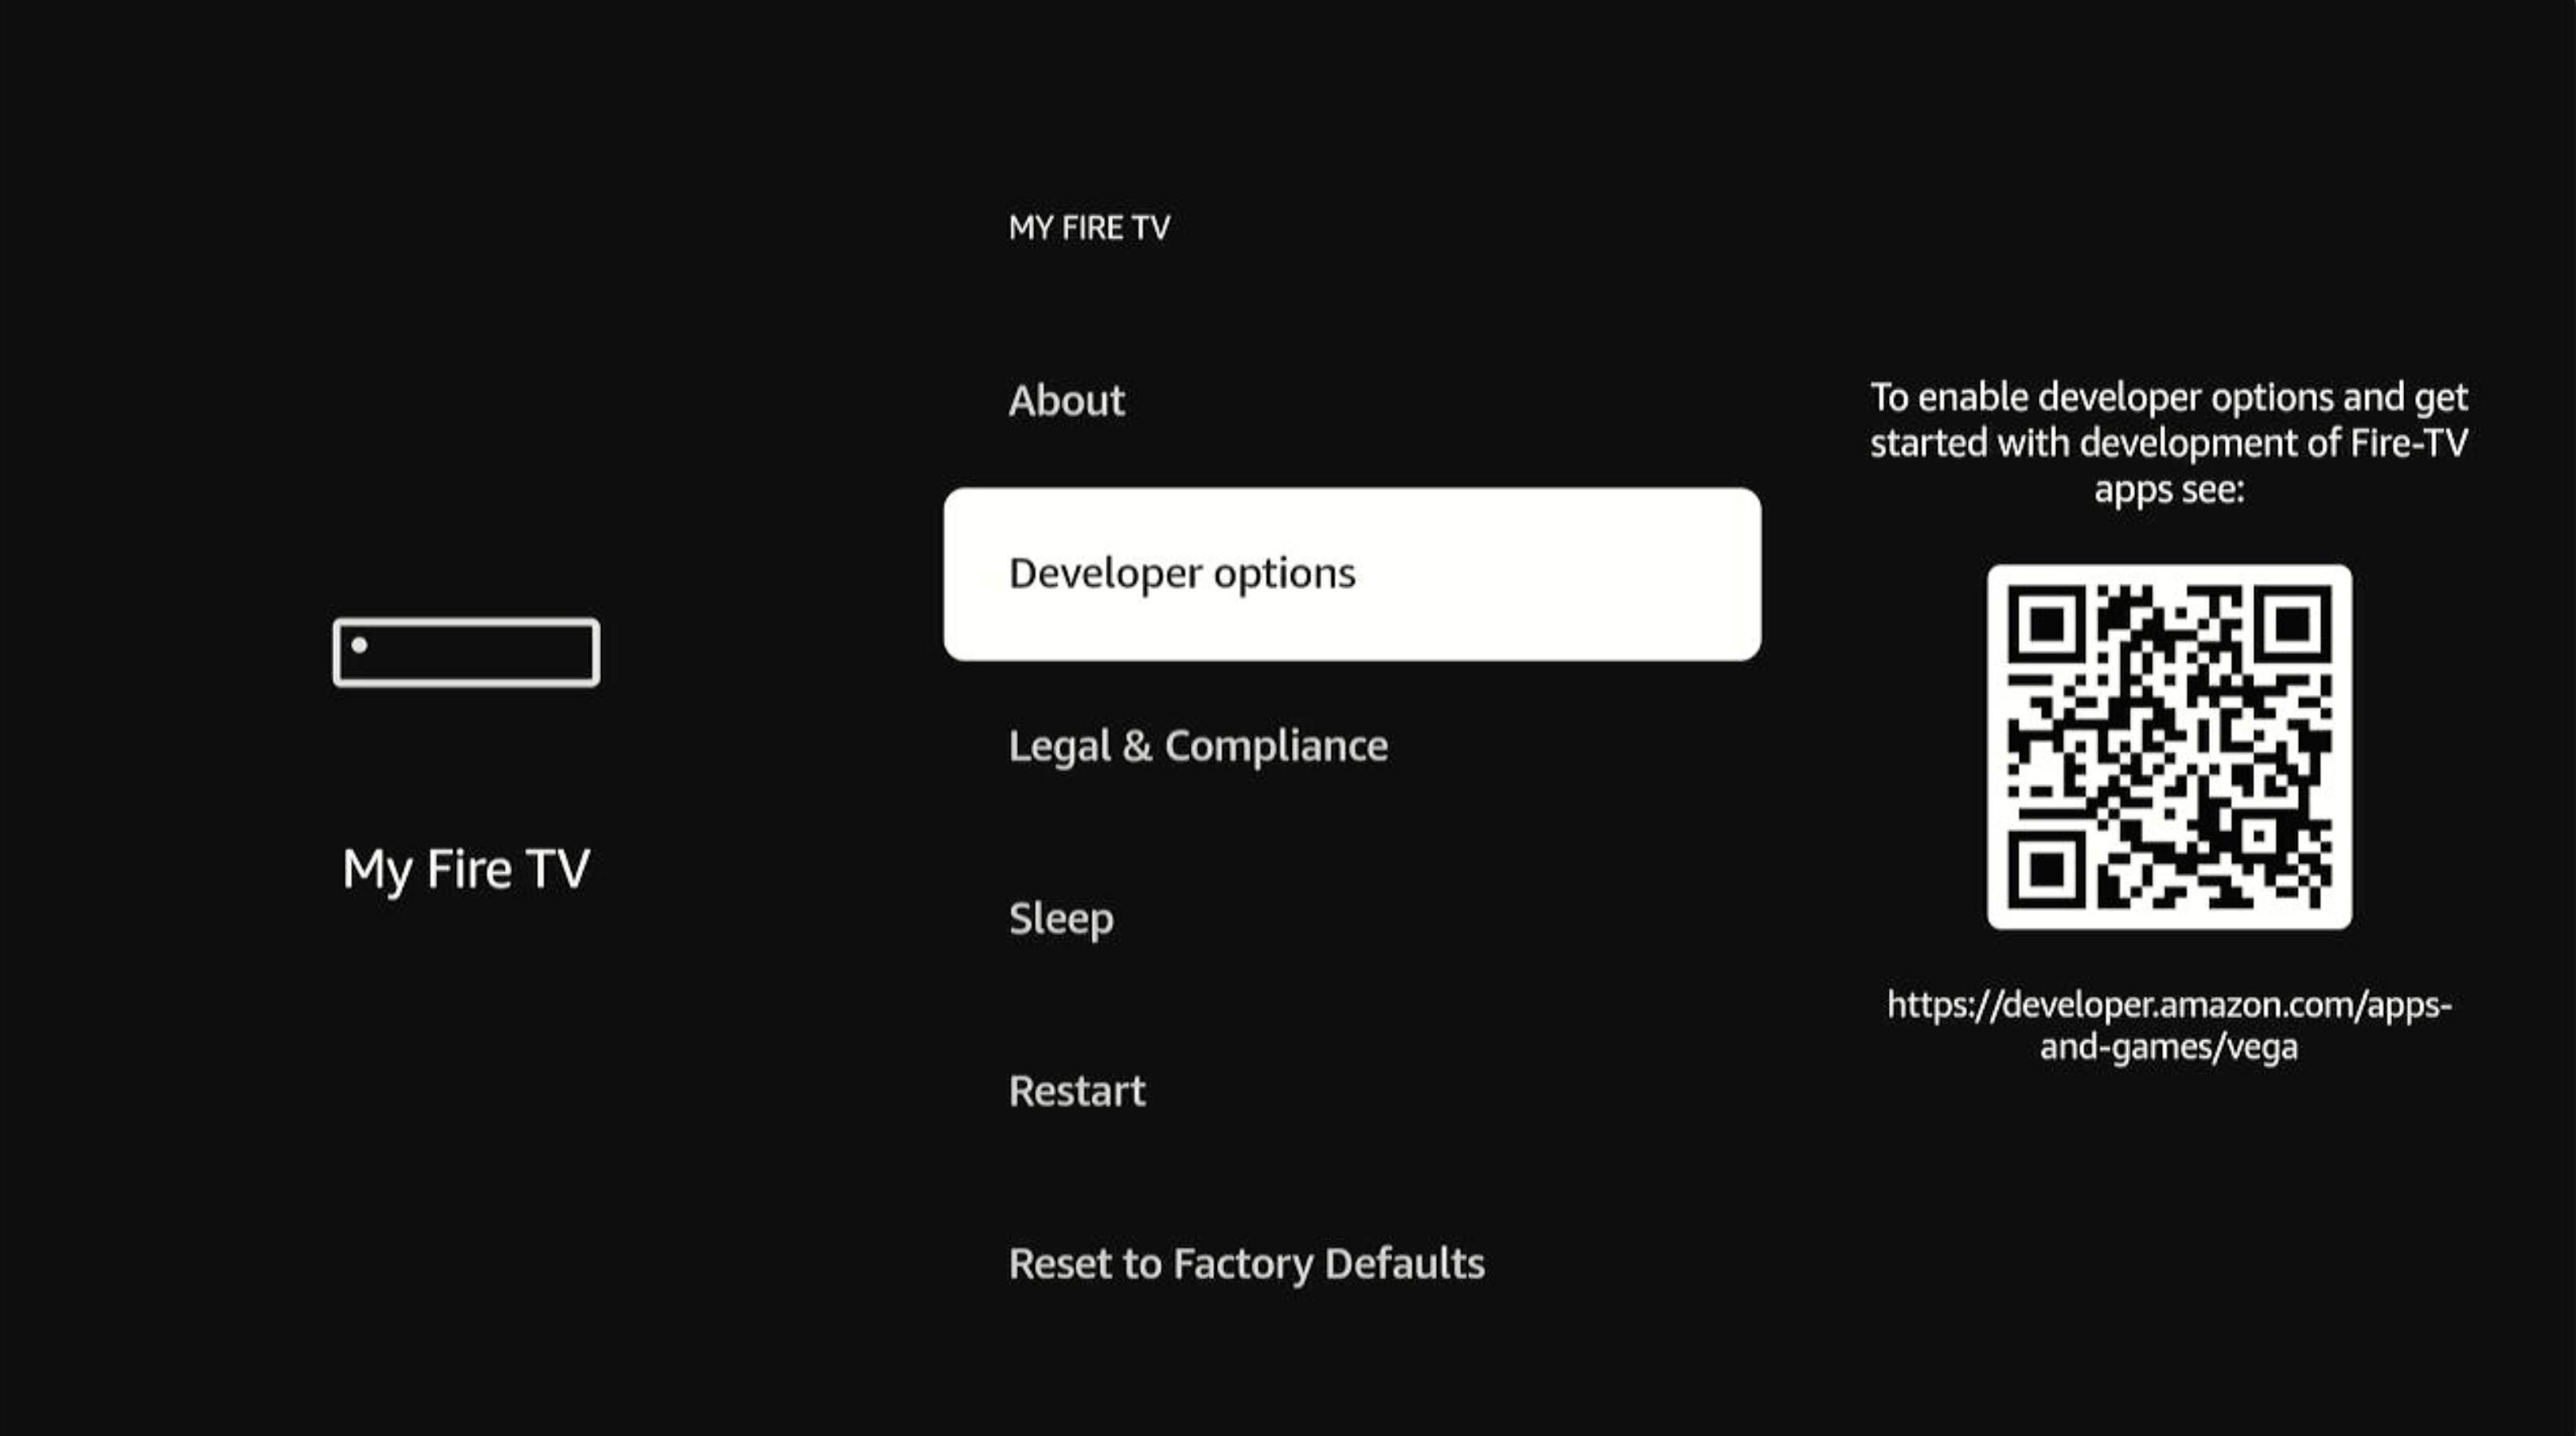
Developer options appears in the list.
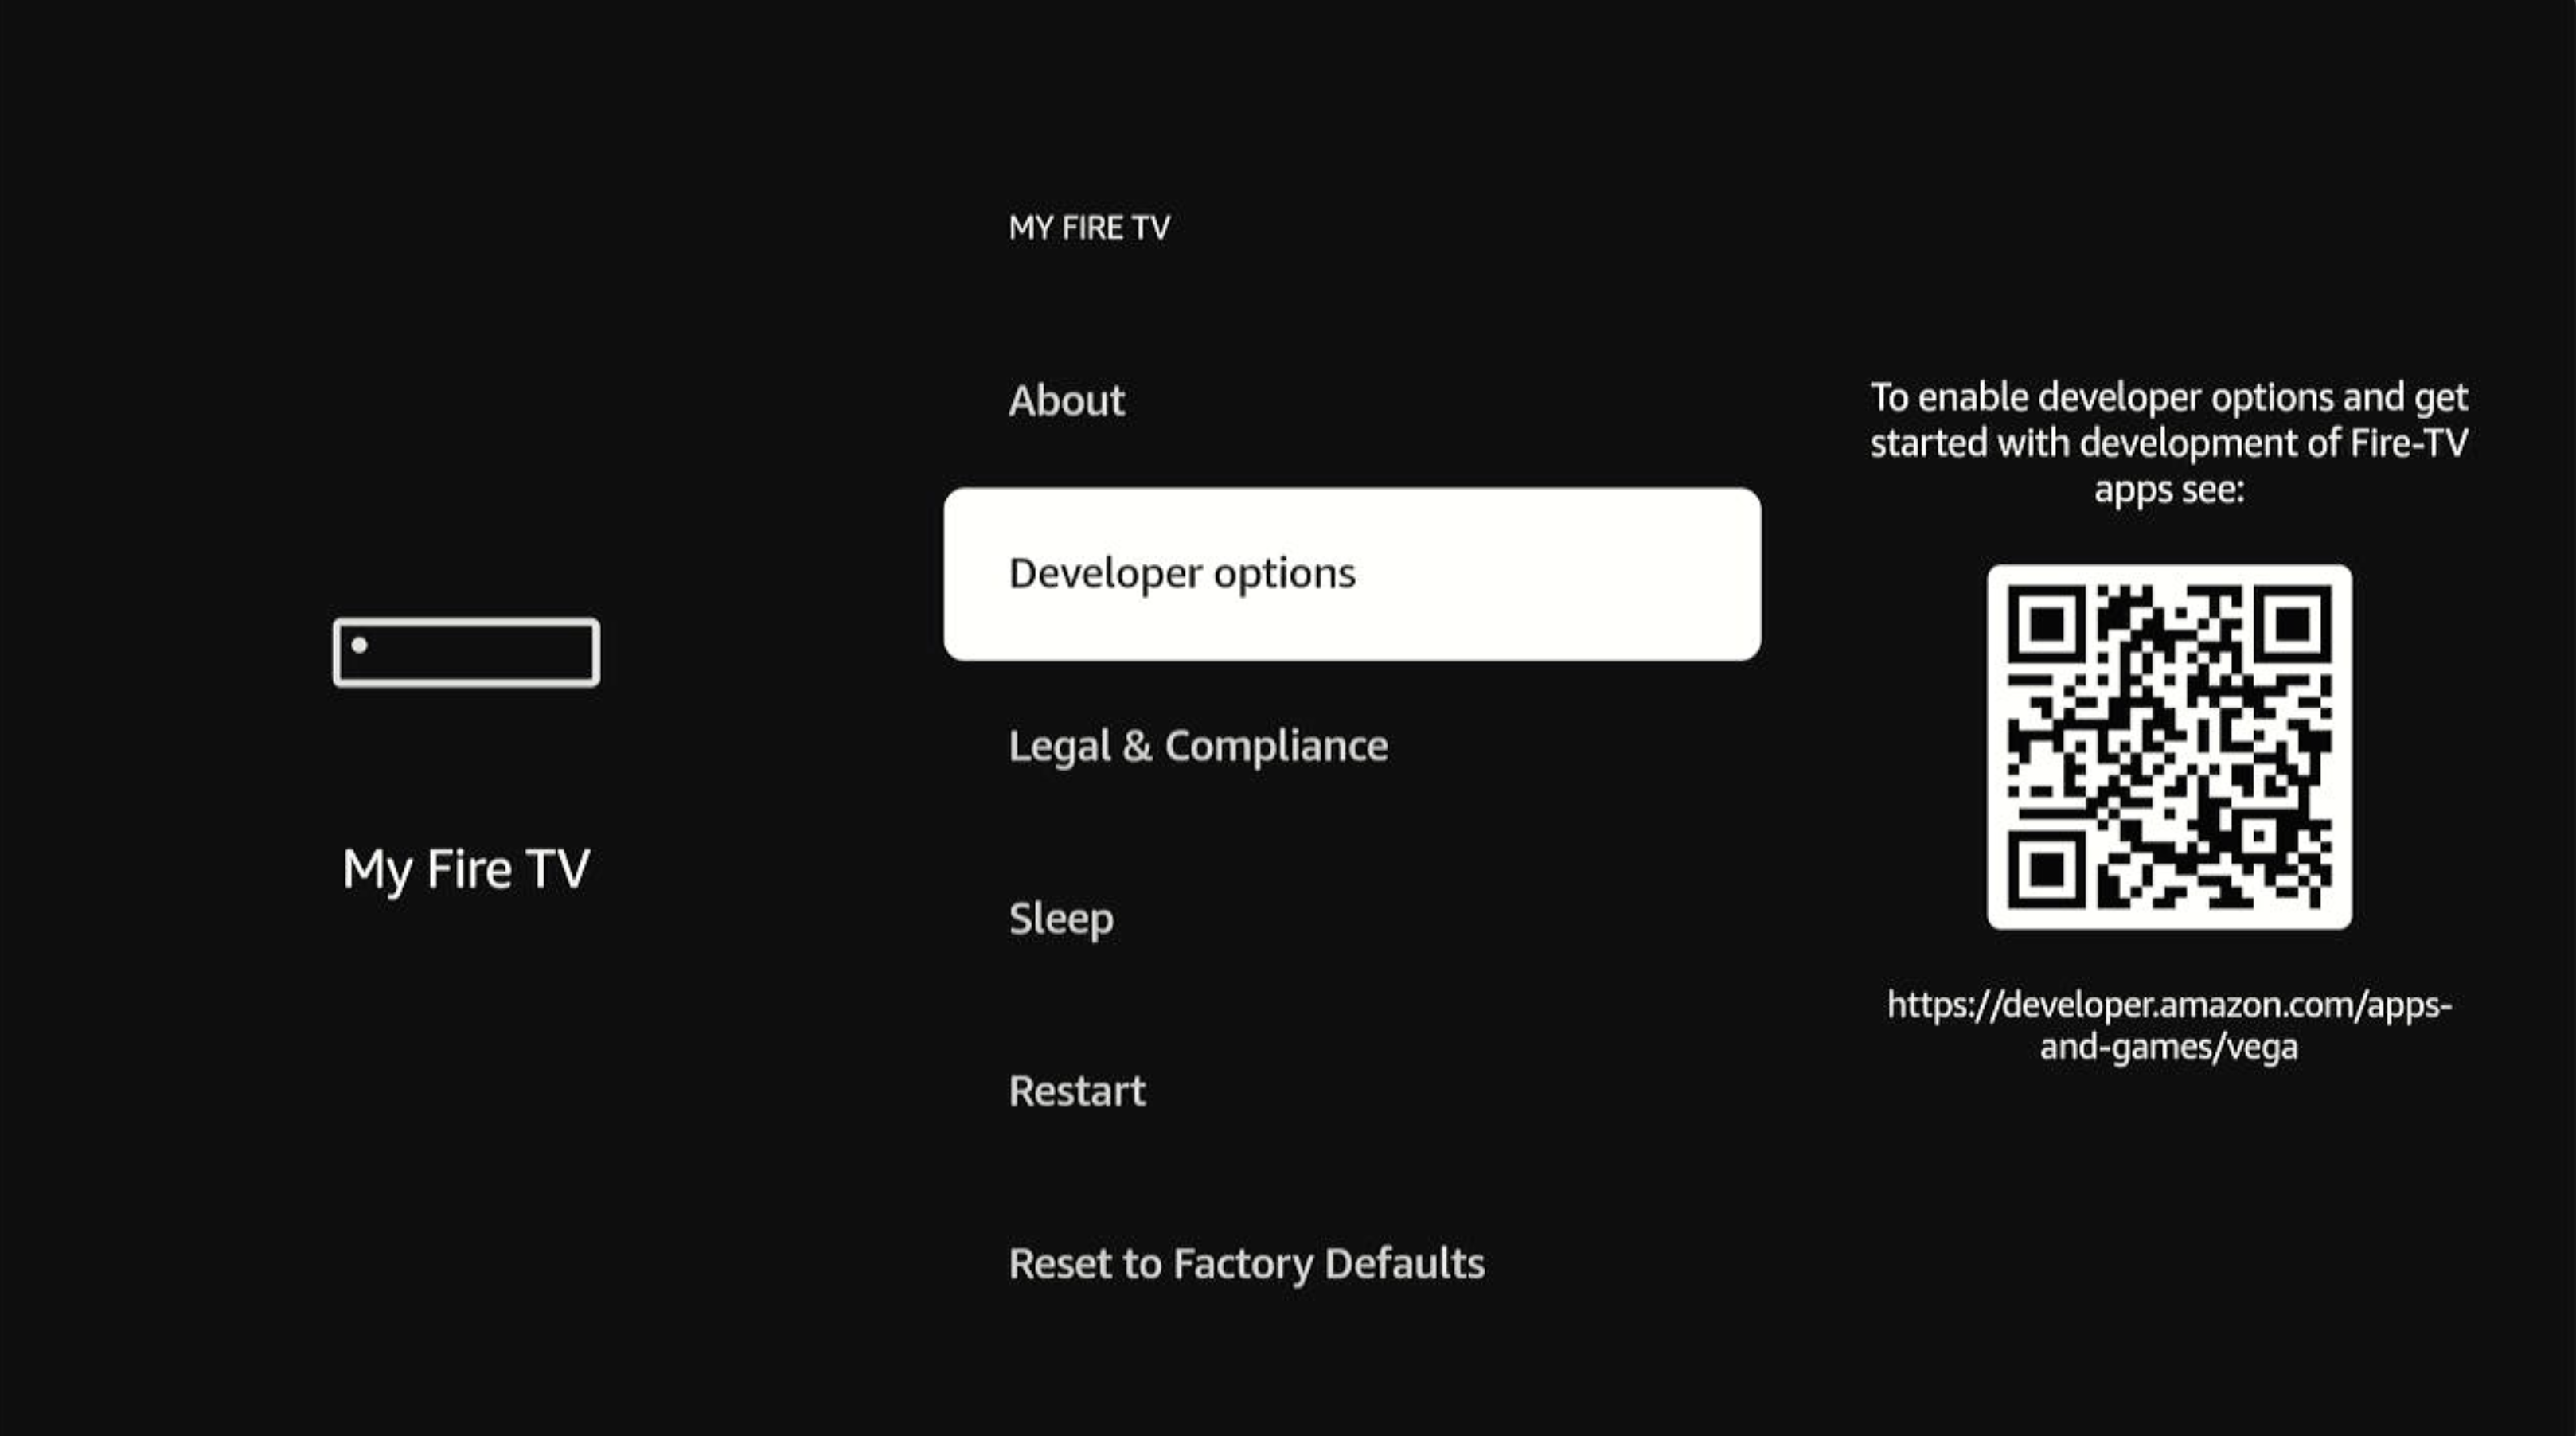
-
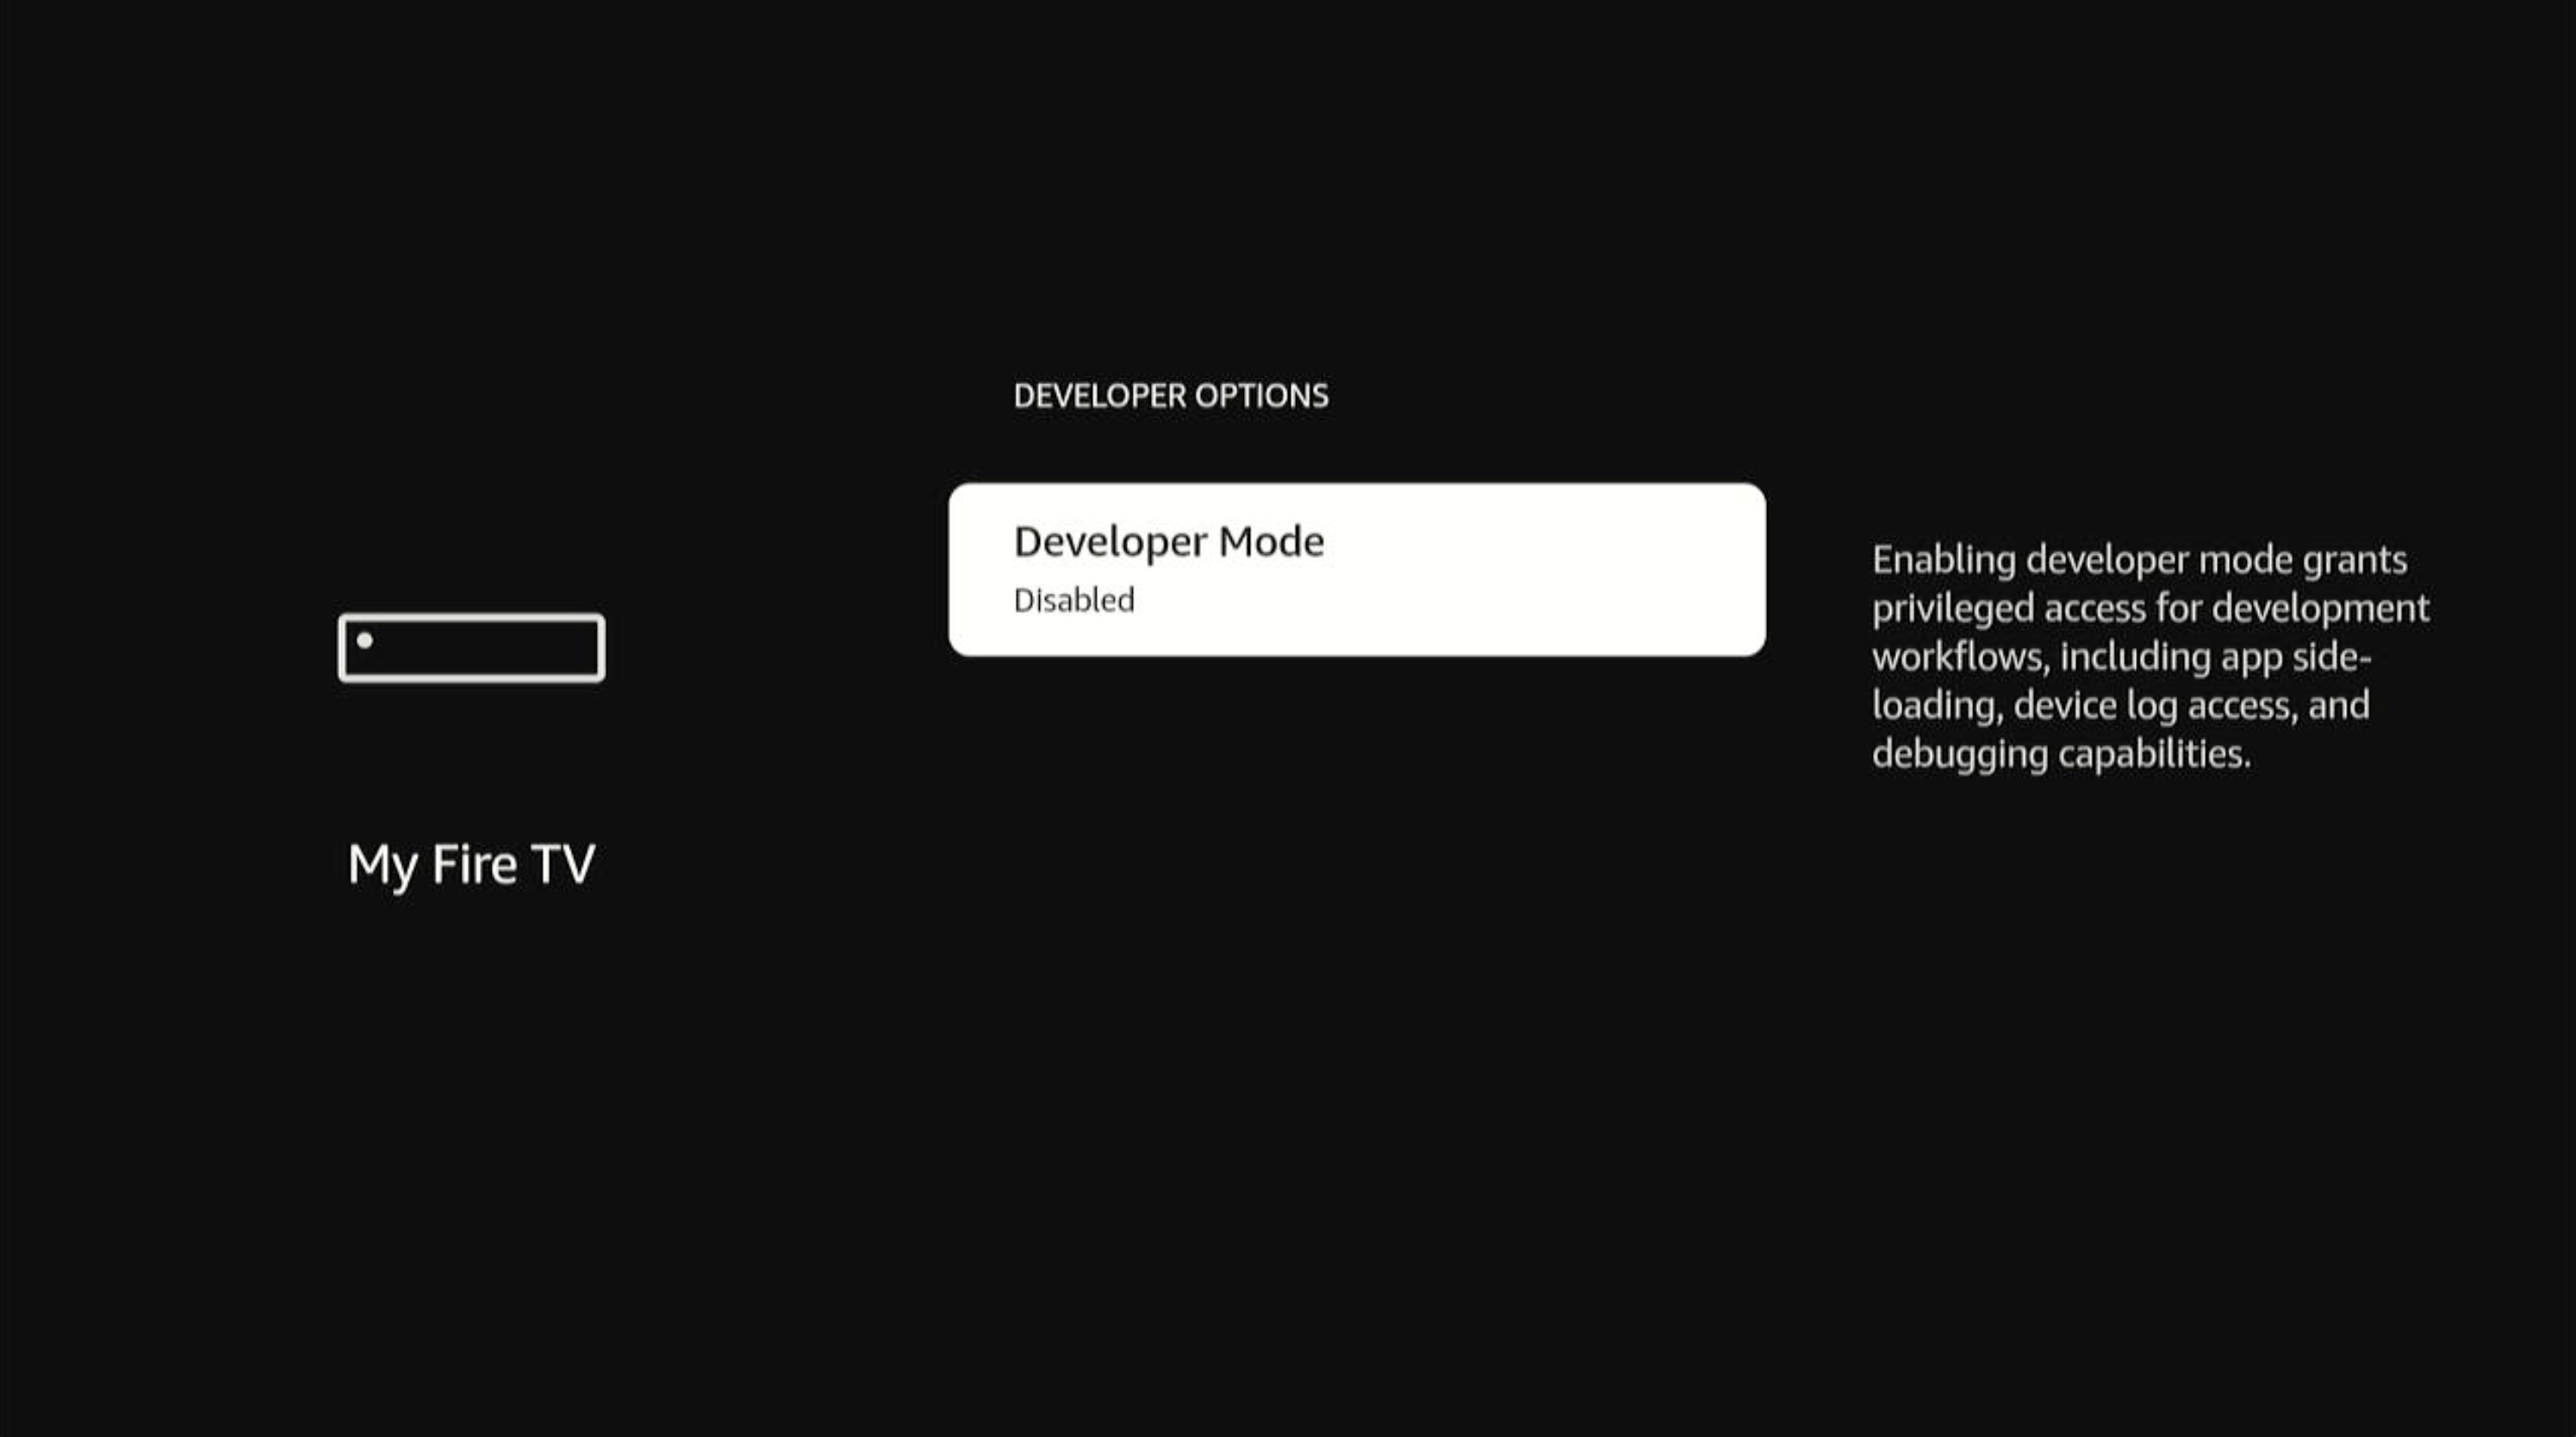
Select Developer options.
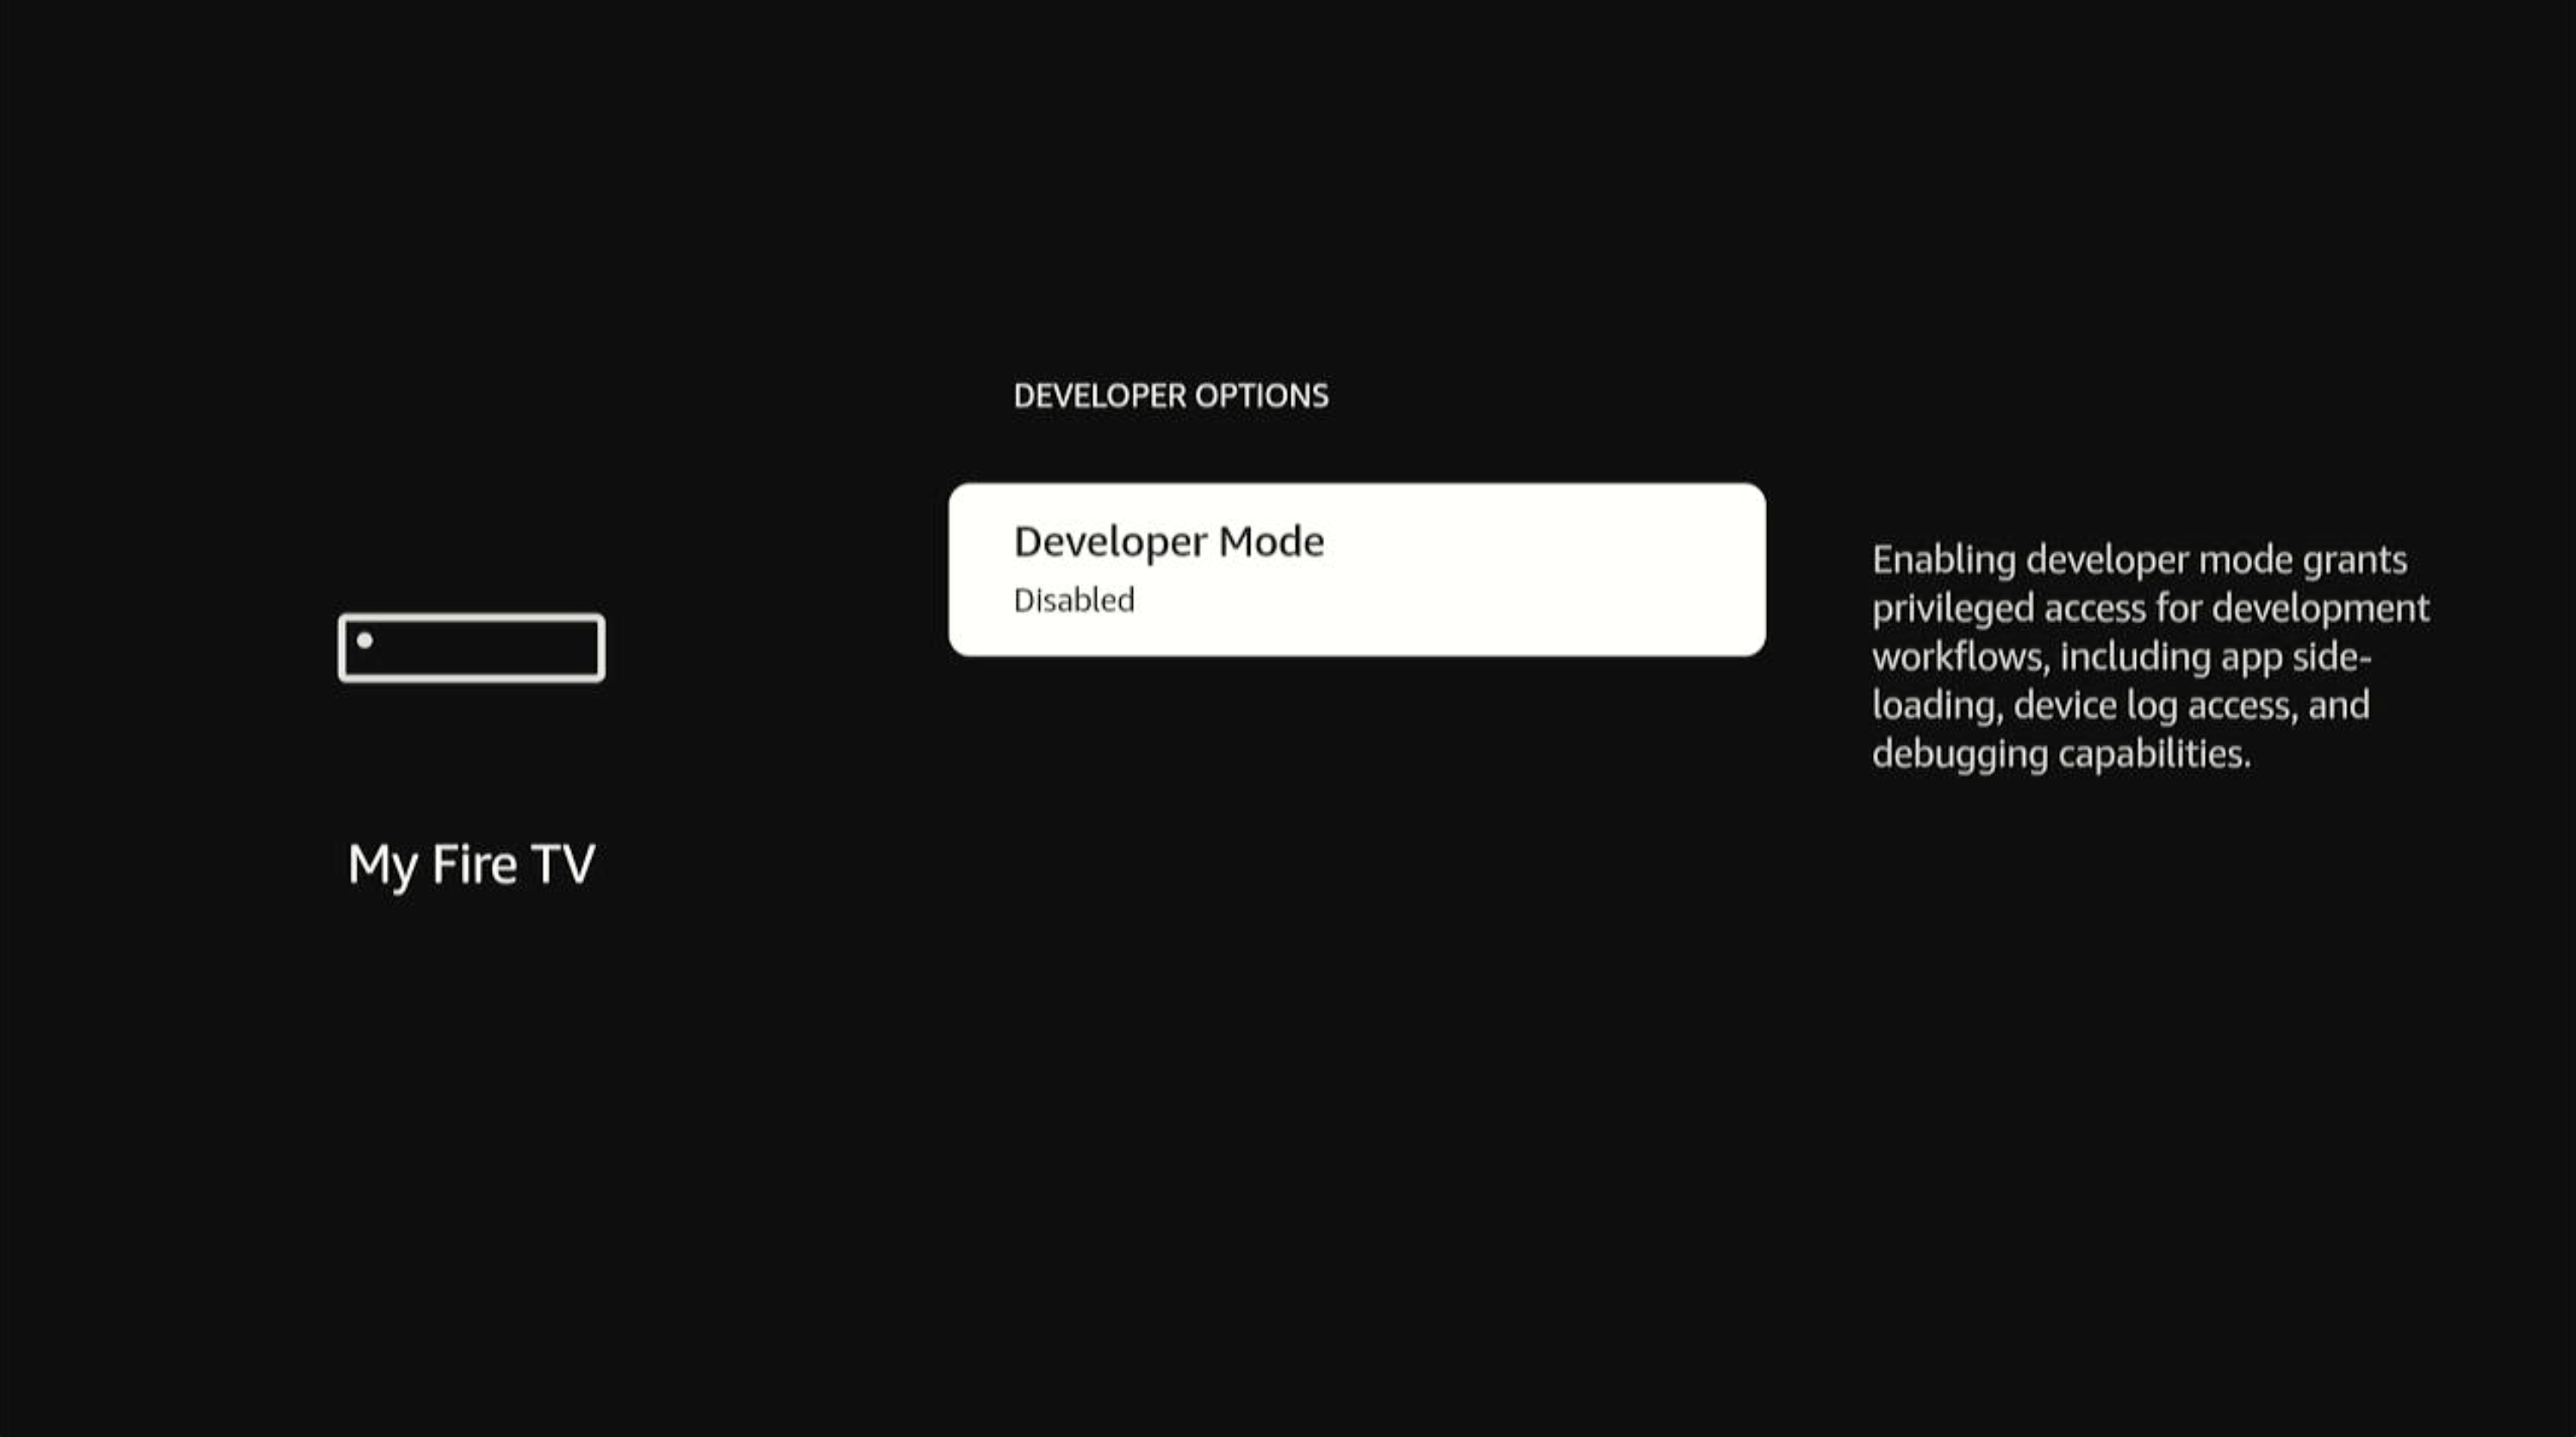
Developer Mode (disabled by default) appears in the menu list.
-
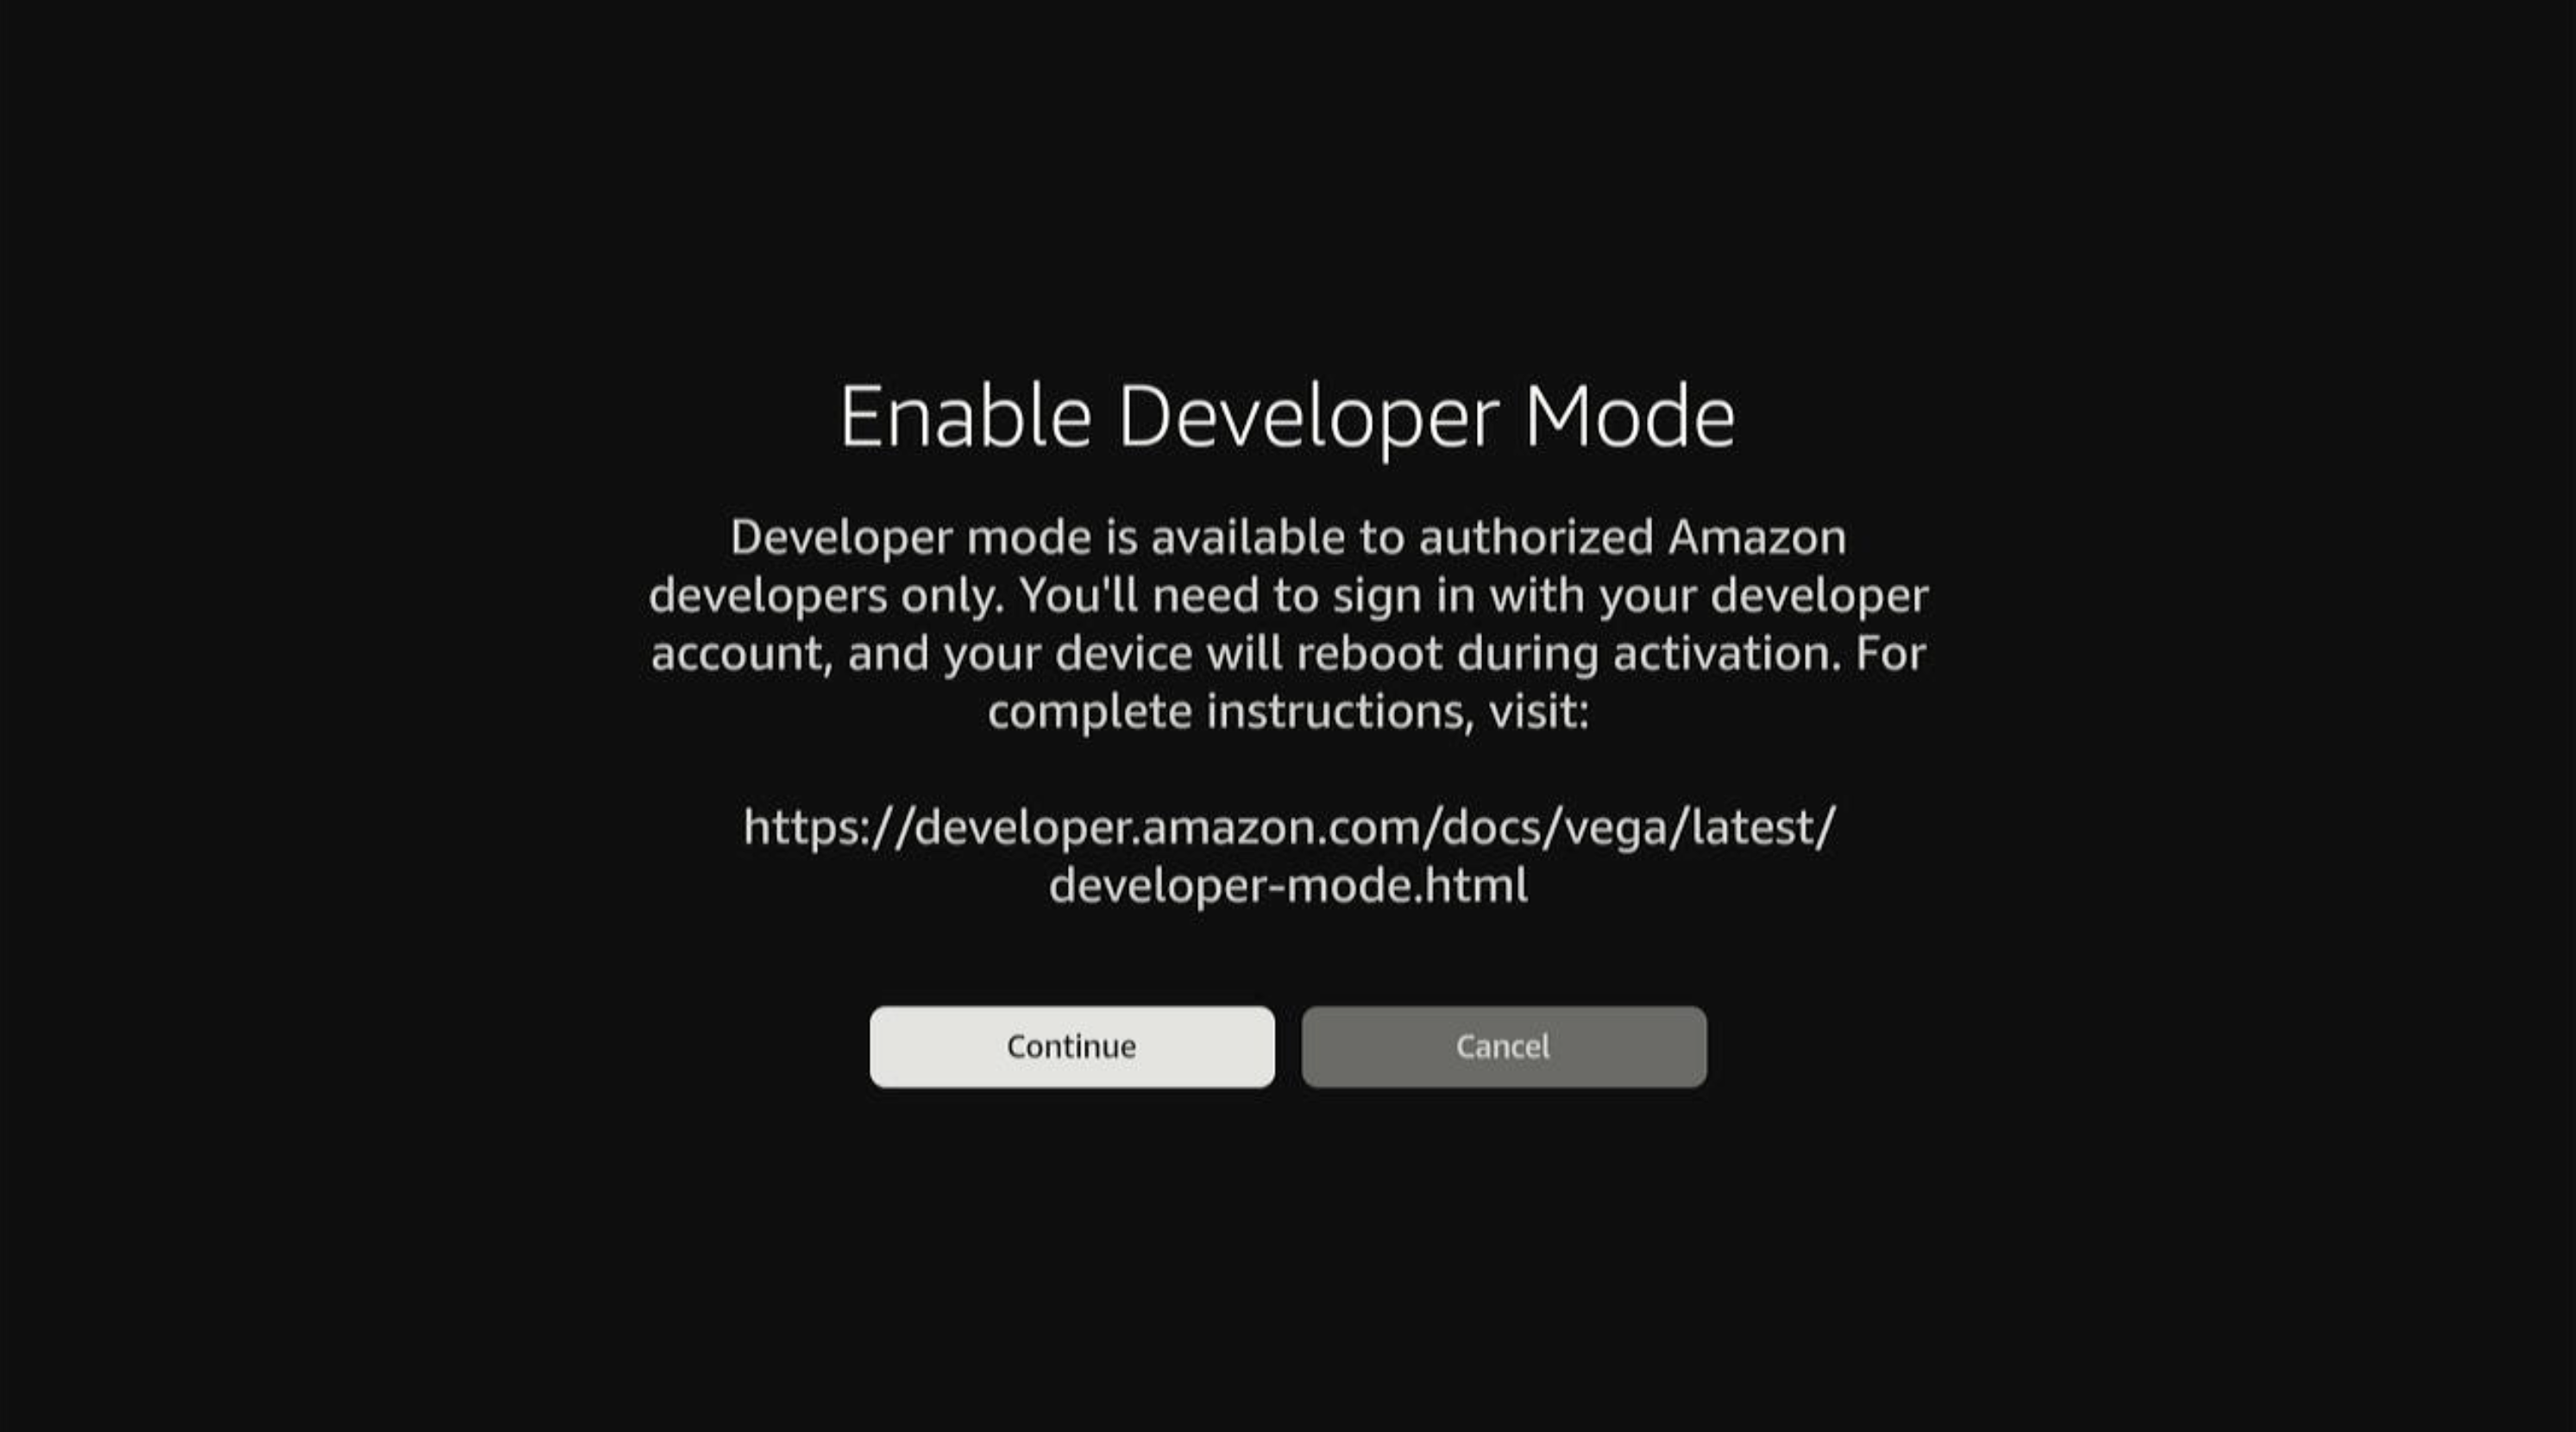
Select Developer Mode to proceed.
-
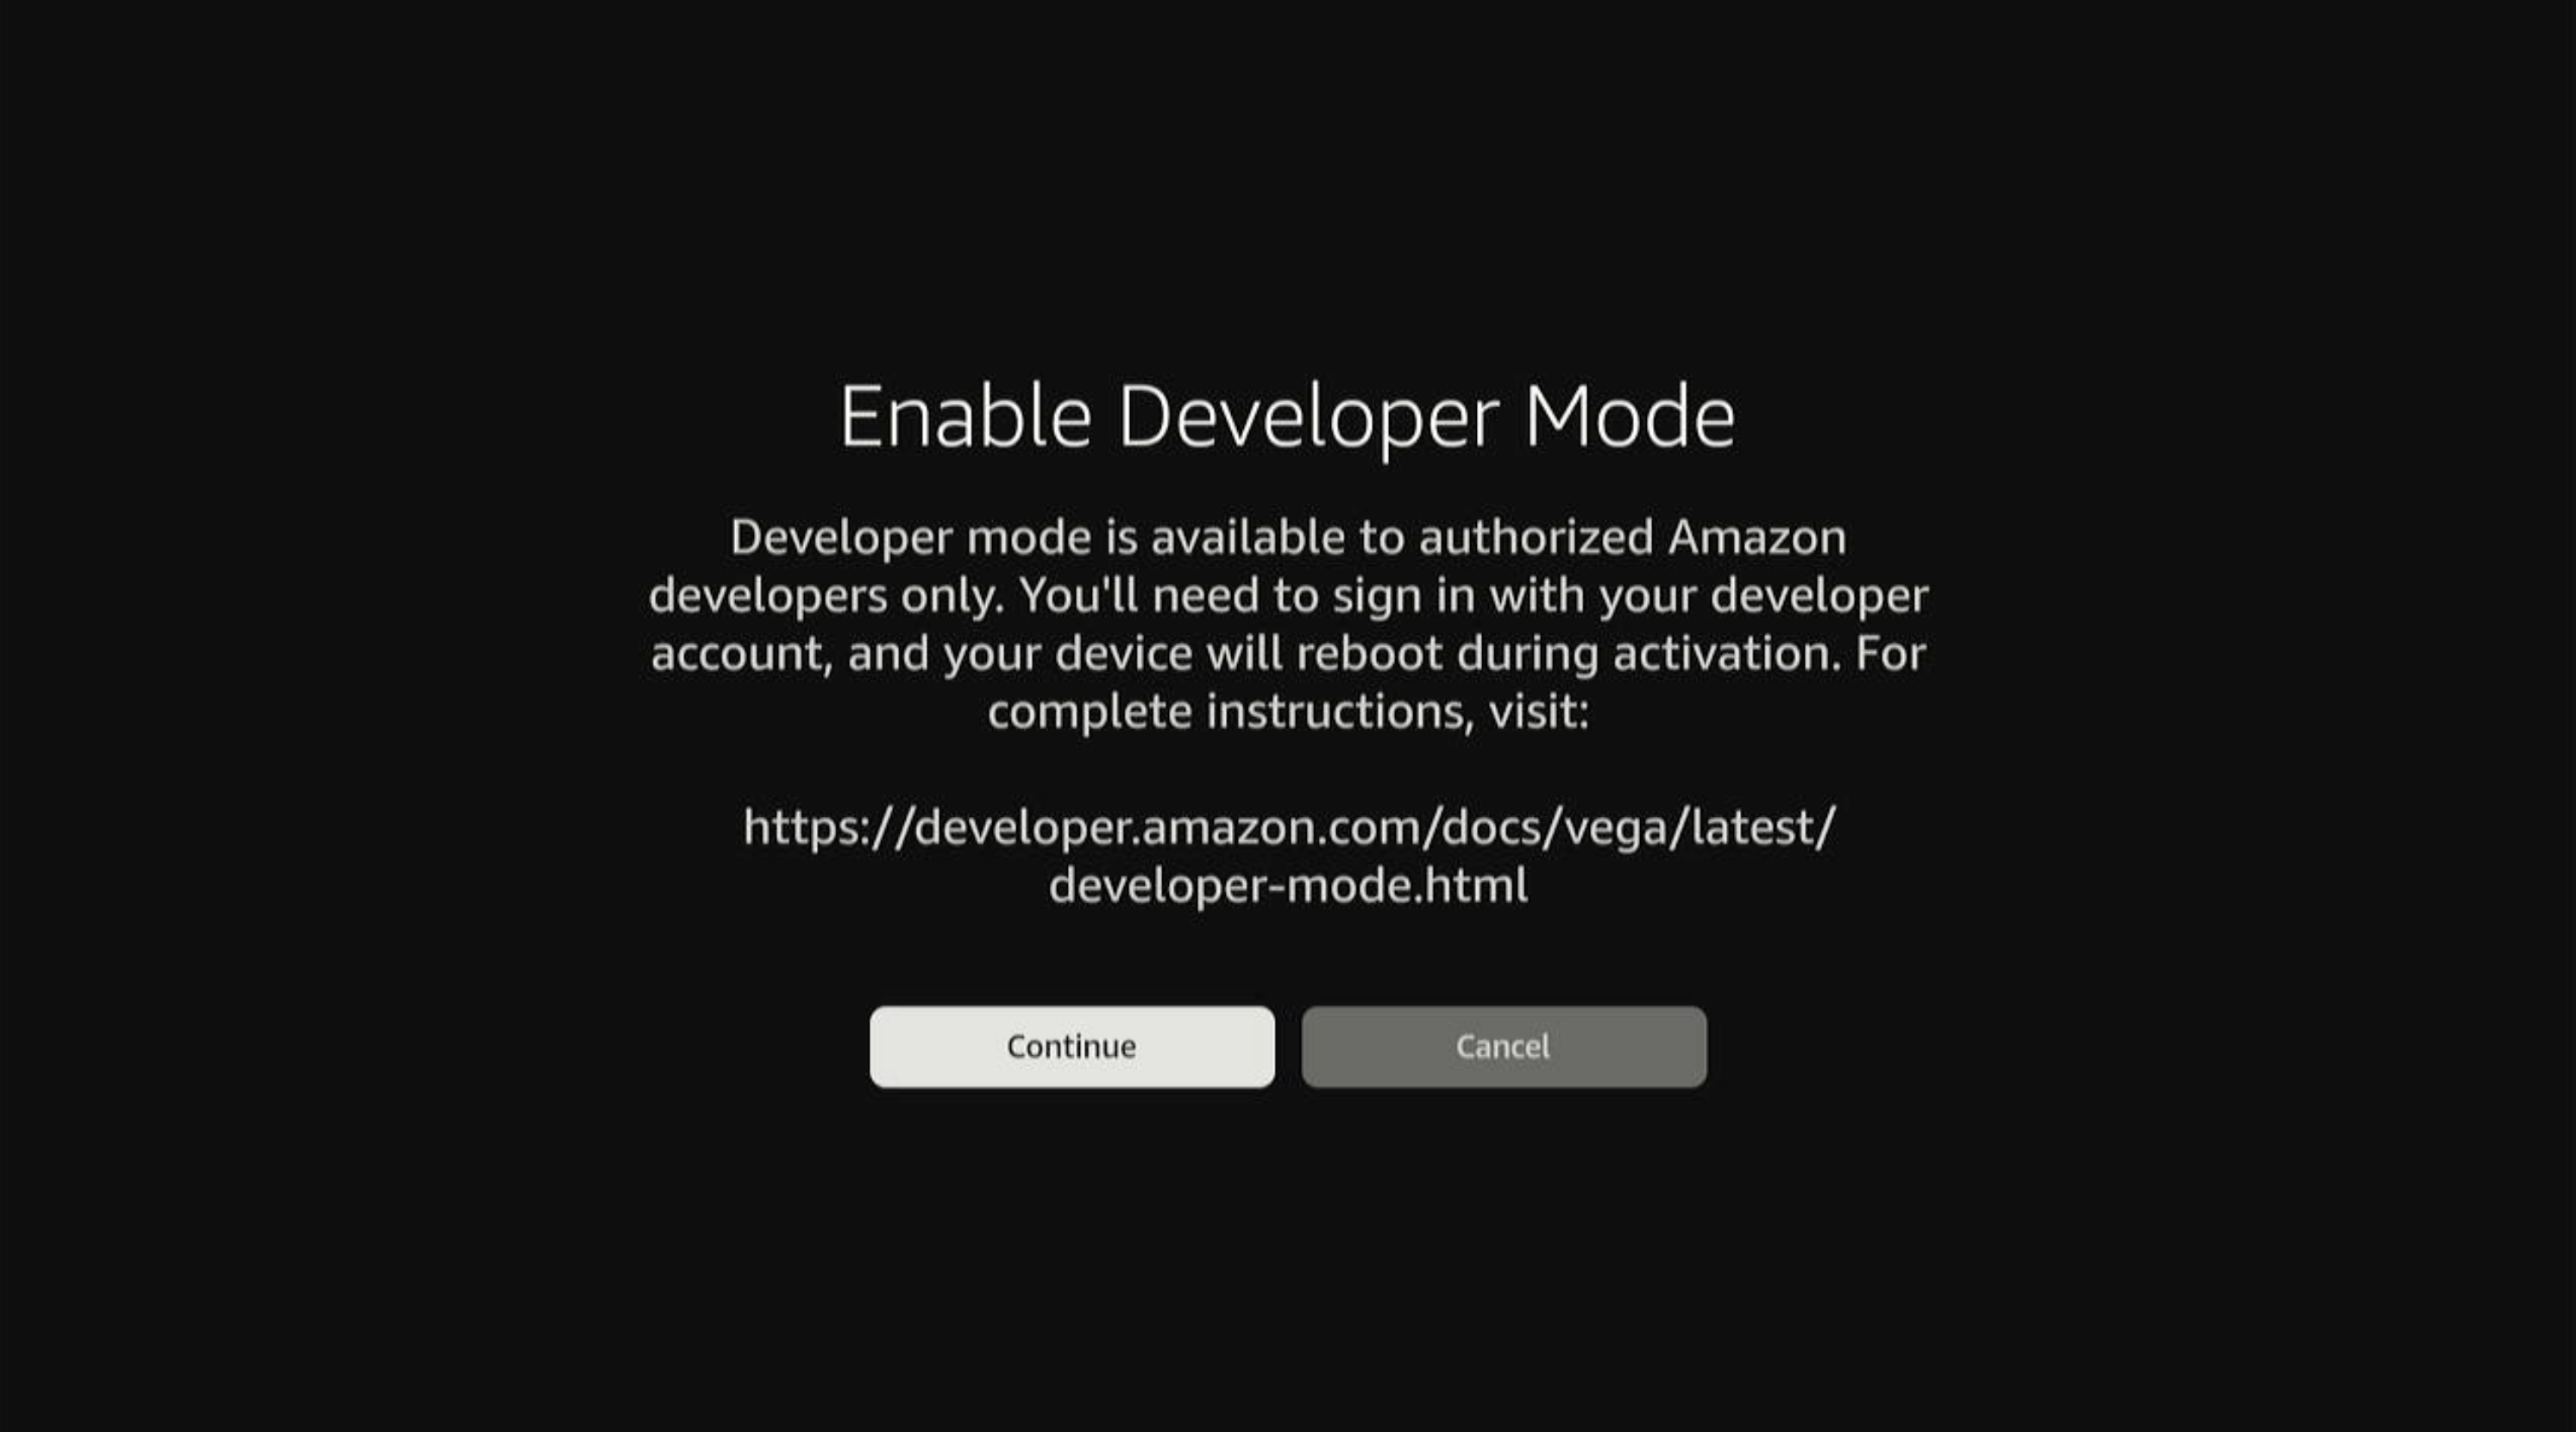
Select Continue to proceed (or Cancel to abort).
If you select Cancel, the dialog closes and you return to the Developer Options screen without changes.
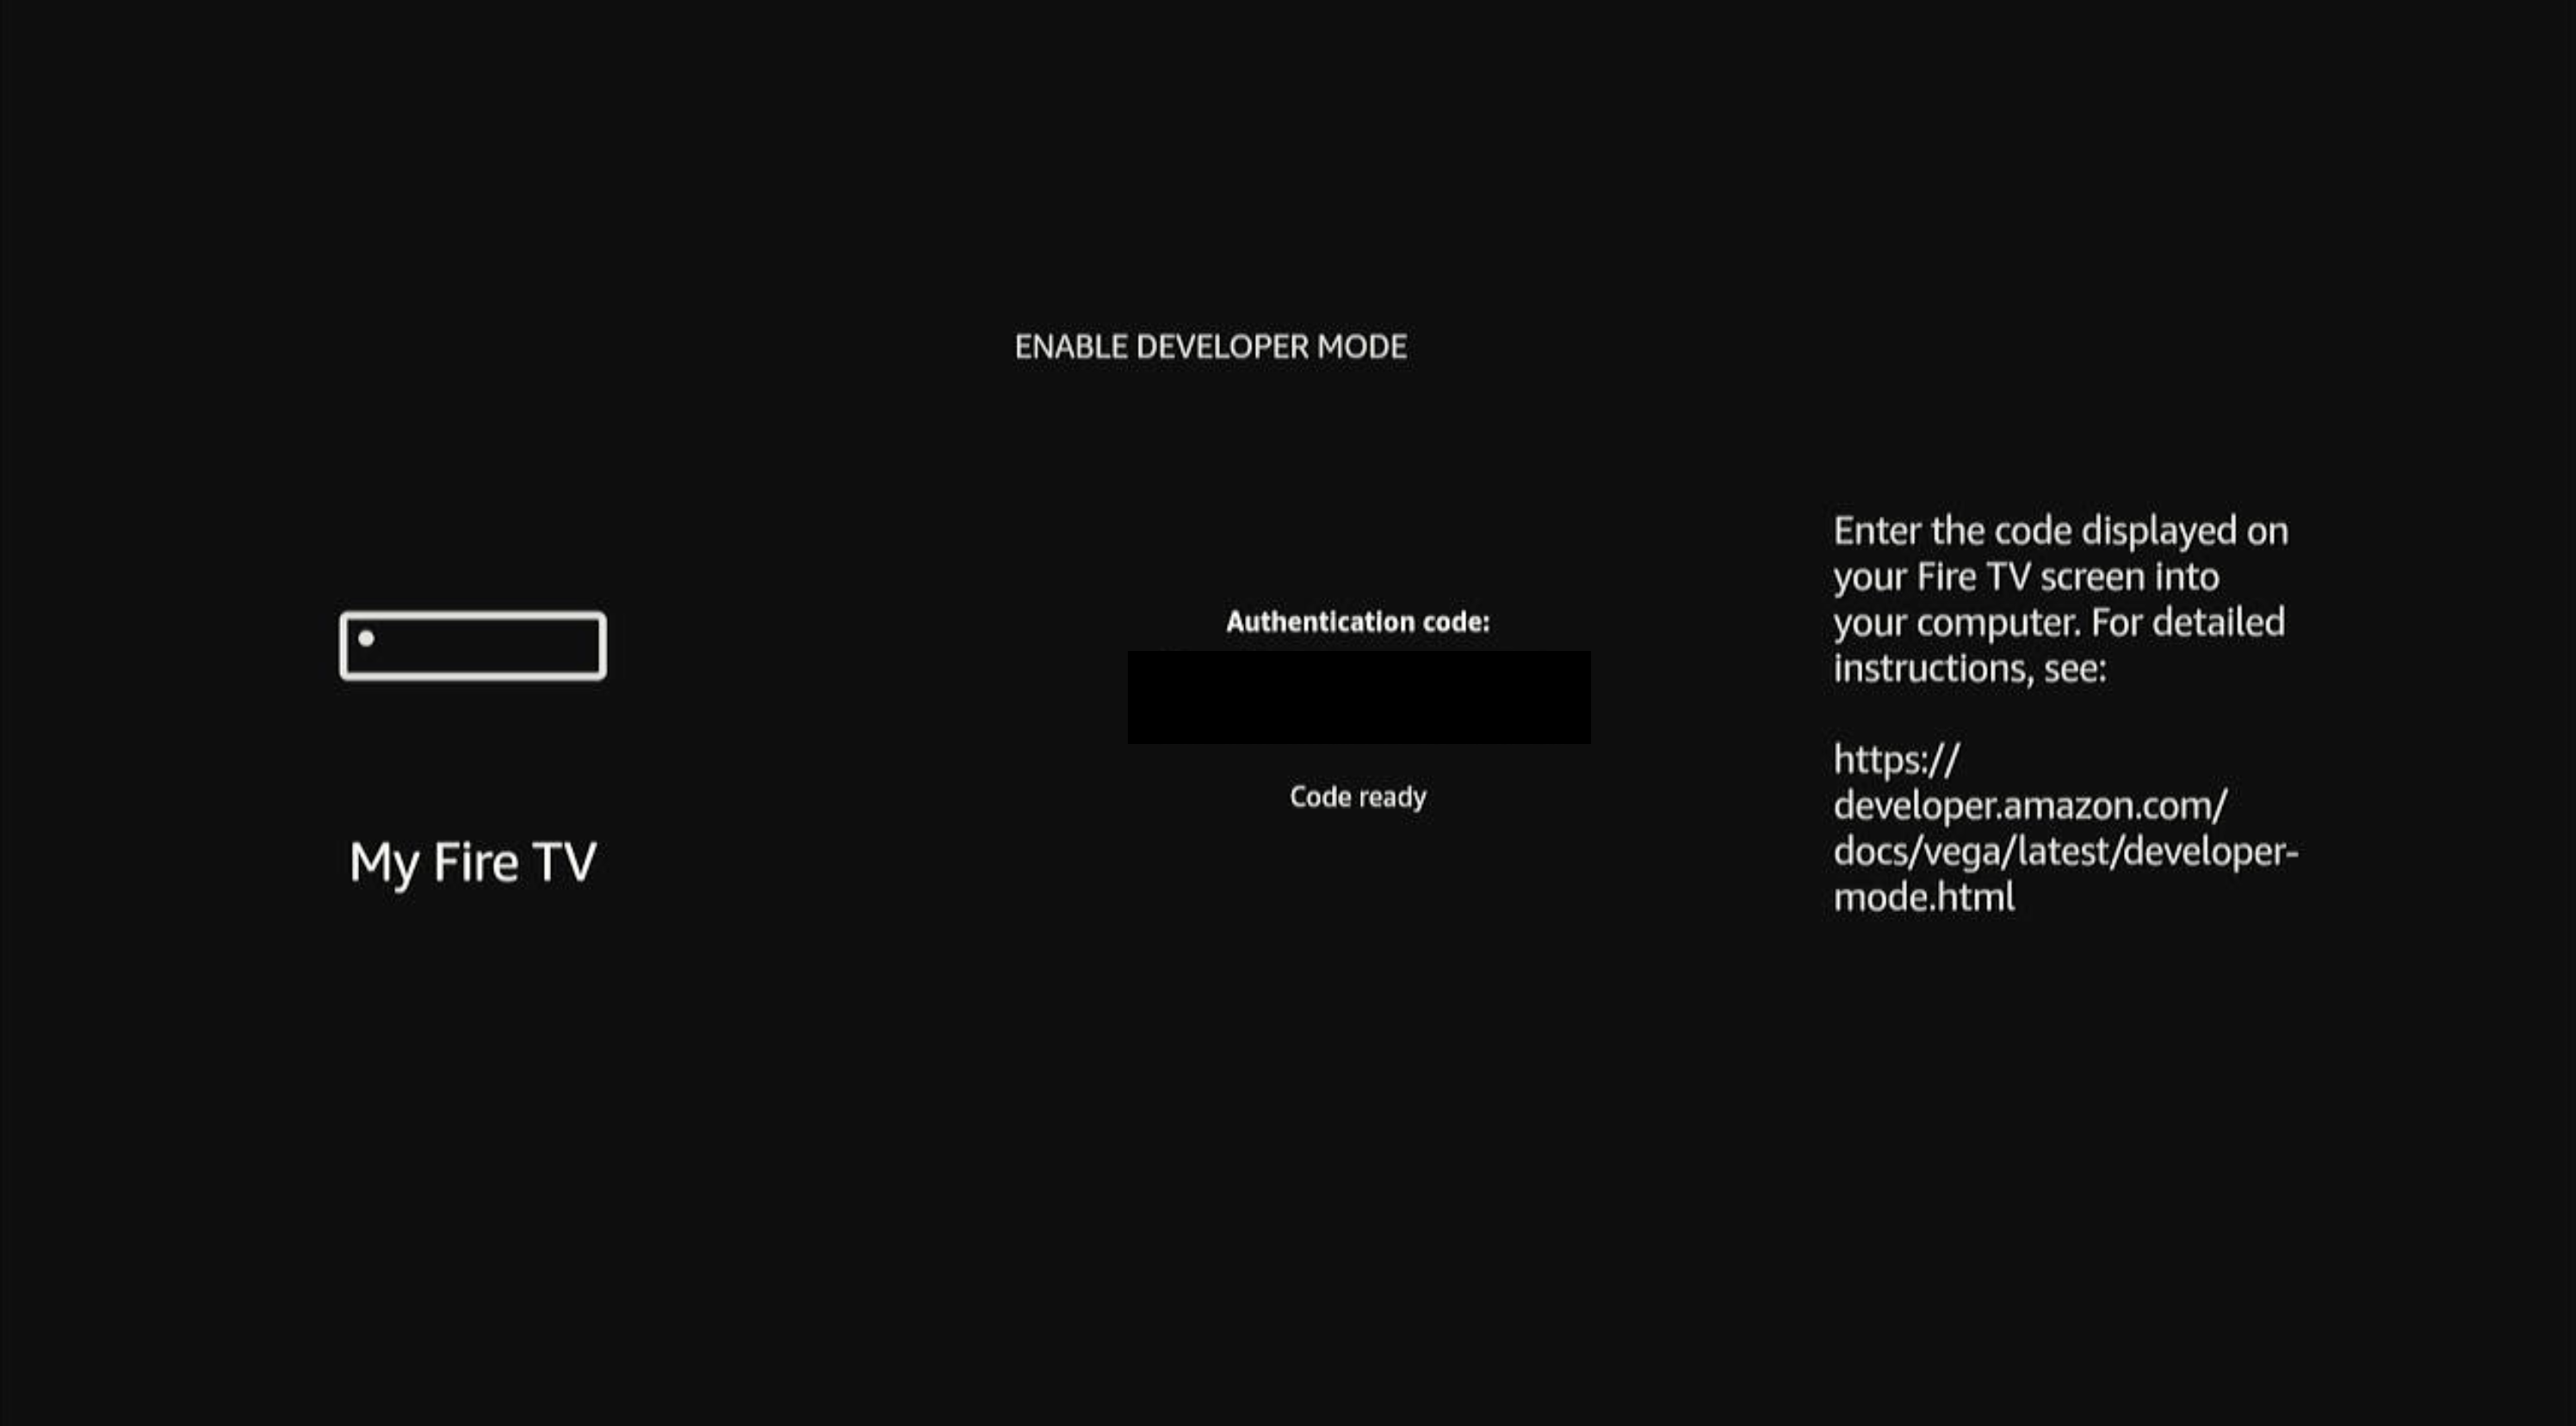
After selecting Continue, the Fire TV screen displays a 6-digit authentication code. You'll enter this code in #11.
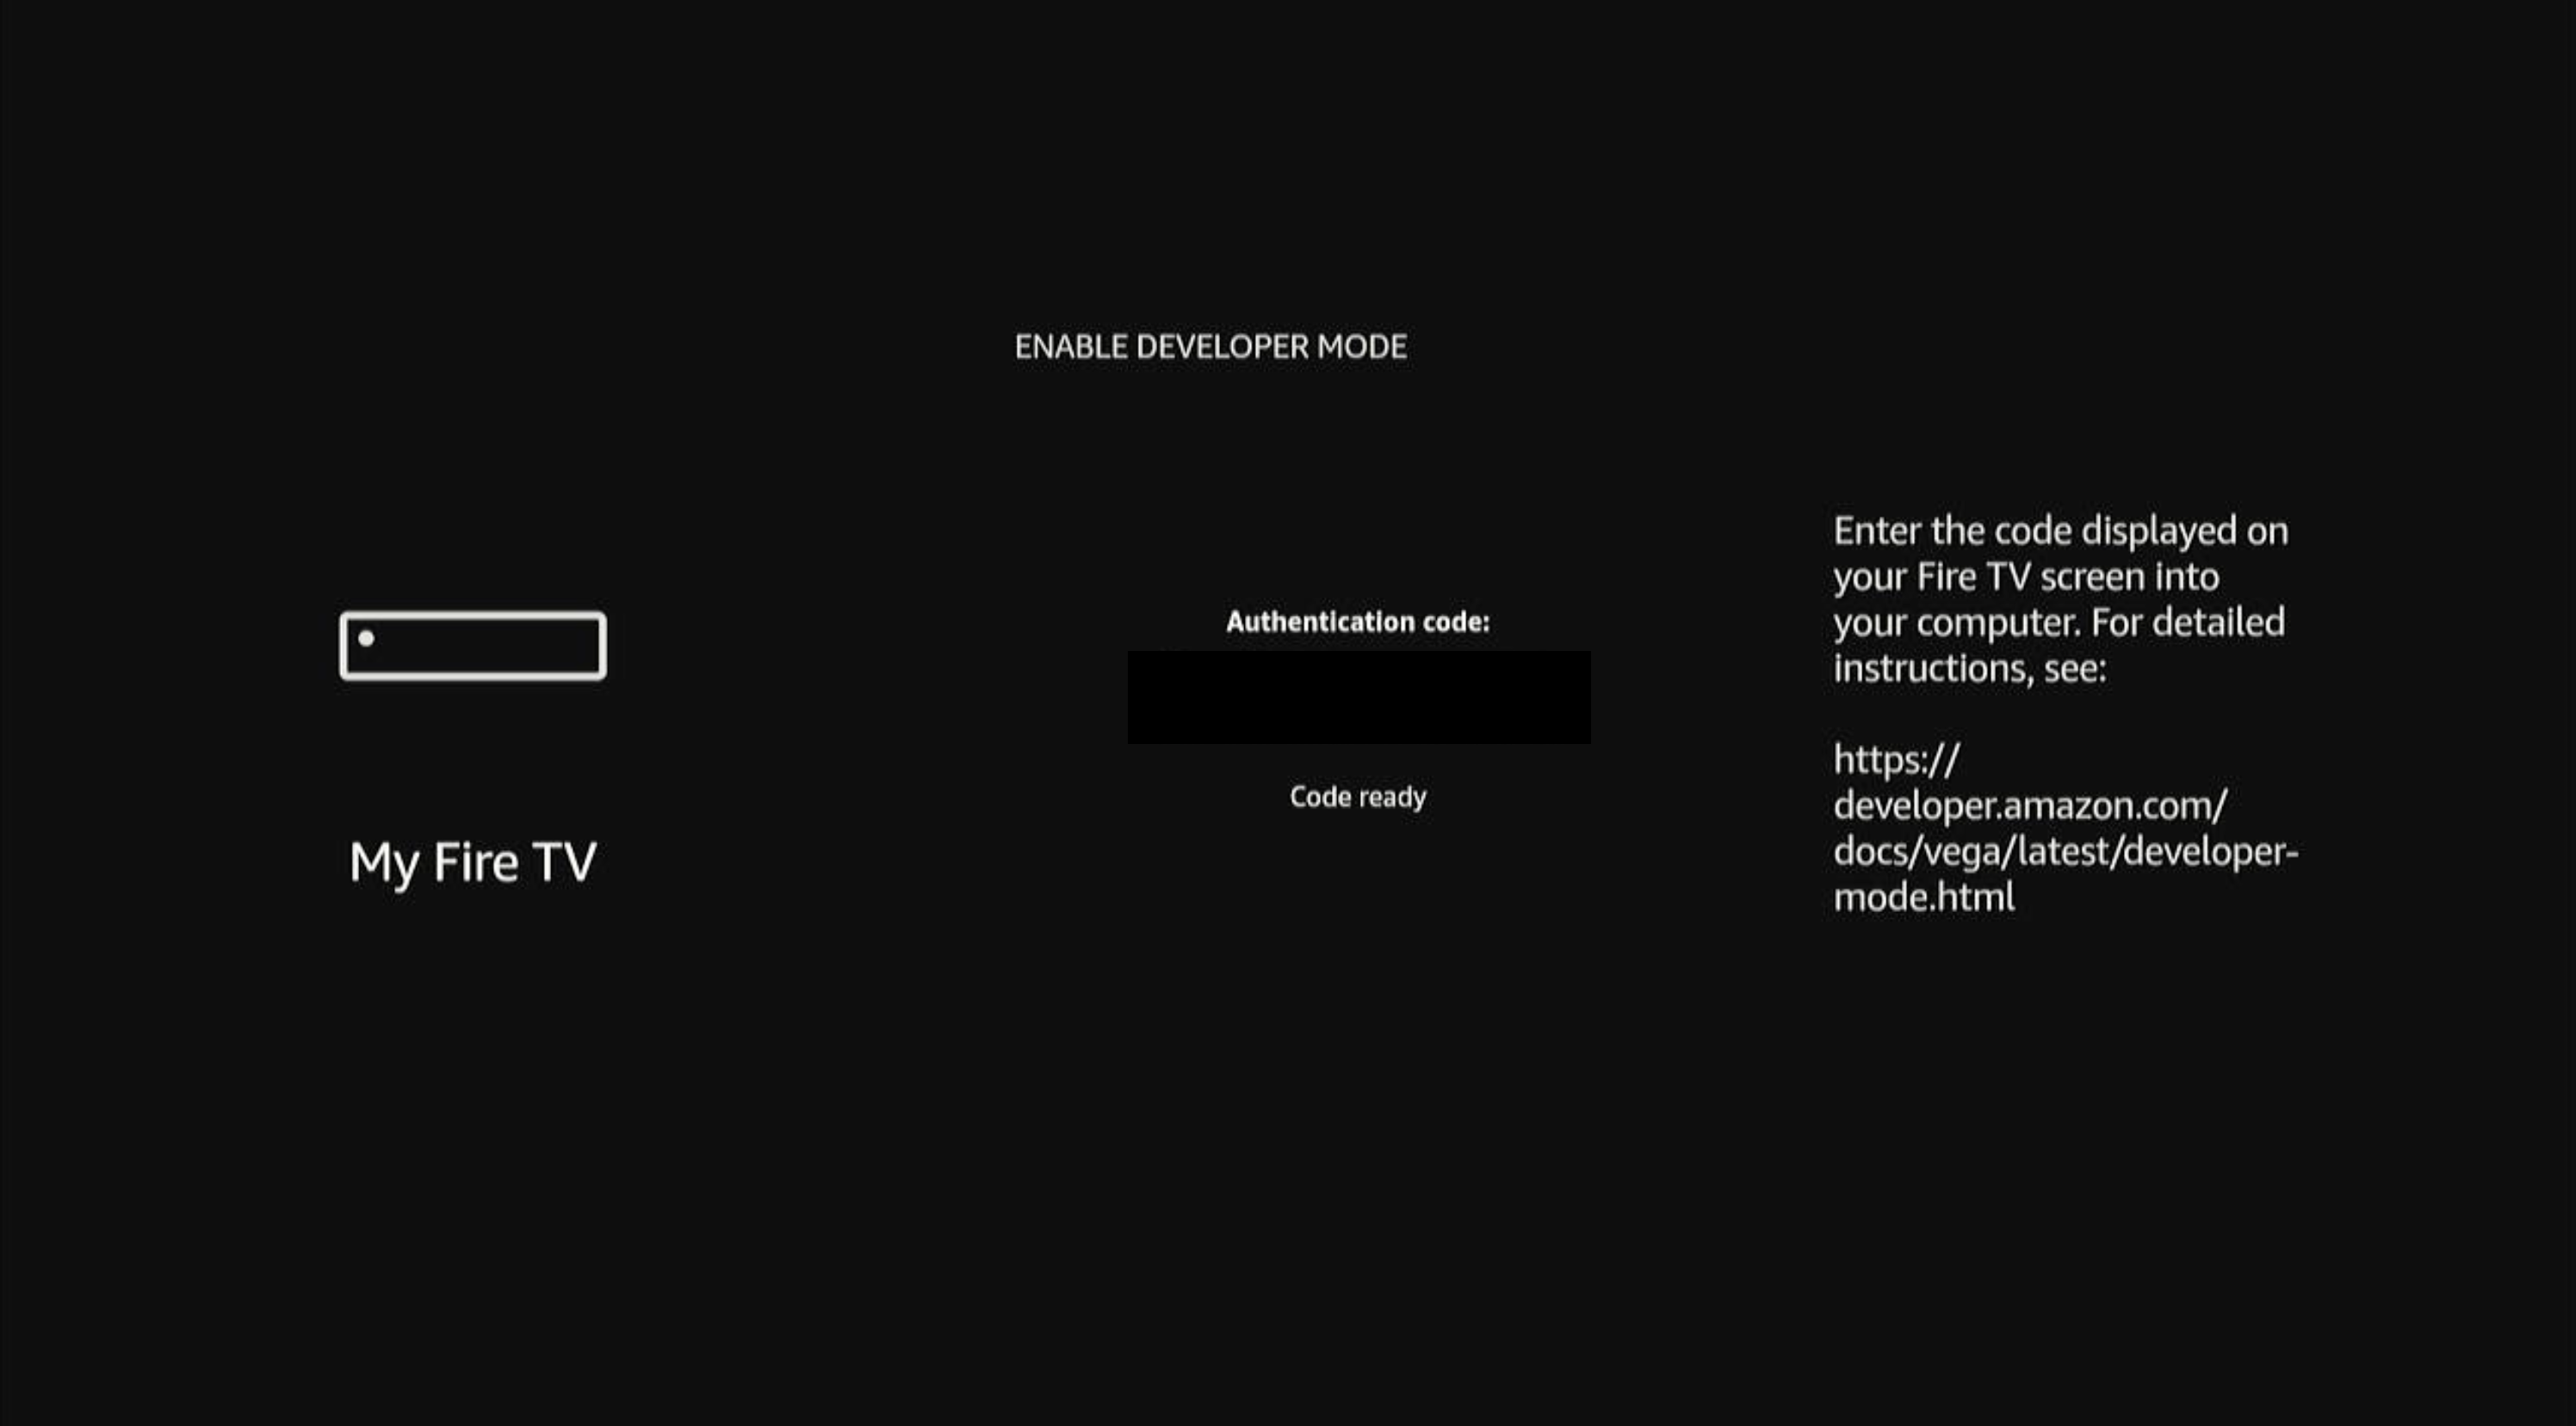 Note: The code expires after 5 minutes. If you don't enter the code within the allotted time, select Request a New Code on the same screen, or return to Developer Options and restart the process.
 -
To authenticate with your Amazon Developer Account, run the login command:
vega devmode loginFollow the instructions from the CLI to complete authentication. The CLI automatically opens your default web browser to the Amazon authentication page. If the browser doesn't open automatically, navigate to the URL provided in the terminal.
-
Authorize Vega CLI access in your browser.
The Amazon OAuth consent screen displays "Vega Authentication Test would like access to:" along with your basic profile information and name.
a. Review the requested permissions.
b. Select Allow to authorize Vega Authentication Test (or Cancel to deny).
If you select Cancel, the CLI denies authorization and displays an authentication error. Re-run
vega devmode loginto try again.After selecting Allow, a confirmation page appears with a checkmark icon and the message "Device connected to your account." You can close this page.
Return to your terminal. The CLI displays:
Login successful! You are now authenticated with Amazon Developer Services. -
Enable the device using the 6-digit code displayed on your Fire TV screen:
vega devmode enable-device --code <6-digit code>If your Amazon Developer account has only one vendor, the CLI displays:
Using vendor: Amazon
✓ Device enabled successfully
If your account has multiple vendors, the CLI prompts you to select one:
Select a vendor:
1. Amazon (XXXXXXXXXX)
2. Amazon (XXXXXXXXXX)
Enter the number corresponding to your vendor. The CLI then displays
✓ Device enabled successfully.Note: A vendor is a developer account for managing and publishing content through Amazon's developer services. This authentication can take a few seconds to reach the device. -
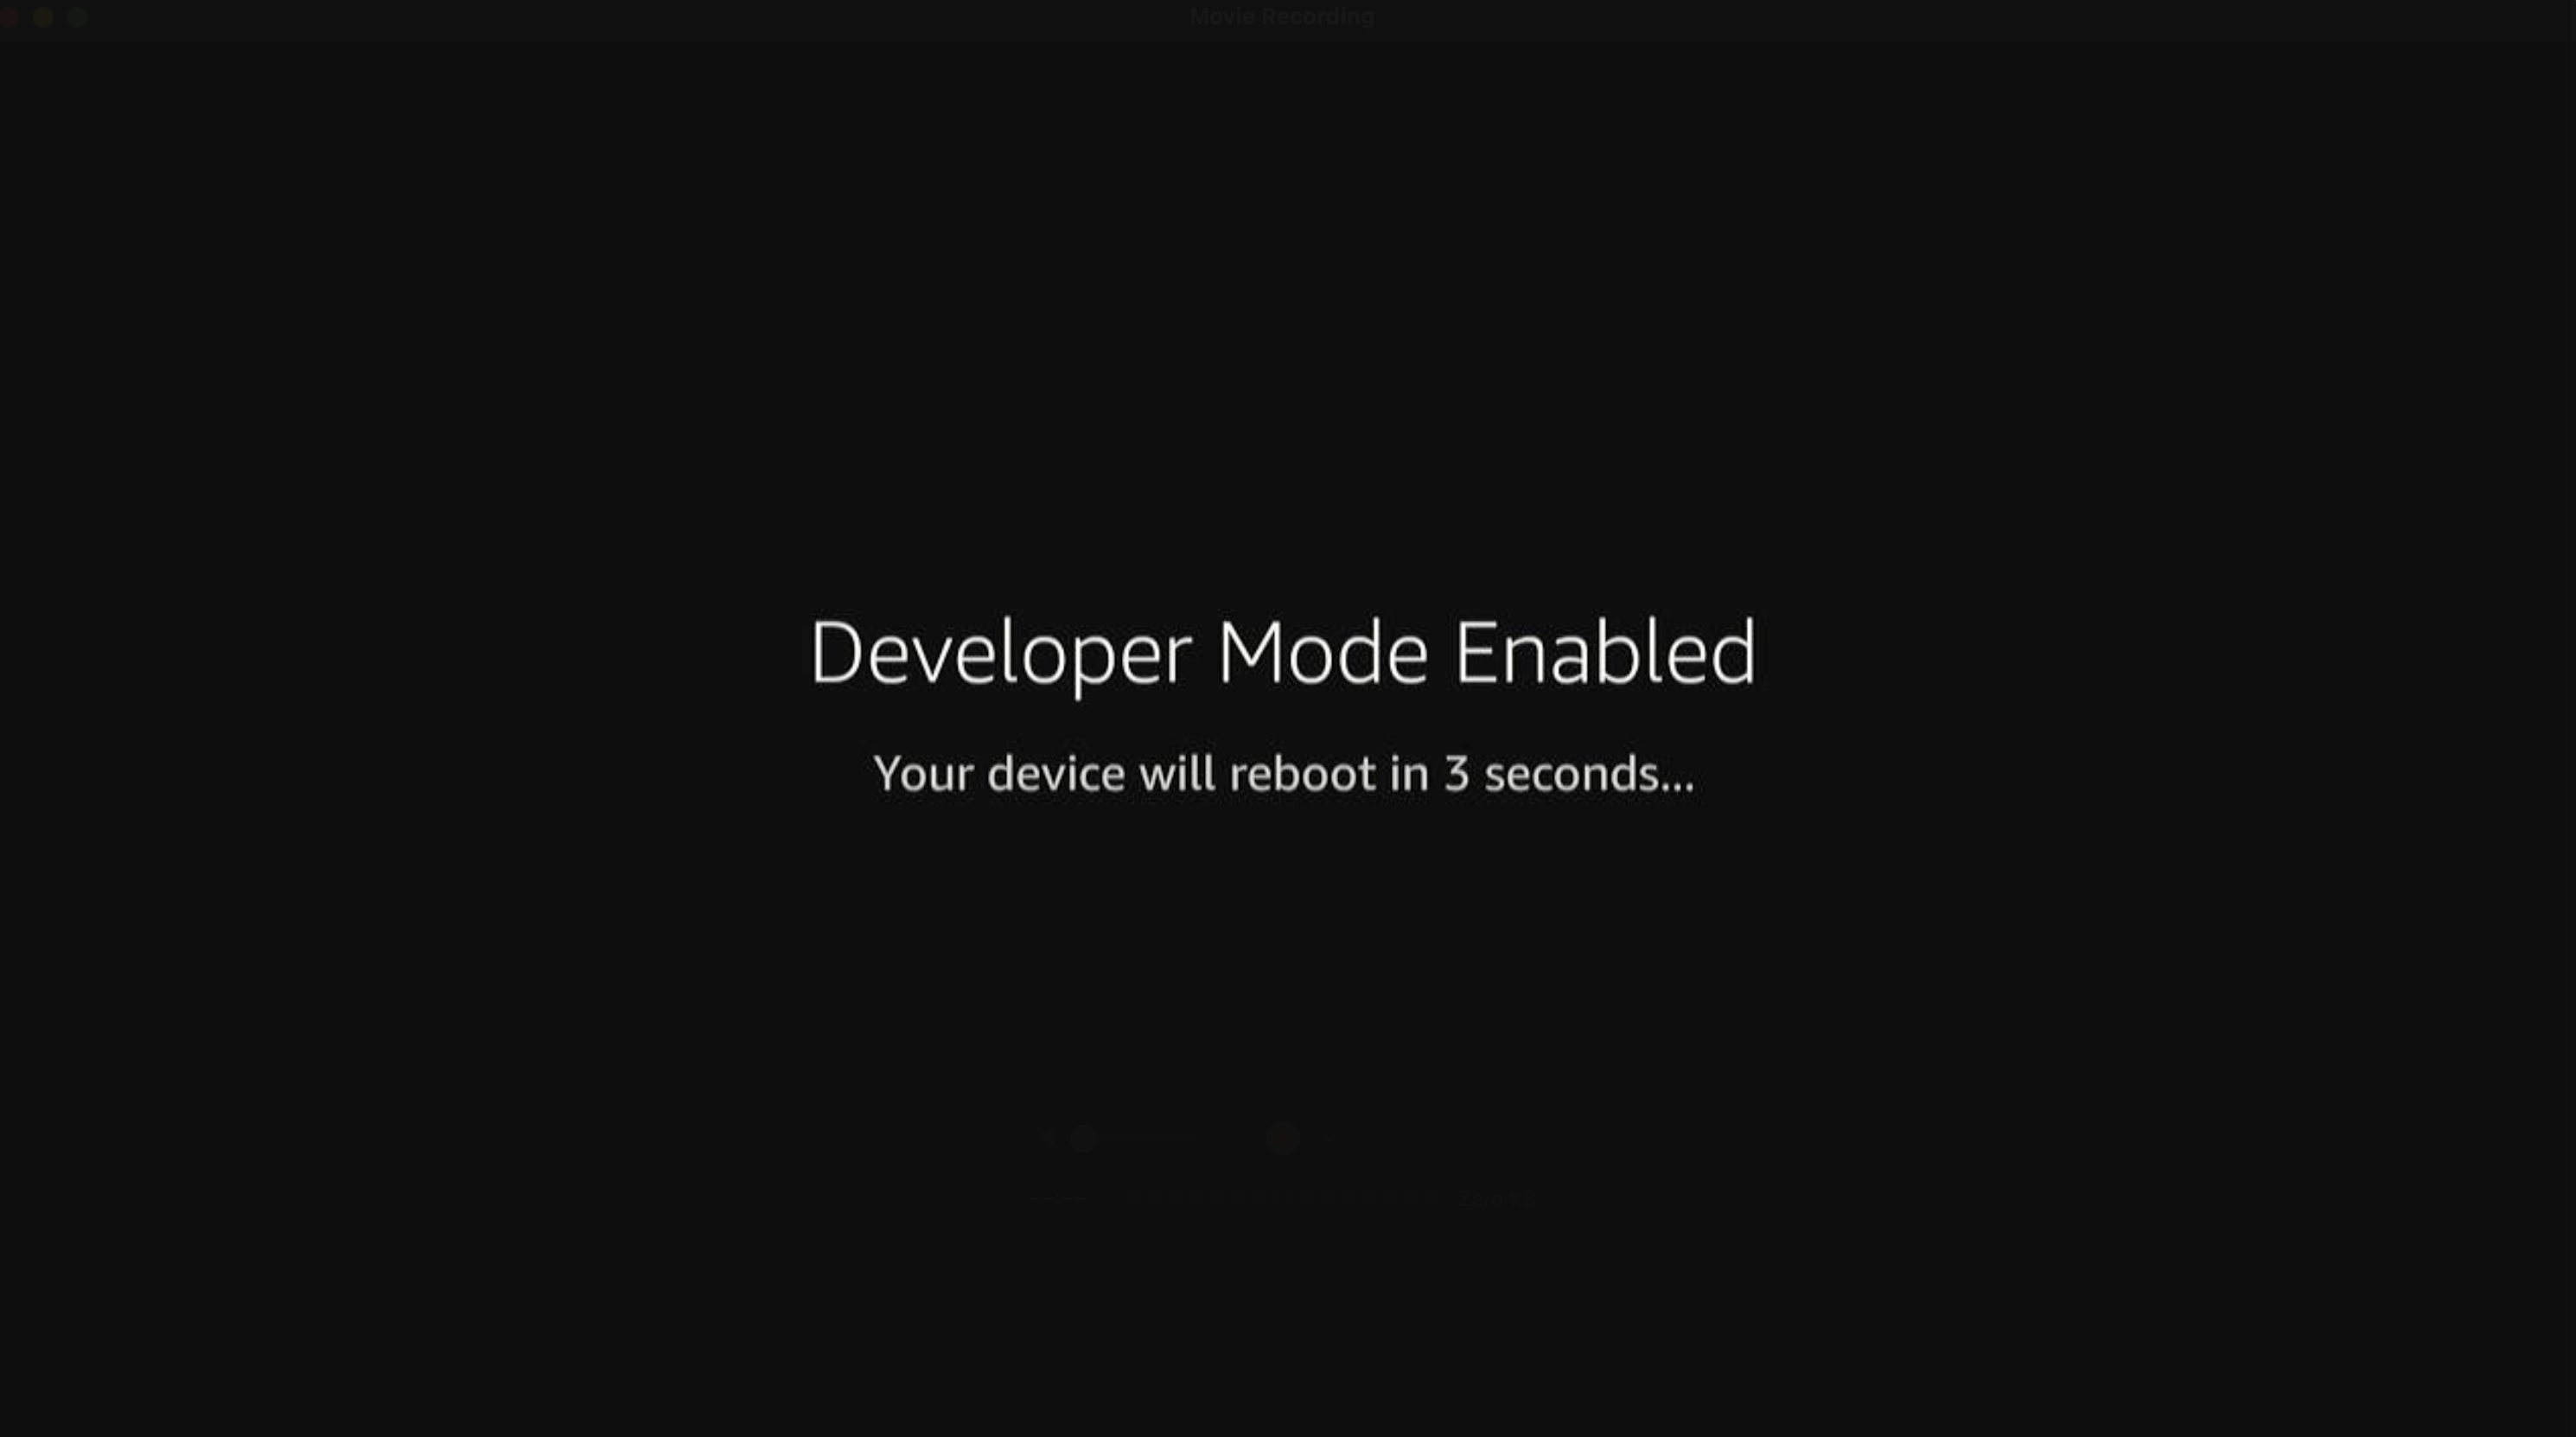
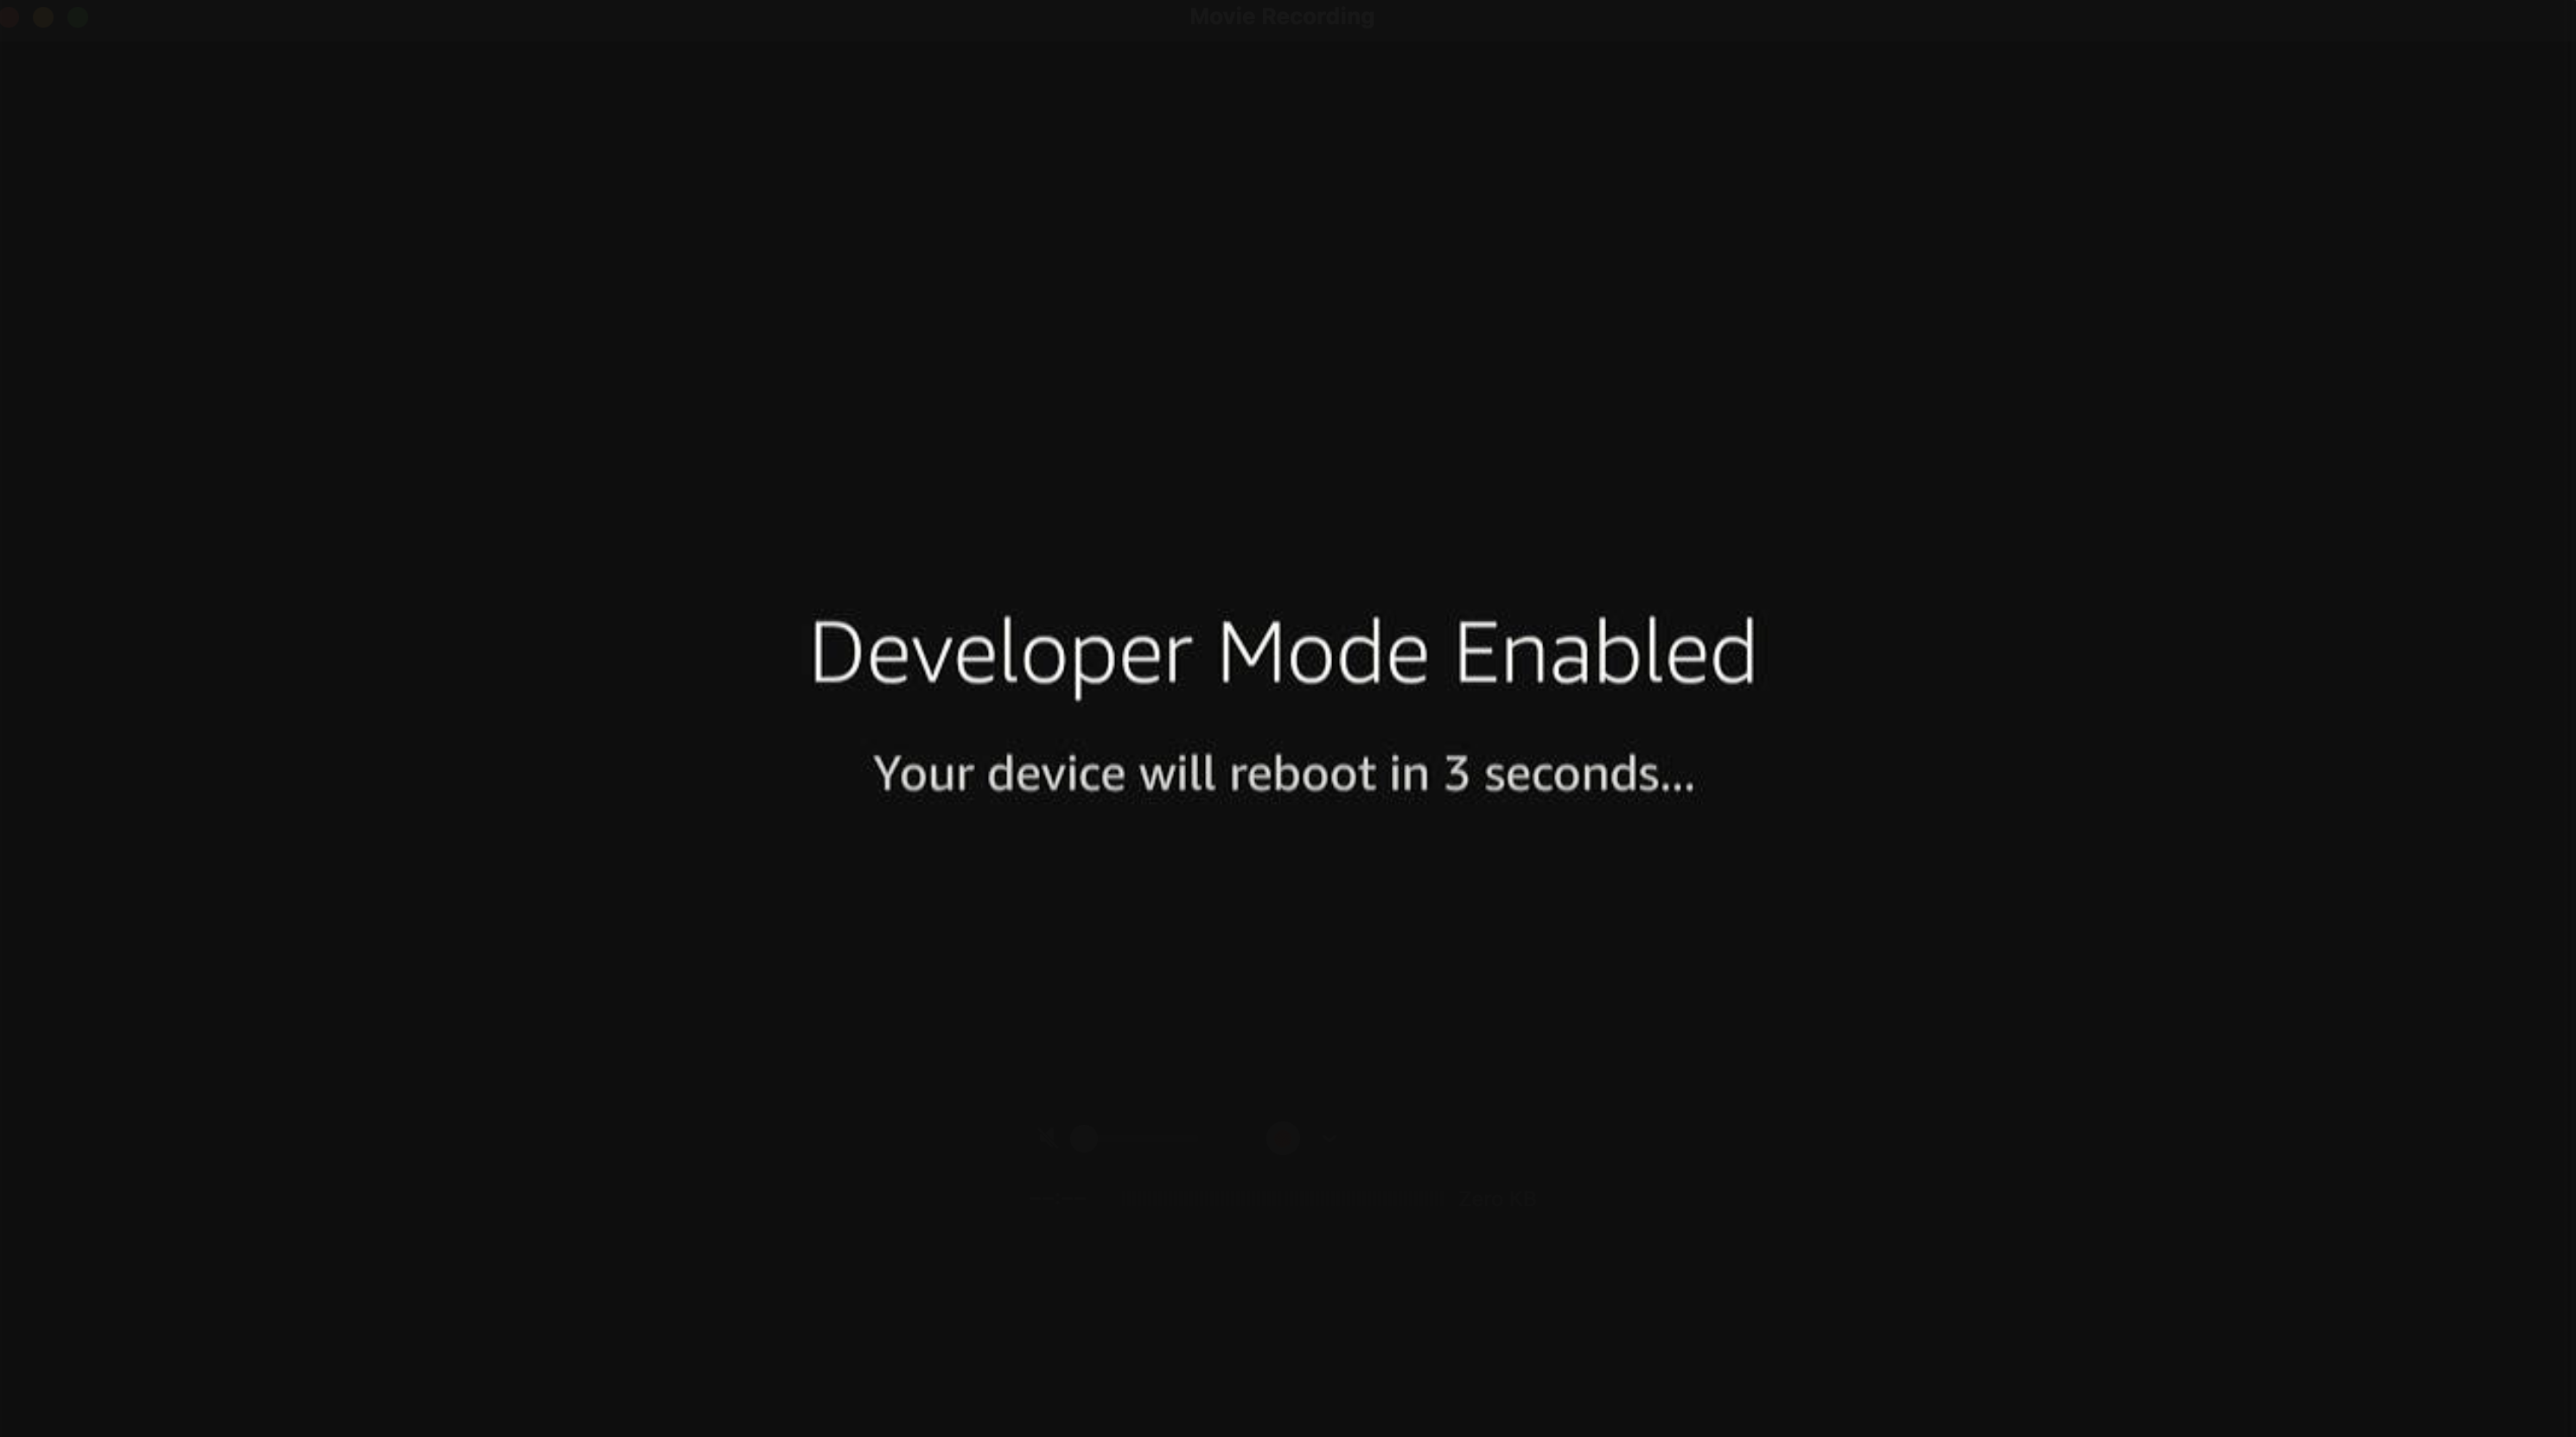
Wait for the device to reboot.
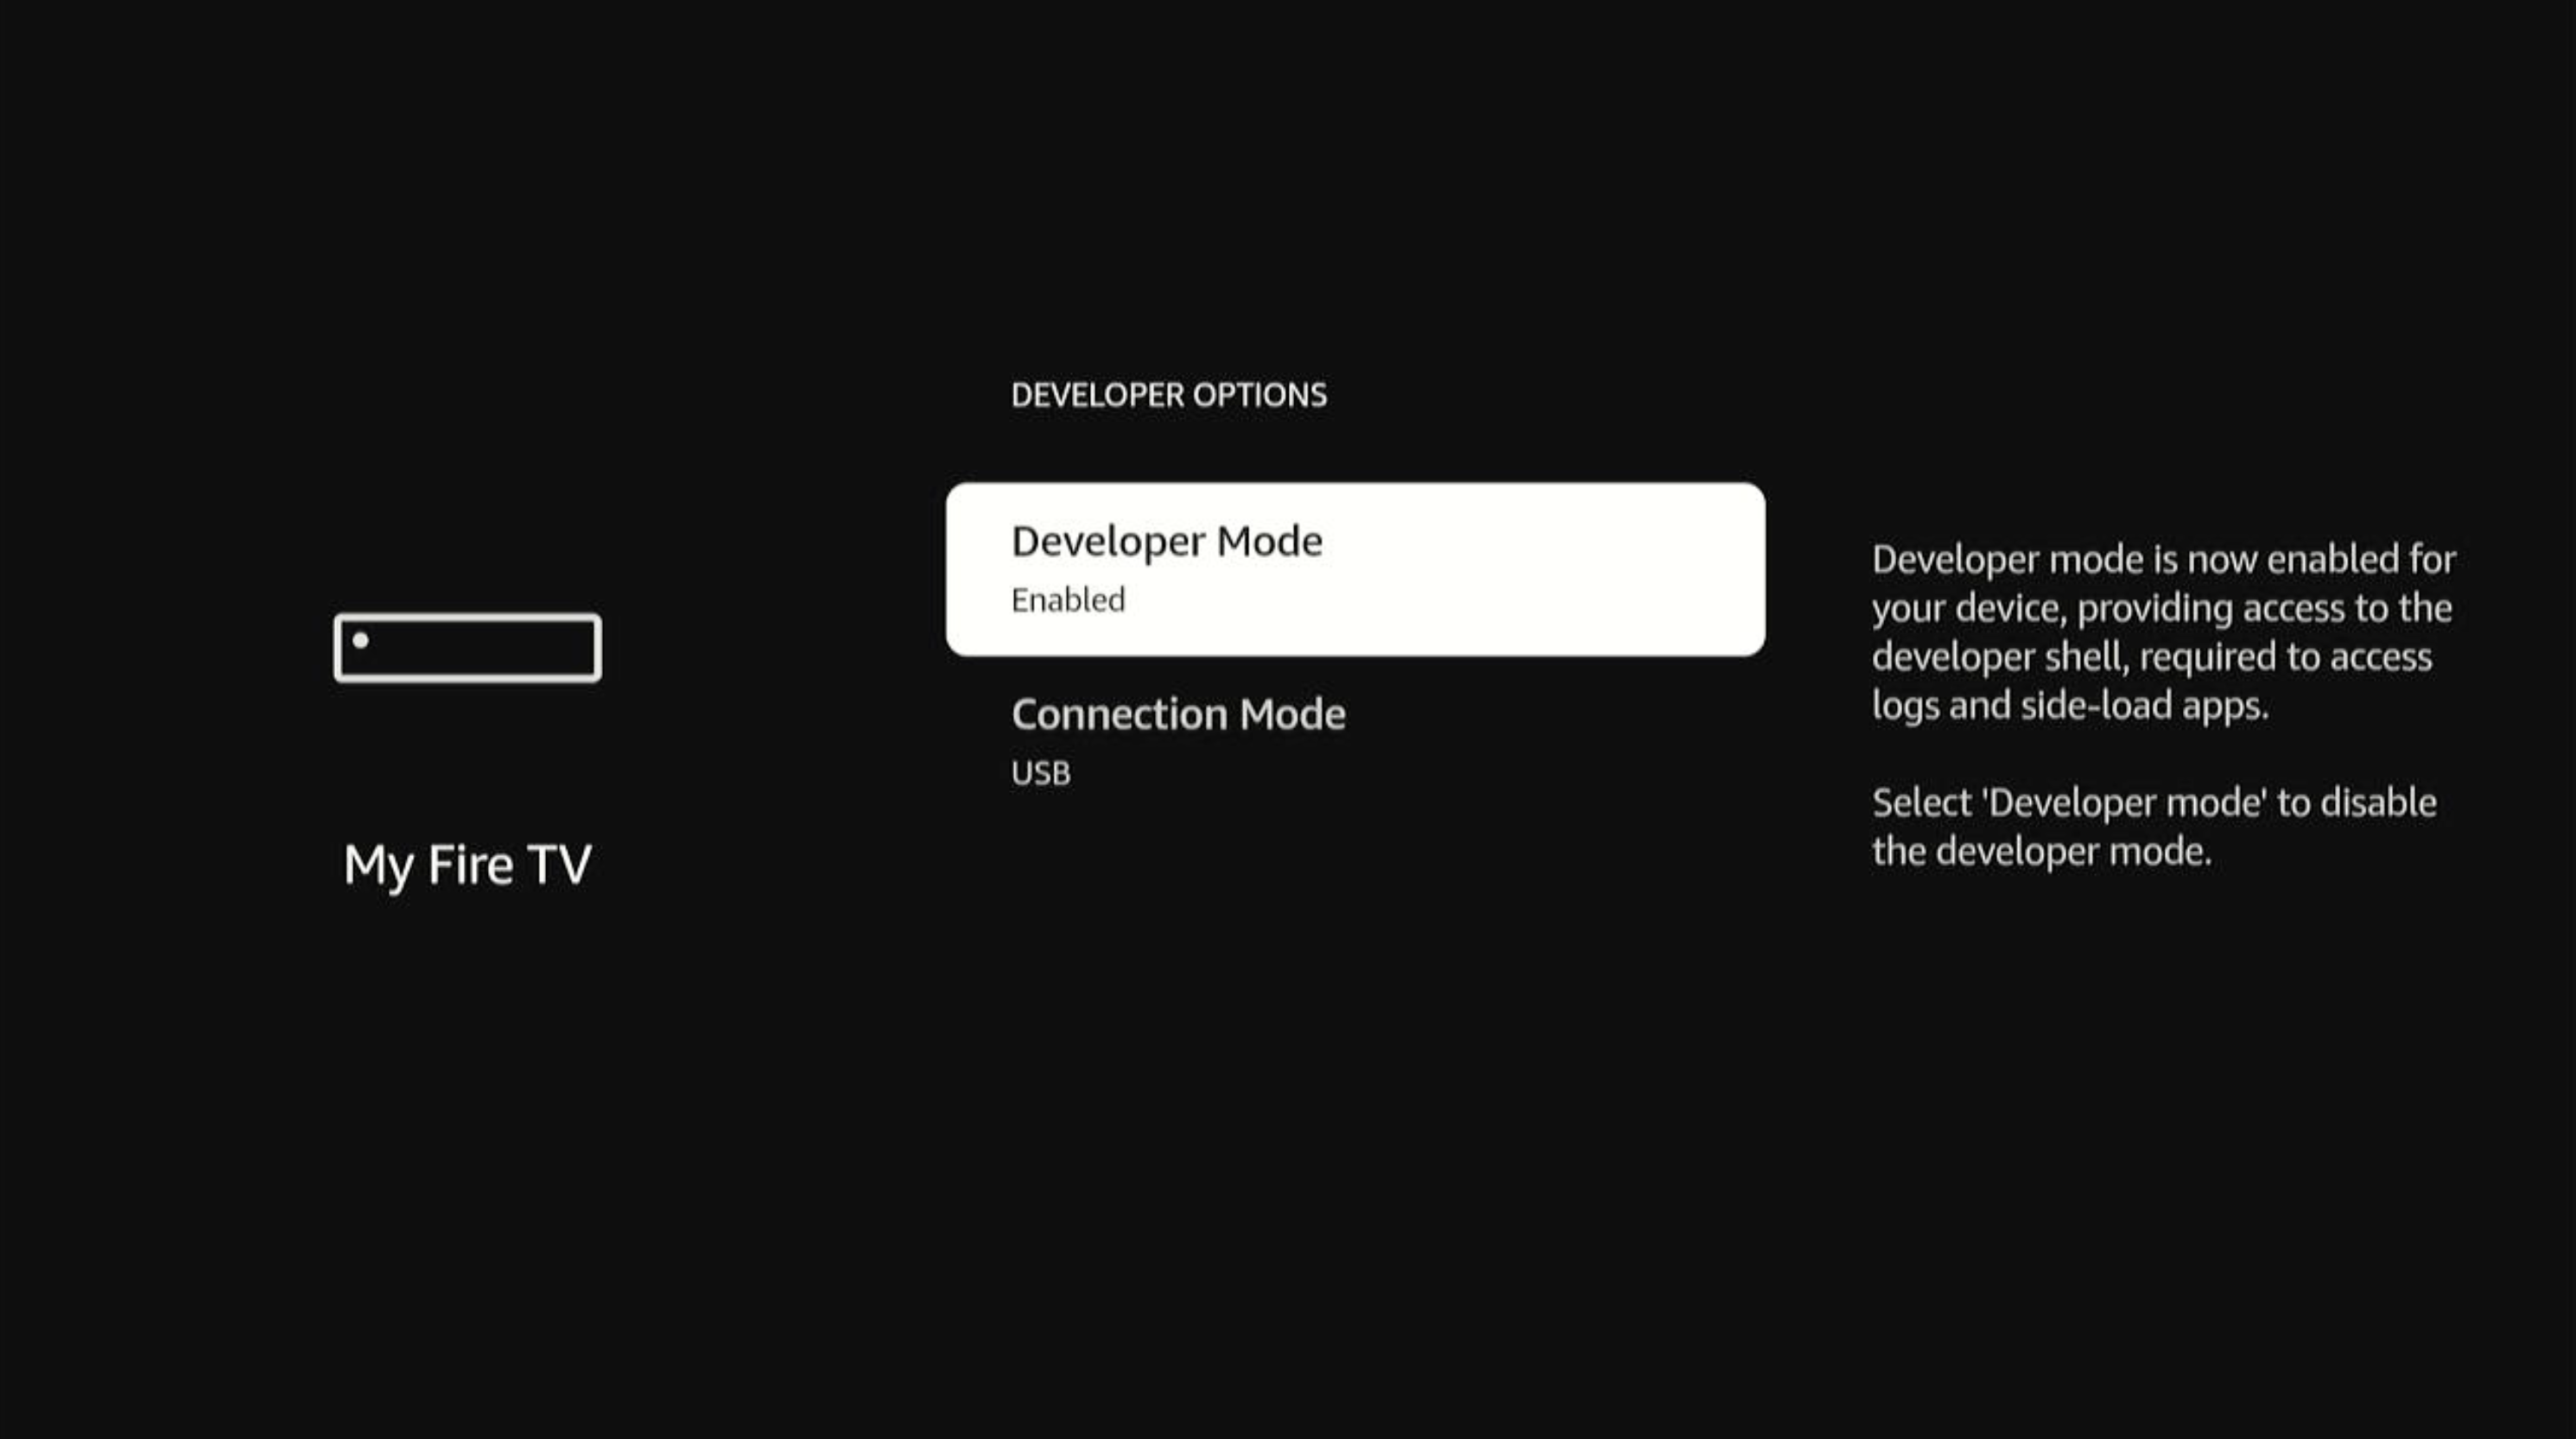
-
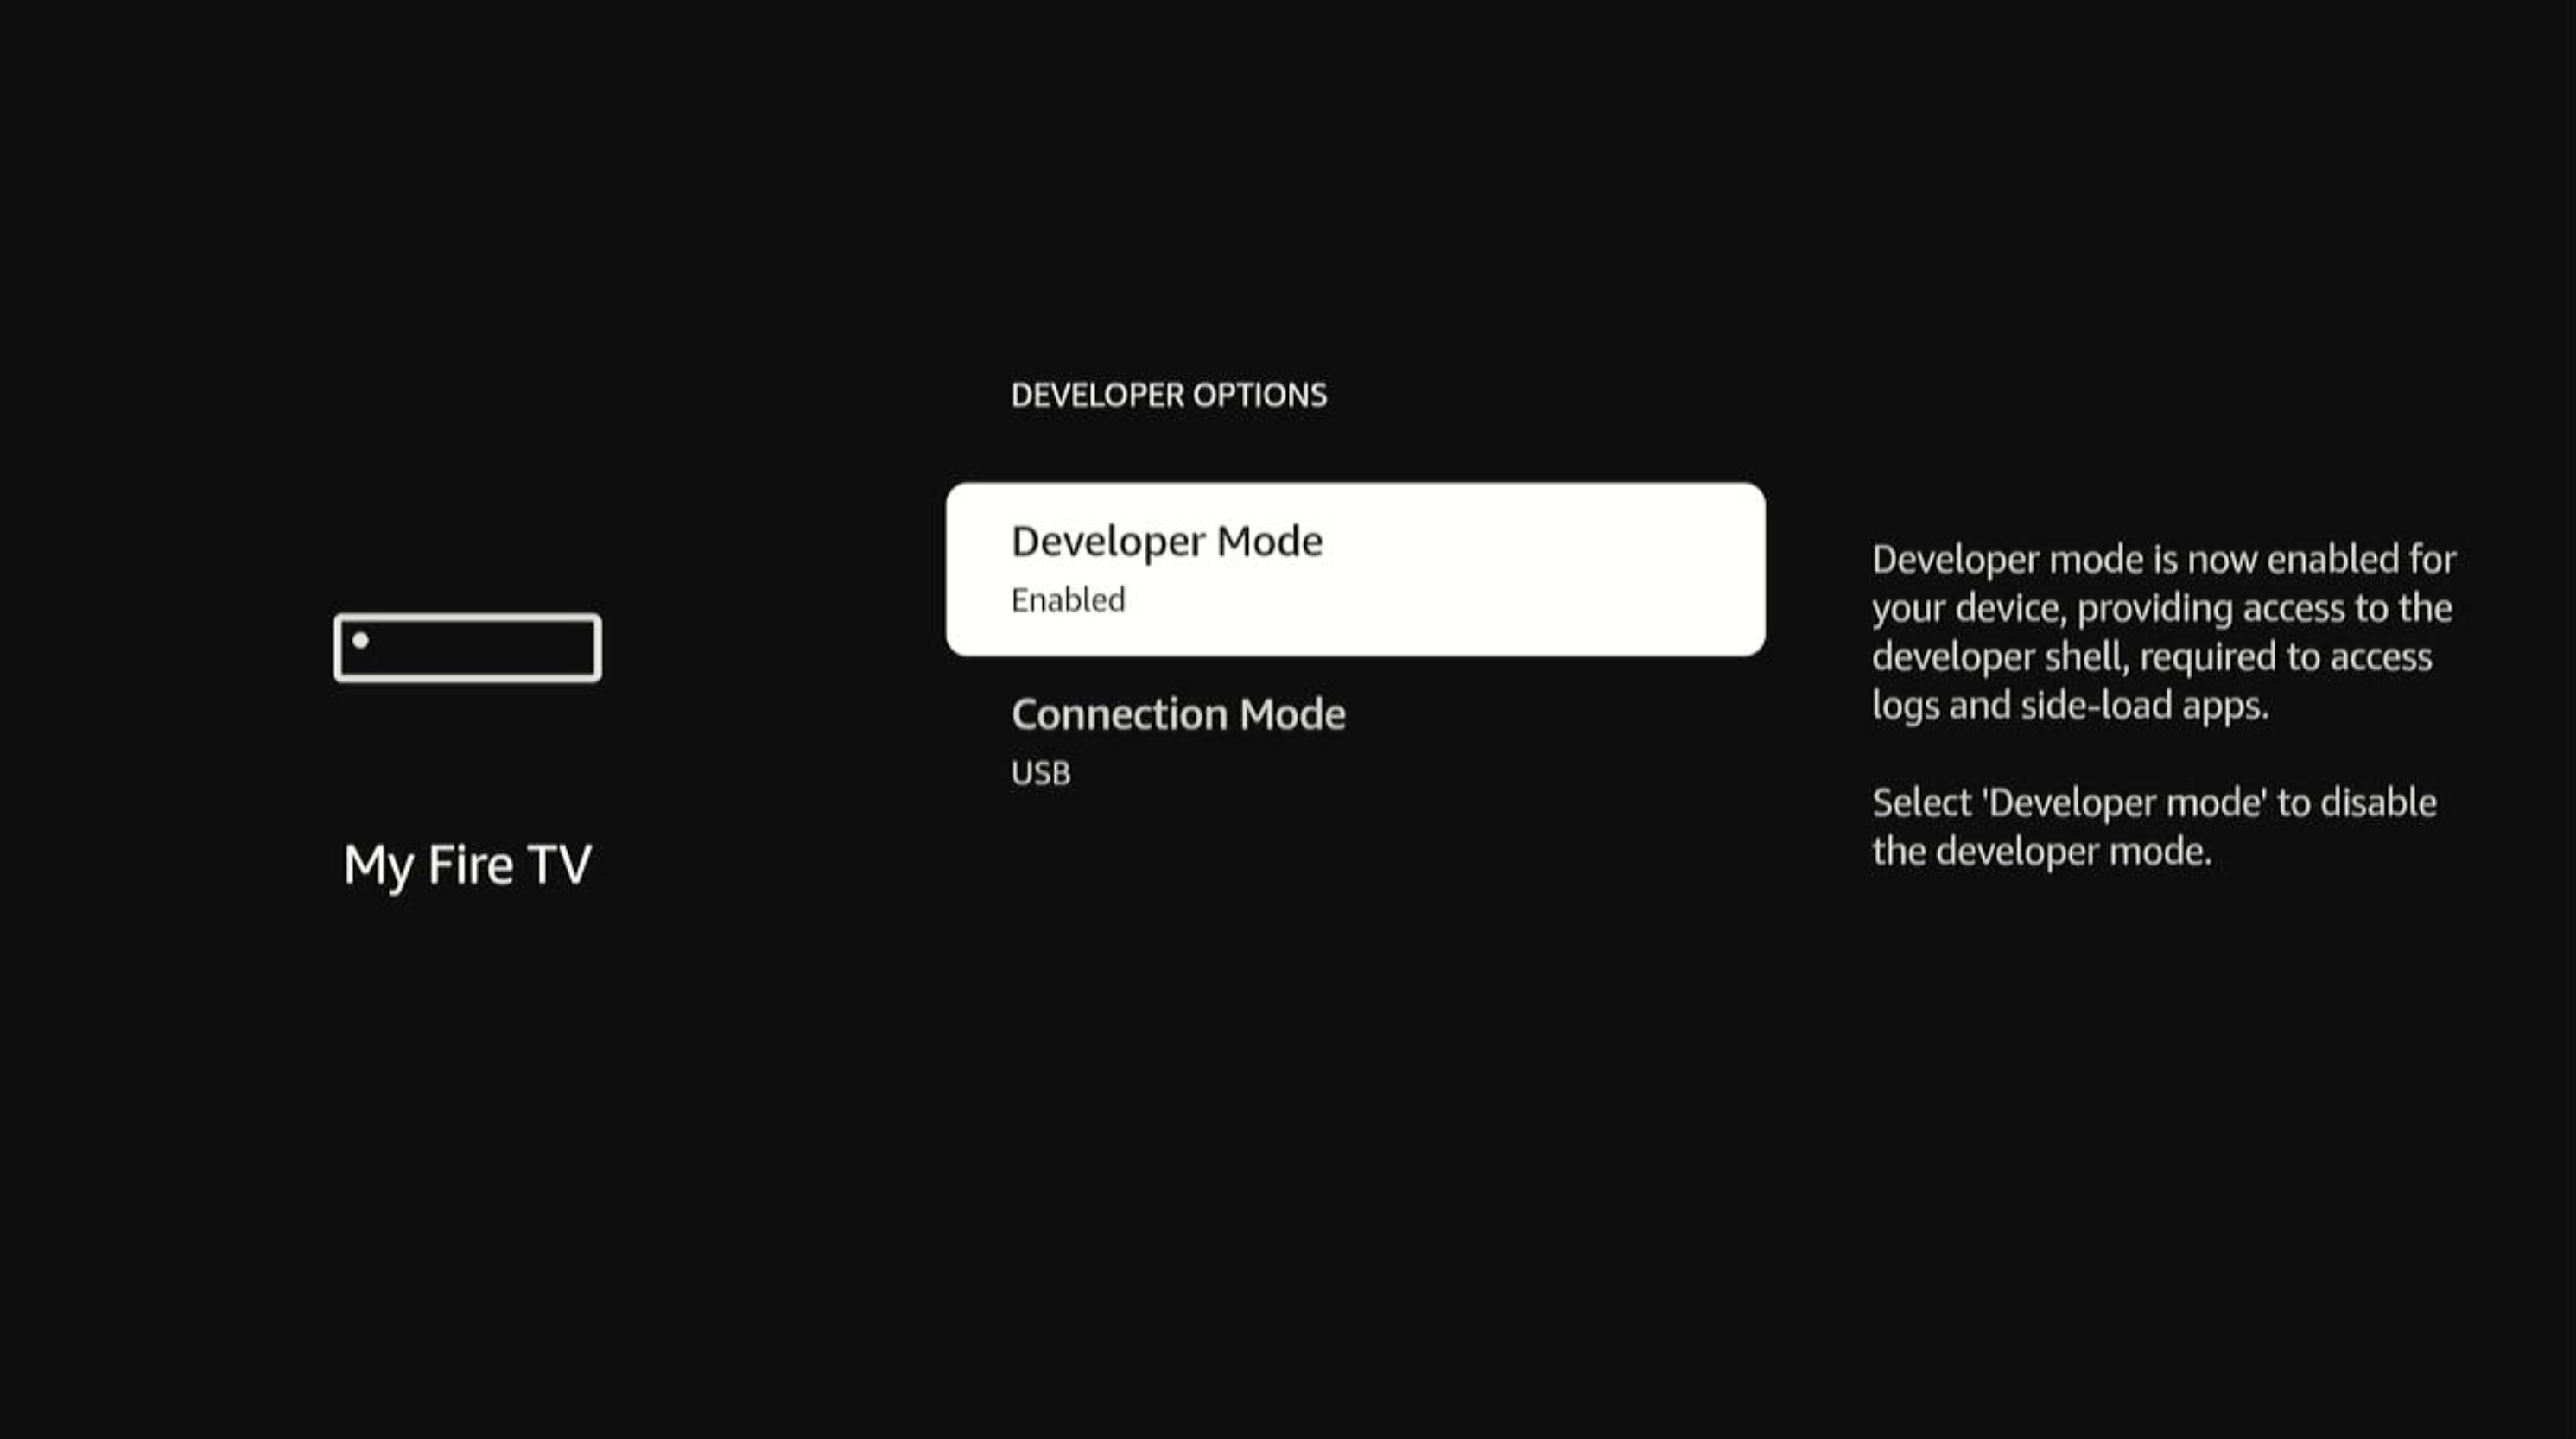
After the device reboots, navigate to Settings > My Fire TV > Developer Options > Developer Mode.
The Developer Mode status displays Enabled.
-
Check device recognition.
vega device listExample output with one device connected:
Found the following device:
[Serial Number] : [Device Number]
Example output with multiple devices connected:
Found the following devices: [Serial Number] : [Device Number] [Serial Number] : [Device Number] -
Connect to the device.
-
If you have one device connected:
vega device shell -
If you have multiple devices connected, specify the Device Serial Number:
vega device -d <Device Serial Number> shellExample output:
 (hostmachine)% vega device -d <Device Serial Number> shell

 ##################################################

 ##### Welcome to Developer Mode Shell #####

 ##################################################

 sh(com.amazon.dev.shell):/$
-
Step 3: Load your app on a Fire TV device
After you configure Developer Mode on your Fire TV device, open a new terminal and use the following commands to load your app:
Find your .vpkg file
When you build your app with vega build, the build process generates the .vpkg file in your project's build/ directory. The path follows this pattern:
build/<ARCH>-<BUILD_TYPE>/<APP_NAME>_<ARCH>.vpkg
For Fire TV devices, use the armv7 architecture. For example, if your app is named sampleapp and you built a release variant:
build/armv7-release/sampleapp_armv7.vpkg
One device connected to your computer
Replace <my-package.vpkg> with the path to your .vpkg file.
vega device install-app --packagePath build/armv7-release/sampleapp_armv7.vpkg
Multiple devices connected to your computer
Use the following command to specify the target device. Replace <Device Serial Number> with your device's serial number and <my-package.vpkg> with the path to your .vpkg file.
vega device -d <Device Serial Number> install-app --packagePath build/armv7-release/sampleapp_armv7.vpkg
Example output:
Installing/Updating '/tmp/sampleapp_armv7.vpkg' .. success
.vpkg file may vary depending on your project structure and build configuration.Step 4: Run your app on Fire TV
After you load your app on your Fire TV device, use the following commands to run your app.
manifest.toml file and follows the format <package-id>.<component-name> (for example, com.amazondeveloper.sampleapp.main).One device connected to your computer
vega device launch-app --appName <component-id>
Multiple devices connected to your computer
Use the following command to specify the target device. Replace <Device Serial Number> with your device's serial number and <component-id> with your app's component ID.
vega device -d <Device Serial Number> launch-app --appName <component-id>
Example output:
(hostmachine)% vega device -d <Device Serial Number> launch-app --appName com.amazondeveloper.sampleapp
Launching app 'com.amazondeveloper.sampleapp' .. success
Your app launches and appears on the connected Fire TV screen.
Related topics
Last updated: Jul 08, 2026
